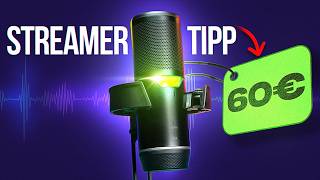

3 Budget Mics Under €100?
45sImmediately addresses a common pain point (affordable quality) and teases a comparison, sparking curiosity.
▶ Play Clip"The title promises a recommendation under €100 and delivers exactly that with detailed testing and pricing, though the 'recommendation' is somewhat subjective."
This video reviews the Endorfy Solum 2 series of USB microphones, including the Core, standard, and Pro models, all priced under €100. The reviewer unboxes each model, highlights their differences, and conducts detailed sound tests to evaluate audio quality, directional characteristics, and shock mount performance.
The Solum 2 series is launched with three versions: Core (€59.90), standard (€69.90), and Pro (€82.90). A Boomarm Set is also available at €82.90.
All three microphones are condenser microphones with cardioid polar pattern and USB-C connection. They work plug-and-play without additional software.
The Core is the entry-level model with minimal controls—only a USB-C port. It includes a plastic pop filter and a stand with a metal base and shock mount with rubber springs.
The standard Solum 2 adds a gain dial on the front and a blue ring, but still lacks a 3.5mm headphone jack.
The Pro version includes a gain dial, RGB lighting button, and a 3.5mm jack for latency-free headphone monitoring. It also has a mute button with visual feedback.
All are condenser microphones with cardioid pattern, 24-bit resolution. The Pro supports 192 kHz, while Core and standard support 96 kHz. All come with a 2.5m USB cable, stand, shock mount, and pop filter.
The reviewer records with the Pro at 24-bit 192 kHz, gain set to 84, with no filters applied. He tests directional characteristics by speaking from different angles and distances.
The shock mount effectively dampens table vibrations and keyboard/mouse sounds, as demonstrated by tapping and typing during the test.
The included pop filter reduces plosive sounds (like 'P') noticeably, improving audio clarity.
The reviewer praises the sound clarity and shock mount performance. He recommends the Pro for its monitoring and higher sample rate, but notes the Core is a good budget option if those features aren't needed.
The Endorfy Solum 2 series offers excellent value under €100, with the Pro version providing the best features for streamers and content creators. The Core is a solid entry-level choice, but the Pro's additional monitoring and RGB justify the price difference.
What are the three models in the Endorfy Solum 2 series and their prices?
Core (€59.90), standard (€69.90), and Pro (€82.90).
00:31
What polar pattern do all Solum 2 microphones use?
Cardioid.
01:23
Which Solum 2 model includes a 3.5mm headphone jack for latency-free monitoring?
The Solum 2 Pro.
05:45
What is the maximum sample rate supported by the Solum 2 Pro?
192 kHz.
08:06
What is the main difference between the Core and the standard Solum 2?
The standard has a gain dial and a blue ring, while the Core has no controls.
04:23
How does the mute button on the Pro indicate status?
The rotating circle turns red when muted.
07:26
Technical Specifications
Provides clear, factual specs that help buyers compare models.
07:54Shock Mount Effectiveness
Demonstrates a key feature that reduces unwanted noise, valuable for recording.
10:45Pop Filter Impact
Shows a simple accessory can significantly improve audio quality.
13:04Recommendation Logic
Offers practical advice on which model to choose based on needs.
14:14[00:01] microphone set that, in my opinion, offered really good quality at a low price. And now I'm sitting here in front of three new microphones from Endorphie, which are designed to do exactly that , deliver even better quality,
[00:14] , deliver even better quality, and are considerably cheaper. three microphones, I'll show you the exact differences, and of course, we'll also do a detailed sound test.
[00:31] is completely relaunch the Solum series . Specifically, we get the Solum 2 here, and in three different versions. For example, we have different versions. For example, we have the Solum 2 Core for a recommended retail price of
[00:44] €59.90. Then we also get the Solum 2, which has a recommended retail price of €69.90, and of course we also get the Solum 2 Pro, which has
[00:56] a recommended retail price of €8290. It's very important to note that I now have all three microphones here. Yes, and there's also a version of the whole thing, instead of the one already shown in the picture, with a stand and a microphone arm. That would be
[01:10] the Boomarm Set, and that too is supposed to be available at a recommended retail price of 8290 decide whether you would prefer a stand or the Solum 2
[01:23] with microphone arms. To round things off, all microphones are condenser microphones with a cardioid polar pattern and a USB-C connection. That means we're simply talking about USB
[01:37] difference here? As you can see, we all have a foothold here. It's actually more the user interface and the additional features that differentiate them all. But let's go into more detail. Let's start
[01:50] with the Solum 2 Core. So this is the entry-level model of the new Solum 2. And [music] yes, everything is nicely wrapped in paper. Let's just unpack this. First, we have the microphone here,
[02:03] the Solum 2 Core. What's really cool, and you can tell and hear it, is that . First of all, in a very traditional way, we do n't really have many connections or anything like that here. We can't change anything, absolutely nothing. We only have the
[02:17] USB-C port. Also included is a small pop filter. You can add that later . It's made of plastic. Then we get the stand, and yes, as you can tell, that too is not
[02:31] easy. The lower part is also made of metal and has a shock mount at the top. It has rubber springs. That 's pretty cool too. This means the microphone can be placed here without picking up vibrations from the table.
[02:45] is, we have an adjustment screw here. This allows me to screw here. This allows me to mention this again, we can turn the whole thing off. If I turn it a little here
[02:58] the whole shock mount turns off and then I have it in my hand, which is quite practical because the shock mount also has a thread here, and we can of course use that if we
[03:11] course use that if we such as the Endorphy Boomarm. And last but not least, we also have but not least, we also have a USB cable included, USB-C, which connects to the back of the
[03:24] microphone, and then we have USBA or USB-C here. So, theoretically, we can simply click on the adapter that's included and included and
[03:38] all the microphones work without any additional software. That means connecting Plugin Play to the PC . The microphone is recognized immediately, and then of course I have to recognized immediately, and then of course I have to
[03:54] But what I think should be immediately noticeable with the Solum 2 Core is... We have no connection for, e.g., headphones. This means that we will search in vain for a 3.5 mm jack connector for headphones on this microphone; it is not included anywhere, and
[04:07] that, for example, is already a difference. The core version has very few way to adjust the gain directly on the microphone, and we or anything else. But let's take a look at the other variants and then
[04:23] you can see the gradation. If we then take, for example, the Solum 2, we see that it's a bit different. We have a little dial down here. This allows us to adjust the gain directly on the microphone. Otherwise, on the
[04:36] back we again only have USB-C. This means that the Solum 2, the middle variant, also does not have a 3.5 mm jack connector. And we see this small blue ring down here, which isn't present on the core either. That means everything
[04:49] there is simply black. Otherwise, it's completely the same. That means we also have the stand here, we have the pop filter included, and we have the pop filter included, and we have the USB-C to USB-C with USBA
[05:02] not even going to unpack it any further. Let's put that aside for now so we can really Finally, we have the Solum 2 Pro here, which is the fully upgraded version, and everything is the same there as well. That means we have the
[05:15] have the stand, and underneath we have the USB-C to USB cable with USBA adapter. But let's take a look at what the real difference is here. And that's right on the microphone itself again. Here we now
[05:30] also have the rotary dial that we already had on the Solum 2. We have another ring down here and on the back we have a button for RGB lighting as well as, [music] we can see it here, a 3.5 mm jack for
[05:45] headphones. This means we have direct, latency-free monitoring, which is only available in the Pro version. Otherwise, as I said, all three are the same. And what's pretty cool about this microphone with this shock mount is that theoretically, the whole thing just needs to be
[06:00] clipped in here. That means take the microphone, click, microphone in, it's hanging here in the holder. You can also take another look at it here, can simply place it on the table in front of me and then
[06:17] use it accordingly. Personally, [ahem] to be quite honest, the microphone should of course be close to the mouth. In this case, it's even a little different. Studio, we still had the feature where you spoke into the microphone from above.
[06:31] front, you can see it here again where the LEDs are, you speak into the microphone there. Let's plug it in, but let's also connect everything so we Solum 2 Pro. We have RGB lighting there. You can see here, among
[06:46] we take a closer look, that we don't have direct RGB lighting, but rather it comes out indirectly underneath . That looks pretty nice, and I also think that by 2026, you simply don't need heavy RGB lighting on the microphone
[06:59] anymore. We can see at the top, when we turn it at the bottom, how much the gain is turned up. I think that's really great, I have to say, because that's
[07:12] gain, but you don't even know where you button up here, [music] then you see here in front: unmuted,
[07:26] muted, unmuted, muted. One major criticism of the predecessor was, for example, the fact that it had a touch button on the microphone for muting. However, you can't really see if you're muted, and that can quickly
[07:40] nobody can hear you because you accidentally muted yourself. As I said, that can't happen here anymore. The rotating circle at the top also turns red, but when I step on it again, everything goes back to normal, which is wonderful. But
[07:54] otherwise, technically speaking, as I said, all three are condenser microphones. In all three cases, the voice is directed from the front and we have a cardioid pickup pattern. and we have a cardioid pickup pattern. All three come with 24-bit resolution, and then the
[08:06] Pro has 192 kHz, while the Core and the regular Solum 2 have and the regular Solum 2 have 96 kHz. They all come with a 2.5 m long USB cable, and they all get this stand and the shock mount, and
[08:22] of course the pop filter that can be clipped on the front. continue with the detailed microphone test, I'd be interested to know: are you currently using a condenser or a dynamic microphone, and what specific model are you using
[08:37] in the comments below and we'll now get into the microphone test. From now on, you'll be hearing me through the Endorphi Solum 2 Pro. To put everything into perspective, you haven't heard me talk about this before, the thing you usually listen to me on
[08:52] is a studio microphone that costs over €1000 . That means please don't draw any comparisons. That would be nonsense. Just to be honest, something pretty cool is that if you look at the
[09:05] see that I've set it to 24-bit 192 kHz and the set it to 24-bit 192 kHz and the microphone level is set to 84. We have the option of adjusting the level using the dial here on the microphone,
[09:20] quick look, then I get louder or quieter here, is that also adjusted in parallel in Windows? With previous versions, such as the Solum 2 Core, you don't have a dial, and you can
[09:34] easily adjust the level via Windows . In my case, as I said, I'm back up to 84 now, so we're doing well. Also important to note before we average, no filters are applied. Nothing else seems to be
[09:48] done to this microphone signal. I record completely unfiltered. That means hear my air conditioner or other things, just so you is to test the directional characteristics. We have
[10:04] condenser capsule here. That means we shouldn't get too close I could try it, but I would probably overcompensate; instead, my mouth would be about 10 to 15 cm away. Speak from the front
[10:17] test it by having me speak into the microphone from the side or from behind and then turn it back around, then speak into the microphone from above and then back to the front. And I think
[10:33] one should have a pretty good grasp of where the directional characteristic is going. the directional characteristic is going. also included with the microphone is this shock mount, which is there to dampen
[10:45] vibrations on the table or later on the microphone arm if I tap on it, so that they are not transmitted directly to the microphone . For example, if I place the microphone on the table now...
[10:58] Boing boing and now tapping on the table , no vibrations should be recorded. I'll stop talking now.
[11:11] a shock mount is for. In other cases, it is also referred to as a spider, i.e., decoupling the microphone from vibrations. It would sensitive the microphone is. As I said, I speak
[11:26] into the microphone from about 10 to 15 cm away, and if I have, for example, a keyboard and mouse with me, I want to hear how far that is being recorded. For this, I simply place the microphone back on the table in front of me, and behind the
[11:39] microphone, even if you are using a microphone arm, it would actually be in front of you; behind the microphone, about 20 cm away, is a keyboard. keyboard. You should have heard them . And while I'm talking, I'll write something down
[11:53] . That means the microphone is definitely picking something up. And I also use the mouse for clicking. And now I'll stop talking.
[12:09] The microphone will also be included with this gain setting and the distance of the mouse and keyboard, unless you are using more filters. Now you've already gotten a little bit of an idea of what it's like when I
[12:22] 'm closer to the microphone or when I move further away from it, or when it was on the table, the microphone was just about, I would say, 40 cm from my mouth . But what if I go even further away ? That means
[12:35] we're now at just under 40 cm. I'll get up and go further back . We're now at about 1 meter. Now I'll go even further back. We are now at a distance of approximately 2 meters. And if I
[12:48] motherboards. But I'll lie down over here . So, now we're at a distance of about 3 meters. Then I'll come back and we'll discuss the microphone again as normal. 10 to 15 cm distance.
[13:04] usually turn the game volume up further because otherwise I'm too quiet . A big mistake many people make when setting up their microphone for a stream make when setting up their microphone for a stream or for YouTube videos.
[13:18] But what about plosive sounds? We've been it's like without the pop filter on . Peter goes to his favorite pizzeria and orders a pizza with lots of mushrooms. Pluperfect
[13:32] pizza with lots of mushrooms. Pluperfect sounds, such as a P, make the sound unpleasant. Let's put That's really well done, I must say. You just
[13:45] click here at the front and now we have Popschulz on it. Pop Popschulz, who doesn't know him, the pop filter. And I'm curious to see how much of a difference that makes. To be perfectly honest, this is obviously a very simple pop filter and
[14:01] I don't think it will reduce the sound that much , but let's test it. Peter goes to his favorite pizzeria and orders a pizza with lots of mushrooms. Yes, did you hear a difference? Feel
[14:14] comments. Now the question is, what is my conclusion about the Solum 2? I listened to how it sounded. And one thing has to be said here: the pop filter
[14:26] has already filtered out quite a bit. I actually think it turned out very well. What I found really amazing, though, is how the vibrations shock mount. [music] It works really well and
[14:40] screw the whole thing onto the microphone arm. Pretty good too. I like the option to adjust the gain with the rotary knob and to see it directly on the microphone, as well as the subtle RGB lighting. Purely in terms of processing.
[14:53] Super. The sound is, I must say, very clear. Yes, so you do that you might otherwise know, maybe from some podcast microphones. It is very clear, very detailed, and you can
[15:10] Mouse and keyboard sounds were also not recorded as much, and if you filter the microphone cleanly, for example by using an expander, then you will achieve wonderful results . The only criticism I have, and
[15:26] microphone, is the distinction between the Core version of the normal between the Core version of the normal Solum 2 and the Solum 2 Pro, because I have to say that the Core
[15:43] difference of €20 here. However, I do n't have lenz-free monitoring via 3.5mm n't have lenz-free monitoring via 3.5mm jack, nor do I have 192 kHz if I might want to use that. If I were considering options in that area,
[15:56] I would probably usually go for the Solum 2 Pro. Or if 96 kHz is sufficient and you don't need all that RGB stuff, then
[16:08] lower, although we I have to say, it's a really nice microphone, and the price is extremely attractive – under €100 for this quality. But now I'm curious to hear what you all have to
[16:22] say about it. Be sure to write that in the comments below and then I'd say see you in the next video.




⚡ Saved you 0h 16m reading this? Transcribe any YouTube video for free — no signup needed.