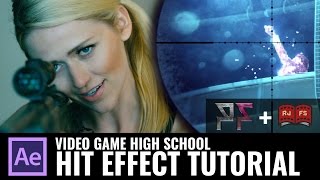

Unlocking the Secret Behind VGHS Hit Effects
44sReveals the behind-the-scenes process of a popular show's VFX, instantly grabbing viewers' curiosity.
▶ Play Clip"The title promises a breakdown of the VFX process, and the video delivers exactly that with a step-by-step tutorial."
In this tutorial, Ryan from PlayFight breaks down the creation of the Video Game High School hit effect, also known as the Reds Effect. He covers the entire process from setting up the initial crate to adding the final glow, including tips on frame rates, using Rayfire for chunks, and compositing techniques in After Effects.
The tutorial is part of a series where PlayFight breaks down VFX shots from their videos, providing downloadable resources for viewers to follow along.
The hit effect in VGHS was filmed at 48 fps and lasted 18-20 frames, but in this tutorial at 23.976 fps, it lasts about 10 frames.
Chunks that fall off the character were created in 3ds Max using Rayfire, and are included in the download pack for the tutorial.
The chunks are parented to a null object, tinted blue to match the hit effect, and their transfer mode is set to add.
A glow layer is created with a solid, masked with an ellipse, set to color dodge, and feathered to blend into the scene.
A fast blur with a setting of 3 is applied to all roto and texture layers to soften the sharp lines.
Hit effect duration varies with frame rate
Explains the technical relationship between frame rate and effect duration, a key concept for VFX artists.
01:30Using Rayfire to create chunks
Demonstrates a specific tool for creating dynamic debris, which is a common need in VFX.
15:47Creating a glow with a roto mask
Shows a practical method for adding a glow that interacts correctly with the scene, a reusable technique.
17:32Work in half resolution until final
Highlights an efficient workflow practice that saves time during compositing.
18:44[00:00] Hey what's going on guys, this is Ryan from PlayFight here. Have you guys ever wanted to know what went into the visual effects for a shop? How it was done from start to finish?
[00:15] Or maybe you guys already have all the bases down, you're just looking for a new challenge. Here at PlayFight we want to give you all the tricks and trades that we use so that you guys can do this too. For every video that we release, we're going to break down a brand new shop. Welcome to PlayFight VFX time for Rocket Junk Dome School.
[00:30] Now in this lesson we're actually going to be breaking down one of the longest running shots that we've been doing with Freddy and the Rocket Jump.
[00:44] It's the Video Game High School Hit Effect, or as we like to call it, the Reds Effect. So here's what you're going to need. Now we've also included a download pack for you guys so that you guys can also follow along with the resources that we need so that you guys can accomplish the shot.
[00:58] Now we give the difficulty level of this comp 3 freddys out of 5. And so before we get started we're going to need a crate, or in other words something for us to work from. Let's pull up something from the season 3 of...
[01:18] Now that we have a crate, we're going to have to figure out where to put the hit effect. Uh, how about... here. Now, I'm going to choose a spot right when Brian reacts to getting hit.
[01:30] Now, in VGHF, the average hit effect, which was filmed at 48 frames per second, lasted about 18 to 20 frames. In this case, since we filmed at 23.976 frames per second, it's going to last about 10 frames.
[01:45] Let's take a look and open our password. Now, Brian, he got wrecked by a bullet in the face and we're going to make this effect look perfect.
[01:57] Let's do it. We're going to drag our footage into the comp and here's Brian. Okay I'm going to be changing a little setting here. I'm going to change the resolution from full to half.
[02:09] This is because we're going to be working with a lot of layers here and it's going to really drag down our workflow. Today we have a green screen, but usually we roto, and when we do so, it doesn't have to be necessarily very accurate.
[02:22] We typically use the roto brush tool because it's a very effective way of getting a nice roto in a very quick amount of time. Okay, so now you should just add a key light. So once you've selected the color, next you want to clip the black and bring that up, and then bring down the clip white.
[02:41] and then afterwards turn the replacement method to hard color and soften up the edges a bit. Add a mask so that we remove all the parts outside of the green screen and then cut the clip once your character has fallen out of the screen.
[02:57] Duplicate the layer and remove all of the effects and masks from it and then move it to the bottom. Select the first layer and find the end point where the hit effect is going to begin.
[03:09] Pre-compose the top layer and name it Roto. So we're inside the rotocop and now we're going to create an animation that reveals
[03:22] the roto and by doing that we select the ellipse tool and we draw it on. Now I'm going to set this map to subtract and invert and if you rotoed with the pen
[03:35] tool you can do just the same. However if you use rotobrush all you need to do is leave it unadd. Next up let's animate that mask path so that it starts from nothing and engulfs
[03:47] Ryan's entire body and this is going to take place within about four or five frames. Now just feather the mask a bit. So let's solo the first layer and then duplicate it about five times and hide the new duplicates and let's just work with the first one.
[04:05] First step is to add a mosaic, and what I usually do is I try to match it up to the about 8 blocks that make up his entire head. Okay so what I'm going to add next is called Estesort, and it's from a plugin pack called
[04:21] Sapphire by GenArt, and it's an amazing pack of just incredible tools that really help add a finishing shine to your comp. Alternatively, you can use an effect called Displacement Map, and it does a very similar
[04:33] effect as the S-Distort but it's just not as nice and shiny. Make sure the blue lens is set to around 90 and set the lens to be the hit effect sequence. Then click on find and start playing with the amount. Next step is to add find edges.
[04:51] Click on invert and set the blend with original to around 25% and then click on the layer and set the transfer mode to darken Okay so the next sapphire plugin we going to be adding It called Glow Rings and what it does is it adds this cool glowy rainbow type effect Man double rainbow all the way Wow Next we going to fiddle with the
[05:13] brightness and then increase and decrease the threshold until you get just a small portion of the effect. Next start playing with the width. Next copy and paste all of those effects onto the
[05:27] next roto layer. Control C, Control V. Set the transfer mode for this layer to Add. And the only thing that you're going to need to change in this is the mosaic. So increase
[05:40] and decrease the different settings in the mosaic so that the lines are differently positioned as opposed to the other way. If we turn both layers on we can see how cool this looks when
[05:53] they are added together. Wow, so awesome! Oh my god! To achieve the effect that we're looking for, we're going to have to add a fshowbadcolor,
[06:08] and what this does is it allows you to tint the light colors and the dark colors separately. You can always choose colors that are not what we're using in this tutorial, like red for the enemy team or whatever you want really. For now we're going to be using blue.
[06:23] Okay so in this section we're going to be messing around with the colors a bit. We're going to be taking the lightness of the skin and making it a light blue and the darkness of the hair and the shirt and we're going to be making that a dark blue. So fiddle with all of these settings and try to achieve a look that really blends the two different colors
[06:41] nice and really creates something that's just spectacular. Next, add a tint, and in the white section of the tint, you want to select the low color of the show back color.
[06:53] And then you're going to play with the blend with original so that we get a slightly darker tone overall. Next, select the layer and change the transfer mode to a classic color dodge.
[07:08] Alright, that looks nice, but we're missing some of the edges that we need. Let's go back in and fiddle with more of the settings and see if we can get what we want to achieve. So next we're going to be adding a couple flickery square texture patterns.
[07:23] It's going to be adding a lot of the digital flashes and flares that we are used to seeing in these hit effects. Let's get into it. Let's create a new solid. So hit CTRL-Y or CMD-Y to bring up the solid settings.
[07:36] Select black and click OK. Add a Stratel Noise, so go Effect Noise and Grain Stratel Noise and then inside of the noise type you want to select Lock.
[07:50] Then set the complexity to around 3. Increase the contrast and decrease the brightness. What we want to achieve is a look that has a lot of black and fewer greys and a lot of
[08:04] white speckles. Next step is to animate this texture, so hold alt and click on the stopwatch beside evolution. This will bring up a text box for us to type in some code.
[08:16] So let's type in time times 1250. This will ensure that the texture animates fairly quickly. You can bring the scale down a bit and then drag the layer underneath the first turned
[08:29] off roto layer. Click on it again and then add a tint. the white and make it a nice blue like so and then add a find edges inside the find edges make sure that it's set to invert and blend with original it's set
[08:44] to 75% increase the brightness a little bit and set this layer to alpha matte the roto above it then make it a add transfer mode it'll look something like this let's duplicate that layer and it's going to appear up above the the roto
[09:01] layer and it's going to automatically alpha matte the roto that's above it and this is what we want so delete the tint and delete the find edges and pre-compose this layer and the roto layer above it
[09:13] let's name this flicker matte or as I spelt it flicker matte now go into the comp and let's do this bring the brightness down a little bit and increase the contrast what we're going for is
[09:25] It's some small dots that are just kind of coming in and out and a lot of black space left over. Let's go to Hue. Now, it says time times 1250. And what it's doing right now is it's playing the exact same animation as the other texture
[09:41] we have. And that's going to cause problems because we're not going to be able to see the difference between the two. So, click on time times 1250 and type in plus 1000. And what this is going to do is send our texture 1000 frames into the future.
[09:56] Go back into the main comp and take a look at that first layer. Make sure it's set to add in the transfer mode section.
[10:11] So now we going to be creating a new solid control or command Y And we going to be creating a new solid Ctrl and we going to be adding a Video Copilot Optical Flares Optical Flares is a fantastic plugin made by Video Copilot.
[10:23] Now what we're going to be using it for is to create these lens flares that are popping on and off of this texture pattern that we created. Click on the options button and take a look. This is the preset flare and we're actually just going to be using this.
[10:38] Make sure to hide all of the little multi-irises and all the extra things. We don't need those. All we want is the main orb. Turn this layer's transfer mode to screen. Go into the option that says 2D and select luminance.
[10:52] Then select the layer that is the flicker map. Fiddle with the brightness and the scale settings. We want these orbs to be a little bit smaller and a little less bright. Once you've done that, you can turn on the solo of the layer and then mess around with
[11:09] threshold and turn off the track colors. Try to get the look that really suits your scene best. Once again, just fiddle with the brightness and scale so that it looks appropriate to the shot.
[11:21] Now, we're going to take the first roto layer that we have and bring the opacity down to about 75%. Then, take a look at the other roto layers and fiddle with the opacity setting so that
[11:33] get a look that really works for your shot. A big issue is that if these layers are too bright it'll make your character look like a big blob of speckly goop so make sure you have the correct settings.
[11:45] So let's add a new black solid and then add our second optical flare. Click on the option and go into the preset browser. Inside there you will find a cool flare. This is one that
[11:57] we use all the time. Now once again make sure to turn off all of the multi iris stuff and all of the little bits that are unnecessary. Now turn the flare transfer mode to screen.
[12:10] Place the flare right where your character got hit. So, Brian got shot right in the head. Now make sure the timeline is lined up to where the hit effect begins and start keyframing
[12:22] the brightness on and off. Now in this case Brian is wearing a really dark shirt so the Brian is wearing a really dark shirt so the lines that we created are faded off
[12:34] for the majority of his body so we're going to have to create a curves adjustment and apply it on both logo layers. So the strength of these
[12:51] distortions aren't as strong as we want them to be. You can fiddle with the amount settings and the blur lens settings and try to get a look that has the lines wrapping around his body. What the blur lens does is it takes the
[13:05] footage before it's used as a distortion and it blurs it as the word suggests so that it's got a less crisp distortion otherwise it can get really sharp and
[13:18] jacket. So we've brought in a powder hit here and this is from a pack called Atrium Essentials 2 by Video Copilot and this is a fantastic pack we highly
[13:33] suggest that you buy it. It's got plenty of good footage for you to use. You can also find footage similar to this on websites like detonationsfilms.com. This also has a lot of free footage for you to use in case you don't feel like buying.
[13:45] So drag that right onto your timeline and move it up to where the hit effect begins and then move the footage to the spot where your character got hit, in this case the head.
[13:57] So what we're going to do here is make this Puff look blue. So go to the effects and add a tint. Now make the white blue and change it to a screen transfer mode.
[14:09] Alright, it's time to track. So the footage is moving and the Puff is not. How do we solve that? Well, there's a plugin called Mocha and it comes with After Effects. Go into animation and click on track in Mocha and then Mocha is going to pop up and give
[14:24] you a little menu. All of these settings are perfect so click ok. Next, click on the pen tool and draw around an object in your background that is not moving. Something that's stationary and detailed.
[14:37] Then, you can turn off shear and click on the track forward button. Next, click on export tracking data and make sure that it says transform data and not corner
[14:52] pin. Then, click copy to clipboard. Back into After Effects, you can create a new null. So, go layer, new, null and make sure that you go to the beginning of the timeline.
[15:04] This is important because this is how we make sure that the keyframes that are going to be pasted are in the right spot and aren't offset. Press Ctrl V This will paste the transform data that we previously copied in Mocha Now press U on the null and click on anchor point Copy that and paste it onto the position Ctrl C Ctrl V Delete the anchor point by clicking on
[15:29] anchor point and pressing delete or clicking on the stopwatch on the side. Now go to where your counter hit begins and with the parent tool select the null. then it should automatically track. Awesome! Through DGHS you have these chunks that
[15:47] fall off the body as our character gets hit. Now I've created these chunks in 3ds Max with a tool called Rayfire. I've included them in this tutorial and you can use them and follow along. So drag these chunks onto the timeline and drag them
[16:03] up so that they match where the hit effect begins. Then press Y, select the anchor point and move it up to where the chunks are on the screen. Then press Z and get back to your normal pointer tool. Now move the chunks over to where the
[16:18] hit effect is on Brian's body. Now in this situation the bullet comes in from the left side so I'm going to need to flip this footage in order to make it fall in the right direction. Next let's parent it to the null and scale it up if necessary.
[16:35] Now, add a tint and change the dark color to a blue. Make sure the blue is matching the color of the head effect and then change the transfer mode to add.
[16:47] Alright, next we're going to be stretching the time of this so that it's a little bit faster. Right click on the top row here and go into the columns section. Then add a stretch.
[16:59] You'll see all these percentages lined up at the end. the percentage to change the speed of this clip. You want the chunks to fall at an appropriate speed for your shot. The next step we're going to be adding a glow and this is going to be affecting the entire
[17:20] environment around your character. Now in our case it's just a green screen backdrop, however for you it may be the entire ground or it may be objects near your character, but it's the same process nevertheless.
[17:32] Create a new solid by pressing Ctrl or Cmd Y and change the color to the, whatever color you're using for the fit effect, in our case, blue. Now, click OK and drag it underneath all of the layers
[17:45] and right up above the base footage. Now, click and hold the shape beside the pen tool and select the ellipse. Now, with that tool selected, draw one right on your backdrop,
[17:57] in our case, right behind Brian, and animate it so that it moves as he moves. Keep in mind this roto can be very loose. Now just clip the ends for the in and out point of the hit effect.
[18:10] Set it to color dodge and feather the mask so that it blends properly into your scene. Now bring down the opacity of it. Despite the glow layer being underneath all the effects layers, it's still in front of Brian's body
[18:25] So we need to put it behind. Copy the rotor layer from inside the roto-comb and paste it above the glow layer in our main comb. Make sure to remove the ellipse mask that we animated previously. If we just solo those last few layers, you can see that it looks like a glow is occurring behind his back, which is what we want.
[18:44] So I've been working in half resolution this entire time, now it's time to switch it to full. Reason being is we need to see exactly what our effects look like. You can notice
[19:00] now that these lines are really crisp and really sharp, we want to blur them a little bit. So click on the first row though and add a blur. So go effect, blur, fast blur, and then blur it a bit to match your scene. I use the setting of 3. And you can copy and
[19:14] paste this onto all of the roto layers and all of the texture layers and even the chunk. So what I'm going to do next is grab a background and put it behind Brian. And this is so that
[19:27] we can appreciate this effect to its full potential. And there you have it, a full hit effect from Video Games High School. Congratulations, you finished the tutorial!
[19:41] You are one step closer to becoming an official play fighter! Now the BDHS hit effect seems simple enough, right? Uh uh, that was pretty damn complex! Leave your comments and show us what you did!
[19:53] We're interested in seeing it! Hey, what's going on guys? It is Brian, I am back from the dead somehow. Again, we've said it again and again and again, thank you guys so much. Please, please, please give us your comments.
[20:05] Give RocketJump your comments. We want to know what you guys liked about this, what you didn't like, how we can make it better, and especially what you guys want to see next. So somewhere floating around me, coming out here, coming out here, you'll see some RocketJump links, you'll see some PlayFight links.
[20:19] Let us know your comments, follow us, subscribe, do all that fun stuff. And you know what? I think that's it. That's all from PlayFight right now. So we will see you guys later. Thanks, guys.
⚡ Saved you 0h 20m reading this? Transcribe any YouTube video for free — no signup needed.