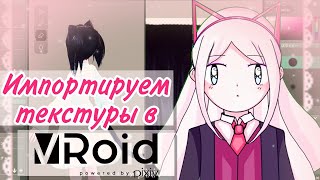

Where to Get FREE Textures for VRoid
41sThe promise of free assets is highly appealing to creators, and the step-by-step search process is practical and shareable.
▶ Play Clip"Delivers exactly what the title promises: a clear guide on importing and finding textures in VRoid, with no fluff."
This video tutorial explains how to import character textures in VRoid Studio, a popular tool for creating 3D VTuber models. The creator demonstrates how to find free textures on the Booth website, download them, and apply them to clothing and other items within the VRoid editor, making it easy for users who cannot draw to customize their characters.
The video teaches how to import character textures, useful for those who don't know how to draw, and where to find textures for beautiful clothing.
Textures can be drawn or found on the Booth website. The creator searches for 'VRoid' on Booth and notes that the site has both paid and free textures, with filters to set max price to 0 for free ones.
After finding a texture, click the download button to get a zip archive or PNG image, depending on the original format.
Booth offers everything needed to create models, including hair, T-shirts, dresses, shoes, and stockings, allowing users to assemble a full model without drawing skills.
In the VRoid editor, choose clothing that matches the texture. The texture of shoes should not match a shirt, and descriptions often indicate size and model compatibility; otherwise, rely on visual judgment.
In the textures tab, select the layer for the clothing item (e.g., T-shirt), click import (around the fifth line), and choose the downloaded file. The texture appears on the clothing, which can be further edited or left as is.
The same import algorithm works for all clothing items, skin, eyes, and any other texture areas in VRoid.
The video provides a straightforward method for importing textures into VRoid Studio, emphasizing the use of free assets from Booth to customize characters without drawing skills. The process is simple and applicable to all texture areas.
Where can you find free textures for VRoid characters?
On the Booth website, using filters to set max price to 0.
00:19
What file formats can you download textures in from Booth?
Zip archive or PNG image.
00:59
What should you consider when selecting clothing for a texture?
The texture should match the clothing item; descriptions often indicate size and model compatibility.
01:26
How do you import a texture in VRoid editor?
Go to textures, click on the layer for the item, select 'Import', and choose the file.
02:09
Does the import method work for all items?
Yes, it works for all clothing, skin, eyes, and any texture area.
02:38
Booth as a free texture source
Highlights a practical resource for users without drawing skills.
00:19Assembling models from free assets
Shows that complete models can be built from free assets, democratizing 3D creation.
01:14Simple import process
Demonstrates a straightforward, repeatable technique for applying textures.
02:09[00:06] tell you about how to import character textures. This can be useful if, for example, you don't know how to draw. And by the way, now I'll tell you where to get these textures to get beautiful clothes for your character.
[00:19] You can either draw the textures for your model yourself or find them on the yourself or find them on the bus website. Let's drink and this is where we'll be looking for a link to the site now. I'll try to leave it in the description. If I don't,
[00:31] remind me. Search in the search engine, "Veliret and Zhil" (Vilat search engines) and see what we can find. This site has both paid textures and free ones. To find only free ones, use filters. Set the maximum price in veins to 0. For
[00:47] example, I found some kind of factory set of T-shirts, apparently, but by name, unfortunately, the images aren't loading because my internet is terrible and I can't do anything about it. So, in order to install them on your character,
[00:59] we click the download button and we download either a zip archive or a png image. It depends on the format in which it was originally uploaded. Then we go, "Hero, you learn these very things." Imports. On this site, you can
[01:14] find absolutely everything you need to create models. In principle, even without knowing how to draw, you can simply assemble a whole good model from these free assets. That is, there is hair, T-shirts, dresses, shoes,
[01:26] stockings, anything for every taste and color. We go to the hero editor and select suitable clothing, and first we need to select suitable clothing that will match the texture. It is obvious that the texture of shoes,
[01:40] for example, should not match the texture of a shirt. I usually write this, that is, they usually write what is needed, that is, for example, in a dress they indicate what size it should be for and what model, but if not, then rely on your eye and your
[01:54] logic. We chose suitable clothes, we go to textures, in textures we we go to textures, in textures we have layers among layers there is a guide here is a grid which shows the sizes of the T-shirt and the ratios if you are
[02:09] going to use cassatas, the layer on which we will draw and the default images, that is, the T-shirt itself, the layer is initially empty and what you do on it now will not change anything, but we must click on this layer and
[02:24] select import, it is somewhere on the fifth line if someone does not know English and then we find our file which we need to import and this is what we got, here is a T-shirt that is beautiful, then we can refine it ourselves, finish drawing it in the
[02:38] editor and or leave it this way this algorithm works with all items of algorithm works with all items of clothing, that is, with a skirt and a dress, it also works with skin, eyes and in general anywhere where you need to make textures. This is all
[02:51] we got today, comments, subscribe to the channel with you was Oman and to everyone, thank you all, bye you was Oman and to everyone, thank you all, bye


⚡ Saved you 0h 03m reading this? Transcribe any YouTube video for free — no signup needed.