
AI Summary
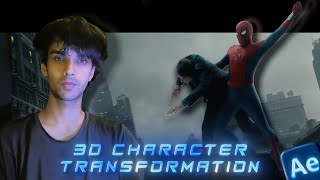
This tutorial demonstrates how to transform a standard character clip into a 3D-looking effect using Adobe After Effects. The process involves background removal with the Roto Brush, applying radial blur, and animating keyframes to achieve the desired 3D appearance.
Chapters
The video opens by promising to show how to convert a normal character clip into a 3D-looking clip in After Effects, with a quick preview of the result.
Two methods for removing background are presented: Mocha Pro and Roto Brush. The Roto Brush is recommended as easier.
If an error about mismatched frame rates appears, the solution is to precompose the clip and then apply the Roto Brush again inside the precomp.
Increase the feather slightly to sharpen the edges of the mask for a cleaner cutout.
After cutting out the character, hide the Roto Brush effect on the original layer to isolate the cutout on a separate layer.
Add the Radial Blur effect to the Roto Brush layer to start building the 3D look.
Set the radial blur amount to around 12, change the render mode to 'Glass Edges', and set color influence to 100.
Place a keyframe at the beginning for completion, add another keyframe later and increase the value, then copy the graph for smooth animation. Set the starting keyframe to 100.
Animate the opacity of the auto brush layer to fade in the effect.
Mention of adding extra effects like character edge glow (link to another tutorial). The video concludes with a plug for the creator's editing store.
The tutorial provides a straightforward method to create a 3D character effect in After Effects using Roto Brush and Radial Blur, with optional enhancements like edge glow.
Mentioned in this Video
Tutorial Checklist
Study Flashcards (5)
What are the two methods mentioned for removing background in After Effects?
easy
Click to reveal answer
What are the two methods mentioned for removing background in After Effects?
Mocha Pro and Roto Brush.
00:21
How do you fix a frame rate mismatch error when using Roto Brush?
medium
Click to reveal answer
How do you fix a frame rate mismatch error when using Roto Brush?
Precompose the clip and reapply Roto Brush inside the precomp.
00:49
What effect is used to create the 3D look?
easy
Click to reveal answer
What effect is used to create the 3D look?
Radial Blur.
02:26
What are the recommended settings for Radial Blur in this tutorial?
medium
Click to reveal answer
What are the recommended settings for Radial Blur in this tutorial?
Amount around 12, render mode 'Glass Edges', color influence 100.
02:48
What is the purpose of animating the opacity of the auto brush layer?
medium
Click to reveal answer
What is the purpose of animating the opacity of the auto brush layer?
To fade in the 3D effect smoothly.
03:53
💡 Key Takeaways
Two Background Removal Methods
Provides a choice between Mocha Pro and Roto Brush, with a recommendation for the easier Roto Brush.
00:21Precompose Fix for Frame Rate Error
A practical troubleshooting tip that solves a common Roto Brush issue.
00:49Radial Blur for 3D Effect
Core technique for achieving the 3D look using a simple effect.
02:26Keyframe Animation for Completion
Shows how to animate the effect's intensity over time for a dynamic result.
03:36Full Transcript
[00:02] show you how you can convert a normal character clip into a 3D looking character clip in After Effects. Let me show you a quick preview.
[00:21] So, without wasting any more time, let's get started. First, get your clips ready. Now, we need to remove the background from this clip. There are two ways to do this. First one is using Mocha Pro, and
[00:35] second one is using a Roto Brush. And the Roto Brush is much easier, so we'll use that method. Select your clip, choose the Roto Brush tool, and start Roto Brushing your character.
[00:49] You might see an error saying that the frame rates are mismatched. To fix that, simply go back and precompose your clip.
[01:02] Open the precomp and start Roto Brushing your character again.
[01:54] sharp, simply increase the feather a little just like I do.
[02:12] it outside the precomp. Then hide the rotobrush effect of this Then hide the rotobrush effect of this layer. been completely removed. Now, it's time to create 3D looking
[02:26] Now, it's time to create 3D looking effect. Add the radial blur effect to the rotobrush layer.
[02:48] characters. I'm going with around 12.
[03:05] Change the render mode to glass edges. Then the color influence to 100.
[03:36] Put your completion keyframe at the beginning. Add another keyframe around here and increase the value as much as you want. increase the value as much as you want. Easy is the keyframes and copy my graph.
[03:53] Finally, set the starting key frame to 100. Now, select the auto brush layer and animate the opacity just like I do.
[04:11] You can also add extra effects to make it look even better, like the character edge glow. If you want to learn how to make that effect, be sure to check out my character edge glow tutorial.
[04:25] And that's it. I hope this tutorial helped you. if you want to add cool text animations, 3D text effects, premium CCs, and a lot more cool editing effects in your edits, be sure to check out my editing store.
[04:41] I'll leave the link to it down in the description. Thank you so much for watching the video. I'll see you in the next one.