
Essential Keybinds for Apex Movement
44sViewers love quick, actionable setup tips that promise to improve their gameplay immediately.
▶ Play Clip"The title promises a 2025 movement guide and delivers exactly that with detailed techniques and keybinds."
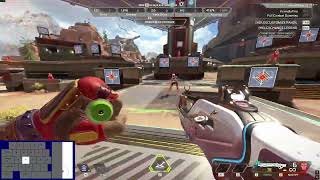
This video is a comprehensive movement guide for Apex Legends, focusing on advanced techniques for PC players. The creator demonstrates wall bouncing, fatigue bouncing, tap strafing, mantle jumping, super jumping, and super gliding, providing keybinds and tips for execution.
Recommended keybinds: scroll wheel forward for move forward, scroll wheel backwards for jump, and V for crouch.
Slide into the wall, jump as soon as you contact the wall, then jump again. Let go of directional keys during the slide.
Jump, wait a moment for fatigue, then jump off the wall. Useful for fighting on walls.
Slide, hold a directional key (e.g., D for right), jump, and scroll forward while looking in the desired direction.
On a zipline with a ledge, at the peak of the climb, hold backward input (S) and perform a super jump (two jump inputs quickly).
Practice circling a target while b-hopping, then combine tap strafes in a half-circle motion (D-W-A-S) to lurch back and forth.
At the peak of a climb, input jump and crouch at roughly the same time. Higher FPS makes it harder; lower FPS (e.g., 150) is easier. Can be combined with tap strafes.
Mastering these movement techniques requires practice and patience. The creator encourages players to take the time to learn them for a competitive edge.
What are the recommended keybinds for movement in Apex Legends?
Scroll wheel forward for move forward, scroll wheel backwards for jump, and V for crouch.
0:27
How do you perform a basic wall bounce?
Slide into the wall, jump as soon as you contact the wall, then jump again.
0:48
What is a fatigue bounce?
Jump, wait a moment for fatigue, then jump off the wall.
1:59
How do you execute a tap strafe?
Slide, hold a directional key (e.g., D for right), jump, and scroll forward while looking in the desired direction.
2:53
What is the key input for a mantle jump?
At the peak of the zipline climb, hold backward input (S) and perform a super jump (two jump inputs quickly).
4:01
How does FPS affect super gliding?
Higher FPS (e.g., 240) makes super gliding harder; lower FPS (e.g., 150) makes it easier.
11:58
What is the input for a super glide?
At the peak of a climb, input jump and crouch at roughly the same time.
10:42
Optimal Keybinds
Provides specific keybinds that enable advanced movement techniques.
0:27Tap Strafe Explanation
Clear step-by-step guide for a core movement mechanic.
2:53FPS Impact on Super Glide
Reveals a technical insight that higher FPS makes super gliding harder.
11:58Practice Advice
Emphasizes that 90% of people won't get it first try, encouraging persistence.
8:48[00:01] What's going on, boys? We are back with
[00:05] another movement guide.
[00:09] So, we're going to jump right into it
[00:11] really fast. This is mainly for the PC
[00:14] players, console players, I will let you
[00:17] know what all you can and cannot do or
[00:20] controller players in in general, I will
[00:23] let you know. But for PC players on
[00:25] keyboard and mouse, make sure you have
[00:27] these keybinds set up correctly. You
[00:29] want scroll wheel forward for move
[00:31] forward,
[00:32] >> scroll wheel backwards for jump. And for
[00:35] crouch, I recommend V. I will get into
[00:39] why this is V in a little bit, but I do
[00:42] recommend it being V.
[00:44] And uh we're going to start off by
[00:48] showing you guys how to basic wall
[00:50] bounce. We'll go over here. The basic
[00:53] wall bounce is pretty simple. You just
[00:55] slide in to the wall you're trying to
[00:57] bounce off of. Jump. Jump. As soon as
[00:59] you jump on the wall, like soon as you
[01:01] contact the wall, hit your jump.
[01:04] Super super easy. Just
[01:08] grab the wall. When you're ready to jump
[01:10] or wall bounce and jump off of it. Um,
[01:14] when you're in your mid slide, let go of
[01:16] your directional keys.
[01:19] Let go of them, jump, and then you can
[01:21] go back to doing your thing.
[01:23] slide into it.
[01:26] Let go. You could even add like a input
[01:29] like say you're you're a little bit
[01:30] aways from it. You can add an input like
[01:32] a
[01:34] >> like a A or a D to get to give you the
[01:37] rest of the way into that wall. You know
[01:38] what I mean?
[01:40] So that's wall bouncing. Slide, jump,
[01:43] jump. Easy. You could you can do it with
[01:46] your uh space bar if you wanted to. It's
[01:50] a little bit I just feel it's easier
[01:52] just to scroll up if you want me to be
[01:54] honest or scroll down. Just scroll
[01:57] scroll. I'm going to show you guys also
[01:59] fatigue bouncing. It's what you just
[02:01] seen me do is that you can use those a
[02:04] lot. Say you're fighting someone on like
[02:05] a wall. You know you're you're boom
[02:07] boom. You know they're about to push.
[02:08] You can [ __ ] walk. Boom.
[02:11] All you have to do is jump and at right
[02:14] after you jump, just contact that wall
[02:16] and jump off of it. Like jump, wait a
[02:20] second, jump. What you're what you're
[02:22] trying to do, you see how after you
[02:23] jump, you get that fatigue. That's why
[02:25] they call it a fatigue mount because you
[02:27] have that fatigue. But if you jump and
[02:29] then [ __ ] jump off the wall again,
[02:31] super simple, brother.
[02:34] >> Super simple.
[02:38] This is one of the easiest things you
[02:39] could do. You really can't mess it up.
[02:44] As you see there, I did that with no uh
[02:46] tab strafe. You can get up on things
[02:48] like that without tap strafing.
[02:53] Super simple. Now, I'm going to show you
[02:56] guys how to uh tap strafe. Tap strafe is
[03:00] been a [ __ ] big thing in the game for
[03:02] a long time. So, all you got to do is
[03:05] I'm going to stand on this line, right?
[03:07] And I want to go forward and go right.
[03:11] So, you're going to slide. As you're in
[03:14] your slide, you're going to hold D
[03:16] because we want to go right. So, we're
[03:18] going to slide, hold D. Then, we're
[03:21] going to jump. And as we're in the air,
[03:23] you're going to look start looking in
[03:25] the direction as you're scrolling
[03:26] forward. So, say you're going to do
[03:30] boom.
[03:32] I want to go right. Slide D. And I did.
[03:36] There you go.
[03:39] >> Run. Slide D. Scroll.
[03:42] That is a tap strafe. You can do that in
[03:44] any direction. You can chain them in
[03:46] multiple directions.
[03:49] It is completely up to you how you do
[03:50] it. You can chain them together. Chain
[03:53] tap strafes together into doing like uh
[03:55] I guess like lurches in a way. Um but
[03:59] yeah, that's tap strafing.
[04:01] Now, I'm going to show you guys how to
[04:03] mantle jump. Mantle jumping can be done
[04:06] on almost any zipline
[04:10] that has a
[04:13] ledge at the top of it. This one's a
[04:15] little The farther away the harder, I
[04:18] think, but you can do it looking up or
[04:20] down. All you're doing is at like your
[04:23] goal is as you're on your climb, once
[04:26] you get to your peak, you want to hold
[04:28] your backwards input.
[04:32] So just press your like hold it for a
[04:33] second, right? So the way it would look
[04:36] like if you're doing it correctly,
[04:37] you're going to go up and then just like
[04:39] that, if you watch the overlay, I press
[04:43] S.
[04:46] It's because I'm trying to put myself in
[04:47] that correct spot to do it.
[04:50] which is like in the air type thing.
[04:54] Like you can you can do it just by
[04:56] without even having to mantle. You can
[04:59] see people like Fade do it. Um
[05:03] Zylus, bunch of the the movement
[05:06] creators, they do it.
[05:09] It's not super difficult. Like I said,
[05:11] you can do it looking up or down.
[05:14] But some air areas when you do them,
[05:17] they're easier looking down than up or
[05:19] looking up and then down. You know what
[05:20] I mean? So just keep that in mind.
[05:23] Sometimes it's easier to look the other
[05:26] direction than you're trying. So I
[05:28] recommend learning how to do it on both.
[05:30] Scroll up.
[05:33] >> Scroll up. But like I said, at the very
[05:35] peak, put your backwards input and then
[05:39] do a super jump. Super jump is just
[05:41] grabbing the zip line and putting two uh
[05:45] jump inputs back to back pretty fast.
[05:48] Just like that. If you seen on the
[05:50] overlay, I I'll use space. It's
[05:53] literally just jump. That's it.
[05:57] That's how you do it. If you're on a
[05:59] controller, you can do this. If you're
[06:01] on keyboard, just grab it and scroll
[06:03] down. It's way easier.
[06:07] All right. All right.
[06:11] Now that we got that out of the way,
[06:13] we've covered tap strafing, wall
[06:15] balancing, mantle jumping, super
[06:18] jumping. Now we can get into um
[06:23] I don't know exactly what you'd call
[06:25] this. I don't know if this is what a
[06:27] neor strafe is,
[06:30] but here's my advice for anyone trying
[06:33] to learn how to do that.
[06:37] Find your target you want to do, right?
[06:39] because you obviously you want to do it
[06:40] while
[06:42] being able to shoot. You know what I
[06:44] mean?
[06:46] So, you want to find a target and then
[06:48] you want to try to circle the target
[06:54] while uh continuing a B hop. I suck at
[06:57] just circling them. I don't know why I'm
[06:59] no good at that,
[07:02] but I I really suck. But yeah, once you
[07:06] learn how to do that, right, you can
[07:08] start to combine your tap strafs because
[07:11] see if you tap strafe back and forth
[07:14] really fast. Now, just remember, you
[07:16] can't just go like this. Like, you can't
[07:18] hold A D and then scroll forward
[07:21] whenever you're doing that, that it will
[07:22] not work. you have to add a forward
[07:26] input, which is why you see me do like a
[07:29] uh I call it a half circle because you
[07:32] don't never really finish the circle
[07:34] like this. You just go from D A or D W A
[07:41] S A W D S W A S W D S You go back and
[07:48] forth. You know what I mean?
[07:51] You can do the circle ones, but remember
[07:54] for every time you press from D and S to
[07:59] W, you want to and then you're going in
[08:02] like that circle. You want to add that
[08:04] tap strafe.
[08:06] You could do it like this to get used to
[08:07] it.
[08:09] You don't need to add the speed. Just
[08:11] you see how it's jerking you back and
[08:12] forth.
[08:15] You can see when you get it just right.
[08:20] You can practice that until you get it
[08:23] right and then you can start trying to
[08:25] do the what's it called with it? The uh
[08:29] the slide and bounce back and forth. You
[08:31] can do this by the way without a uh
[08:34] octane stem. I just suck without it. I
[08:36] don't know why. Don't don't don't.
[08:39] But then you can just start combining
[08:41] them and
[08:43] yeah,
[08:48] it's all you got to do. It takes time.
[08:50] It takes practice. Don't think you'll
[08:52] get it first try because most of the
[08:55] time 90% of people are not going to get
[08:58] it first try.
[09:00] It just doesn't work that way.
[09:03] Um,
[09:05] I'm going to show you how to do uh
[09:12] >> uh
[09:14] man, I'm blanking so hard. Um, super
[09:18] gliding. That's what it's called. [ __ ]
[09:20] Sorry about that. Super gliding. This is
[09:23] a very, in my opinion, I believe it is a
[09:26] very controversial thing right now
[09:30] because of the addition of
[09:34] >> the mantle boost.
[09:39] If you're a controller player or a
[09:41] console player, you can literally just
[09:43] do this and you're pretty much fine
[09:47] because you can't add tap strafs into
[09:50] it.
[09:51] like you cannot tap strafe with it. It's
[09:53] just not
[09:55] it will not let you do it. I don't know
[09:57] why, but yeah.
[10:04] All all this is is just helping you do
[10:07] it with the restriction of not being
[10:09] able to chain movements with it, if that
[10:12] makes sense.
[10:14] If you do it the normal way, you can
[10:17] chain um what's it called? like tap
[10:20] strafes into it as I'm [ __ ] it all up
[10:25] and I suck. Damn. Hold on. Let me try to
[10:27] hit it right here. I'm just [ __ ] up
[10:28] bad.
[10:31] There you go. See how I added the tap
[10:33] strafe in it.
[10:35] >> That's why as well I told y'all about
[10:36] the V key cuz if you see I'm pressing
[10:40] these at a weird interval. All you're
[10:42] doing is you're um at the peak of your
[10:44] climb, you're inputting a jump and then
[10:46] a crouch input at uh roughly the same
[10:51] time.
[10:55] It's roughly the same time,
[11:00] but just remember to watch the uh
[11:03] overlay and when I'm doing these
[11:05] movements because they're way easier to
[11:08] learn when you're watching the button
[11:10] presses yourself. if you're on a
[11:11] keyboard.
[11:15] So, as you've seen, you can just at the
[11:18] very peak of your climb, you're pressing
[11:21] those jump and crouch buttons
[11:27] with the it's you have a very short
[11:30] window to hit it,
[11:33] but it does feel like they it made it
[11:36] easier to do.
[11:39] I don't know how, but it feels a lot
[11:41] easier than it used to. It used to be
[11:45] way worse to actually hit them. They
[11:47] were really hard. But your FPS as well
[11:51] has a play in how easy your super glides
[11:54] are going to be if you're doing them
[11:55] this way.
[11:58] If you're at a higher frame rate, like
[12:00] you're at you're at 240, right? Say you
[12:02] play at 240 frames, it is going to be
[12:06] way harder for you to hit a superglide
[12:10] than at say like I play at 150.
[12:14] 150 is still a little higher, but it
[12:17] makes the window a I wouldn't say a ton
[12:20] easier. Oh yeah, it makes it a lot
[12:22] easier, bro. I'm not going to lie to
[12:23] you.
[12:25] Makes it way easier. So, I recommend if
[12:28] you're going to be doing tap strafs
[12:31] and you're going to be doing all all
[12:32] this movement, lower frame rate, easier,
[12:36] higher frame rate harder.
[12:39] Even if it's
[12:41] well, no, it's just really tab strafing.
[12:43] Actually, not tab strafing, but uh super
[12:45] glad. So,
[12:48] it's up to you. Use your discretion at
[12:50] what you want to do. If you want it
[12:51] easier, you can cap your frames.
[12:55] um if you don't know how to cap your
[12:56] frames because I'm pretty sure they
[12:57] don't even have a
[12:59] what's it called in here?
[13:03] Yeah, I don't think they have a frame
[13:04] rate cap in game. But if you're on an
[13:07] Nvidia card, uh you can go into the uh
[13:13] GeForce Experience app, I believe, or
[13:16] the Nvidia app, and you can adjust it
[13:19] for Apex itself,
[13:22] as long as as uh as well with um the
[13:26] custom resolutions. I play at stretched
[13:28] res 1720x 1080
[13:32] or 1728 by 1080 sorry out of um if you
[13:36] want to play at this resolution you have
[13:38] to go into the Nvidia control panel turn
[13:42] off super dynamic resolution
[13:45] and then create a custom resolution
[13:50] and uh
[13:52] put whatever you want like if you wanted
[13:54] this you would you know 1728 x 1080 then
[13:57] you go into Apex's um
[14:01] display files
[14:04] and you can you have to enter in this
[14:07] resolution that you want it to be and it
[14:09] will add this to it to allow you to be
[14:12] able to do it.
[14:15] You know what I mean?
[14:21] But yep, that's the uh video. That's the
[14:26] movement video and a little bit of
[14:28] advice on how to do uh some of the
[14:31] movements that not everyone else can do.
[14:36] >> Faster, faster, faster.
[14:38] >> So, start dominating with it, guys.
[14:41] Super easy to learn. Take the time. It's
[14:44] fun.
[14:46] I appreciate all of you that have
[14:47] watched my videos recently and all the
[14:51] the views.
[14:53] Appreciate you guys. And uh yeah,
⚡ Saved you 0h 14m reading this? Transcribe any YouTube video for free — no signup needed.