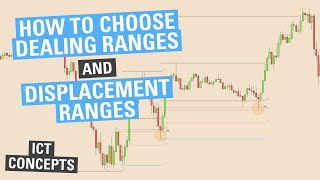

Dealing Ranges Explained Simply
45sDemystifies a confusing ICT concept with a clear visual example, appealing to traders seeking clarity.
▶ Play Clip"Title accurately describes the content; the video delivers on explaining dealing and displacement ranges."
This video explains how to identify dealing ranges and displacement ranges in price action trading, using ICT concepts. The presenter demonstrates how to use Fibonacci retracements to find optimal trade entries within these ranges.
Zoom in to find a high and a low; that is your dealing range. Draw a Fibonacci from high to low to define the range.
What appears as external liquidity on a smaller timeframe becomes internal liquidity on a larger timeframe. Don't get too caught up in the distinction.
You can have multiple dealing ranges at different zoom levels. Focus on where price is currently trading.
Displacement ranges are aggressive price moves over structure. Identify them by looking for strong directional moves.
After a displacement, look for a retracement into a discount (below 0.5 Fibonacci) of the displacement leg before going long.
Use Fibonacci to find the discount of the displacement range. Look for order blocks (PD arrays) within that discount for entry.
If you miss the first entry, mark the next displacement range and wait for a retracement into its discount, ideally at an order block.
Mastering dealing ranges and displacement ranges helps traders identify high-probability entry points. Combining these with Fibonacci retracements and order blocks can improve trade timing.
What is a dealing range?
A dealing range is defined by a high and a low on the chart; you draw a Fibonacci from high to low.
00:08
How does external liquidity become internal liquidity?
When you zoom out, what appeared as external liquidity on a smaller timeframe becomes internal liquidity on a larger timeframe.
00:37
What is a displacement range?
A displacement range is an aggressive price move over structure.
01:47
After a displacement, where should you look for a long entry?
Look for a retracement into a discount (below 0.5 Fibonacci) of the displacement leg.
02:15
What is OTE in the context of this video?
OTE refers to Optimal Trade Entry, which is within the discount of a displacement range, often at an order block.
03:04
What should you do if you miss the first entry?
Mark the next displacement range and wait for a retracement into its discount for a second entry.
04:36
Defining Dealing Ranges
Core concept of the video; essential for understanding the rest.
00:08External vs Internal Liquidity
Clarifies a common confusion among traders.
00:37Displacement Ranges
Key concept for identifying strong price moves.
01:47Retracement into Discount
Actionable strategy for entry timing.
02:15Using OTE and Order Blocks
Combines multiple concepts for high-probability entries.
03:04[00:08] displacement ranges I know a lot of people get confused on which highs and which lows to use external and internal liquidity so hopefully this quick video so the first thing we're going to go over are doing ranges the easiest way to
[00:22] do this is zoom your screen in and look exactly where price is at where is a high and a low it's as simple as that so here's a high here's a low that is your dealing range so then if you take a fib from high to
[00:37] the low of that that's your dealing range and as you notice people will say this is external liquidity right here right here but if you notice as you zoom that external liquidity becomes internal liquidity so don't get too caught up in
[00:53] that so as you zoom out even further you can notice you get a high and a low right so now you have a whole new dealing range from here to there to there
[01:07] so you can have multiple dealing ranges like that but it's important to just notice where is Price trading and what are you looking for so normally when I'm observing price action during the New York morning session so as we skip
[01:21] York morning session so as we skip forward to the New York winning session which is right about here 8 30 start and then we get into 9 30. so price is
[01:33] trading right here now these dealing ranges right here aren't really valid right because price is higher than that so zoom out a little this is the high we're working with and this is the low we're working with
[01:47] so drawing our Fib from this high to this low that is our whole dealing range so you can see we're in a premium of the dealing range here however you also want
[02:01] displacement ranges are aggressive price action moves over structure right so you can see aggressive price action up right here right here to that high that is your displacement
[02:15] retracement into a discount before going along so keeping that in mind I would want to see a retracement of this price leg right here if we're going to continue higher
[02:35] into a discount of a displacement leg before we get a price movement and now you can see we reach higher where is our new displacement range well right there so ideally you'd want to see either
[02:51] down there you go so hopefully that helps out in terms of displacement and dealing ranges we're
[03:04] going to do a few more examples and how you can incorporate OTE so looking at this price action here you can see we're starting to get a displacement leg right starting to get a displacement leg right here right where is our dealing range
[03:16] well here's a high and here's a low so if we Mark out our range on the side we know that we are in a discount down here that premium down here so ideally too long you would want to see a discount in here and a
[03:32] discount of a displacement range so drawing out this FIB what you do is I take the low that started this displacement range which broke this structure so right here and I will follow this up
[03:45] and then that will be the range I'm looking to log in so as it continues higher you follow it up
[03:59] and now you can see we're in a premium of this dealing range so if you're where you'd want to be looking but we're looking for longs so now we
[04:11] get a move down where do we want to see this move into a discount and ideally OTE what do we have right here an order block right so ideally you want to search for PD arrays within these points of interest
[04:24] arrays within these points of interest so as we go lower you can see reach into that order block and you can see how the candles do not close in respect this order block and we get our move higher
[04:36] you can see discount of the displacement range discount of the dealing range this is where you want to be looking too long let's say you missed that entry you would want to see if you can get another entry and a discount of the dealing
[04:50] displacement range so marking out this displacement range opportunity so you follow this high up
[05:04] stretch over this High didn't this place we'll see if it does we'll see if it does so it comes back down
[05:16] well 0.62 right there here's our order block and you can see that is also below this dealing range right here so that would be your second long entry
[05:29] would be your second long entry targeting this high that high and then moved lower so hopefully this is a good example and
[05:41] from it if you need any more examples or have questions please reach out in the comments below hope you enjoyed it and have a great day see ya
⚡ Saved you 0h 05m reading this? Transcribe any YouTube video for free — no signup needed.