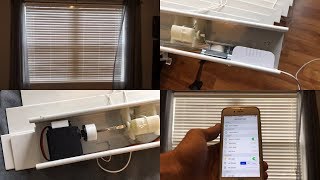

Never remove your blinds before doing this!
42sThe warning about tilting blinds open before removal is a practical safety tip that prevents a common DIY mistake.
▶ Play Clip"Clear installation walkthrough that matches the subtitle, though 'Complete Guide' oversells without the software video."
In this final installation video, Matt from MKSmartHouse demonstrates how to physically install an ESP8266-based Blinds Control that integrates with OpenHAB over MQTT. He walks through removing the blinds, calibrating the servo motor with a blinds-to-servo adapter, routing cables into a control box, and testing the finished setup. The guide focuses on the mechanical installation, assuming the software setup was completed in a prior video.
Only a small Phillips screwdriver and a small flat screwdriver are needed. Links to all materials, tools and parts are provided on the MKSmartHouse website.
Before removing the blinds, make sure the tilt is in the open position. Remove the white plastic trim pieces from the plastic mounts, open the metal end pieces, and remove the tilt mechanism.
Plug the Blinds Control into a power outlet and use the web UI or the app to press the Open button so the servo motor moves to the open position. Unplug the device and disconnect the servo motor cable before mounting.
Place the blinds-to-servo adapter on the blinds shaft, being careful not to move the shaft or the positioning will be thrown off. Adjust the servo motor's height to fit the blinds raceway.
Slide the servo motor onto the adapter, then remove the combined unit so the blinds position stays calibrated with the servo. Tighten the adapter onto the servo motor with the Phillips screwdriver.
Run the servo motor cable through the raceway to the control box, tuck excess cable inside, close the box, reinstall the blinds in the brackets, and manage the power cable based on window trim.
The blinds are controllable from a mobile device via the OpenHAB app and can open/close automatically. Kits, PCBs and 3D printed parts are available through MKSmartHouse.
The installation is straightforward if you follow the calibration and cable-routing steps carefully. The result is a smart blind system that can be controlled from the OpenHAB app and automates opening and closing.
What two screwdrivers are needed for the Blinds Control installation?
A small Phillips screwdriver and a small flat screwdriver.
00:14
What must be done to the blinds before removing them from the window?
Make sure the tilt is in the open position.
00:28
How do you put the servo motor in the open position before mounting?
Plug the Blinds Control into a power outlet and use the web user interface or the app to press the open button, then unplug and disconnect the servo cable.
01:14
Why do you remove the servo motor with the adapter attached after sliding it on?
So the position of the blinds is calibrated with the servo motor before tightening the adapter.
01:43
What happens if you move the blinds shaft while installing the adapter?
It will mess up the positioning of the blinds.
01:29
Where do you tuck the remaining servo motor cable?
Into the control box after opening it with a small flat screwdriver.
02:12
What app is used to control the installed blinds?
The OpenHAB app.
02:56
What can you buy from MKSmartHouse to build this device?
A kit, the PCB, or 3D printed parts.
03:11
Where can you get support for the project?
MKSmartHouse forum at mksmarthouse.com/forum.
03:24
Don't skip the open-tilt step
Ensuring the tilt is open before removal prevents mechanical resistance and misalignment when taking the blinds off.
00:28Power up before mounting
Using the app or web UI to pre-position the servo simplifies the physical alignment and reduces guesswork.
01:14Calibrate before you tighten
Removing the servo and adapter together locks in the calibration before the set screw is tightened, ensuring accurate movement.
01:43Full smart home integration
The finishes device works with OpenHAB and supports automatic open/close, demonstrating a practical MQTT/ESP8266 application.
02:56[00:00] Hey guys Matt here from MKSmartHouse.com and in this video I am going to show you how to install the Blinds Control in your house. [Intro]
[00:14] First up let's go over the tools we need to install this Blinds Control. For tools we are just going to need a small phillips screwdriver, and a small flat screwdriver. The links to all the materials, tools and parts are over on my website, the link is
[00:28] The first thing we have to do is take the blinds off of the window. But before you pull the blinds off make sure the tilt is in the open position. Right now the way the blinds are suppose to be tilted are using these two strings, but
[00:42] To pull my blinds off I had to remove this white plastic trim pieces from the plastic mounts and then I had to open these metal pieces on ends of the blinds and then I could Next remove the mechanism that tilts the blinds.
[00:58] Mine was a wheel with two strings so I also had to untie the ends with the little plastic pulling pieces and then I pulled the mechanism up and then to the side. Now plug the blinds control into the power outlet and using either the web user interface
[01:14] or the app press the open button to put the servo motor in the open position. Then unplug the blinds control from the power outlet and disconnect the servo motor cable. Next take the blinds to servo adapter and put it on the shaft of the blinds.
[01:29] Be careful not to move the shaft, or else it will mess up the positioning. Then take the servo motor and adjust its height to fit in the blinds raceway, by adding or Now slide the servo motor in right into the blinds to servo adapter.
[01:43] Once it is slid on, remove the servo motor with the adapter attached. The reason we do this is so the position of the blinds is calibrated with the servo motor. Take the small phillips screwdriver and tighten the adapter onto the servo motor.
[01:56] Once it is tightened put the servo motor’s cable in the groove on the side of the servo mount and slide the servo motor in and onto the blinds shaft. Take the box to the right side of the blinds and run the servo motor cable through the
[02:12] side of the raceway to the servo motor and connect the servo motor to the cable. Now open the control box using the small flat screw driver and tuck all the remaining servo motor cable into it.
[02:26] Next close up the control box and place it into the raceway with the power cable hanging Then take the blinds and slide it back into the Brackets. Now close the brackets and put the white trim piece back into the plastic mounts.
[02:41] Next we have to deal with the power cable, on my window there is no trim installed around the windows so I just tucked my wire into the hole and plugged it into the outlet, on the other window it did have trim so I just ran the wire on the side of the trim and used
[02:56] That’s it the device is installed. As you can see I can control it with no problem from a mobile device using the openhab app! And if you remember from the software video these blinds will also open and close automatically
[03:11] If you need any of the parts shown in the video you can buy a kit, the PCB or 3D printed parts to make this device as well as other devices at the link in the video description.
[03:24] section below or head over to mksmarthouse.com/forum. Good Bye!




⚡ Saved you 0h 03m reading this? Transcribe any YouTube video for free — no signup needed.