
AI Summary
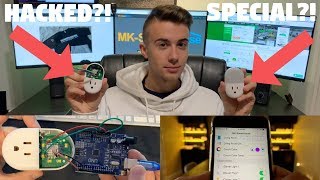
This video demonstrates how to hack the I Clever Light Plug, a smart plug with an integrated ring light, by replacing its stock firmware with a custom build that connects to openHAB via MQTT. It covers unboxing, app features, soldering, flashing, Wi-Fi configuration, and home automation integration.
Chapters
The I Clever Light Plug combines a smart outlet with a built-in ring light, enabling control of connected devices from a phone while also serving as a nightlight.
The ring light can be turned on to provide soft pathway lighting at night, and out of the box the plug works with Google Home, Amazon Echo, and IFTTT.
The box includes documentation, a warranty card, and two devices. Setup requires following the manual because the device creates a hidden Wi-Fi network. The free companion app is called Smart Life.
The app can turn the plug on/off, set countdown timers and schedules, control light brightness, and configure integration with Amazon Echo, Google Assistant, and IFTTT.
The stock app works well, but hacking the device allows it to be controlled from openHAB and become part of one unified smart home ecosystem.
Tools include a soldering iron, solder, a small flat screwdriver, male-to-male Dupont jumper cables, an Arduino Uno, a mobile device, and optional helping hands and a solder fan.
Pry off the plastic cover with a flat screwdriver to reveal the Wi-Fi module, which is an ESP8266 variant that makes custom firmware possible.
Four jumper cables are soldered to the board: two for power (3.3V and ground) and two for TX/RX communication. The soldering only needs to be secure enough for a few minutes of use.
The custom firmware .bin file is downloaded from the guide page on MK Smart's website. The NodeMCU PyFlasher tool is used to flash the device.
To flash, hold down the side button on the I Clever, plug in the USB cable, then release the button. The flashed settings use 115200 baud, dual I/O flash mode, and wipe all data.
Connect to the device's hotspot, open the configuration portal, select a 2.4GHz Wi-Fi network, set the hostname, MQTT server IP, port 1883, MQTT topic, and admin credentials, then save.
Add items to the openHAB items file using the MQTT binding. Commands include 'LED on/off' for the light and 'relay on/off' for the relay. The status portal shows command and status topics.
Add switches to the sitemap and create rules for automation, such as turning lights on at 8 p.m., outlets on Friday-Sunday evenings, and everything off at 3 a.m.
To reset the device, plug it in and hold the side button for about 10 seconds until its Wi-Fi network appears.
By the end, the smart plug works fully in the openHAB ecosystem, enabling local control, schedules, and two-way status sync — all without the vendor app.
Mentioned in this Video
Tutorial Checklist
Study Flashcards (10)
What chip makes the I Clever Light Plug hackable?
easy
Click to reveal answer
What chip makes the I Clever Light Plug hackable?
An ESP8266 variant.
09:29
How many jumper wires are needed to flash the I Clever Light Plug, and which pins?
medium
Click to reveal answer
How many jumper wires are needed to flash the I Clever Light Plug, and which pins?
Four: 3.3V, GND, TX, and RX.
09:53
What is the default MQTT port used in the device configuration?
easy
Click to reveal answer
What is the default MQTT port used in the device configuration?
1883.
20:05
How do you enter programming mode on the I Clever Light Plug?
medium
Click to reveal answer
How do you enter programming mode on the I Clever Light Plug?
Hold down the side button, plug in the USB cable, then release the button.
15:54
What are the MQTT commands to control the light and relay?
medium
Click to reveal answer
What are the MQTT commands to control the light and relay?
LED on/LED off for the light; relay on/relay off for the relay.
27:35
What baud rate and flash mode are used in NodeMCU PyFlasher?
hard
Click to reveal answer
What baud rate and flash mode are used in NodeMCU PyFlasher?
115200 baud, dual I/O flash mode, and wipe all data.
16:33
How do you reset the I Clever Light Plug to factory settings?
easy
Click to reveal answer
How do you reset the I Clever Light Plug to factory settings?
Plug it in and hold the side button for about 10 seconds until the Wi-Fi network appears.
34:13
What does the status portal on the flashed device show?
medium
Click to reveal answer
What does the status portal on the flashed device show?
Hostname, MQTT server/port/auth, command topic, status topic, and firmware update option.
25:21
Why must the user manual be followed during initial setup?
easy
Click to reveal answer
Why must the user manual be followed during initial setup?
The device creates a hidden Wi-Fi network, so the instructions are needed to connect.
03:41
What is the purpose of 'auto update = false' in the openHAB items?
hard
Click to reveal answer
What is the purpose of 'auto update = false' in the openHAB items?
It enables two-way MQTT communication so openHAB only updates state when the device actually changes.
27:01
💡 Key Takeaways
ESP8266 Makes Hacking Possible
The device uses a widely available ESP8266 chip, which is the key that opens the door to custom firmware.
09:29Standard MQTT Port 1883
Configuration relies on the common MQTT port, simplifying integration with openHAB and other brokers.
20:05Two-Way MQTT Status Sync
Using auto update false ensures the UI accurately reflects the relay's real state, a critical detail for reliable home automation.
27:0110-Second Reset Procedure
A simple hold of the side button restores factory settings, making the hacked device easy to reconfigure.
34:13Hidden Wi-Fi Network Requires Manual
This unusual setup choice makes documentation essential and shows why consumers often overlook setup nuances.
03:41Full Transcript
[00:01] society Matt here from MKS I calm and in this video I'm gonna be showing you the most unique smart plug and then we're gonna hack it so the way this video is
[00:27] gonna work is I'm gonna first talk about the I clever plug out of the box how it comes the app all of its different features around the product and then open app so why are we talking about these smart plugs well for the next
[00:41] different ways you can control devices from openhab and from your phone so in about the I clever light plug but then in future videos where when we talk about my power strip and also different sawn-off ways to control devices so
[00:56] don't think that this is the only way you can control plugs or devices in your house we still got many more to go over so this little green board inside this I clever light plug is called a PCB and recently I've been getting my PCBs from
[01:09] PCB way now I don't promote things on this channel that I don't personally use and I've been using PCB way a lot lately like let's take a look at the PCBs that I ordered look at how many I ordered guys if I didn't believe in this service
[01:22] stuff that I bought with my own personal money this is not what they sent out so I've spent hundreds and hundreds of dollars on PCB weight what you don't have to they're starting price is five dollars for ten PCBs and that's a great
[01:36] deal because if you use my cash code which is on the screen now or in the description you can get five dollars off so that means instead of spending money you can get your first order for free but what is fees easy way well PCB
[01:48] weight is a full-on prototype service so they have PCB assembly SMD stencil and they have been in business for a long time so head on over to PCB Wacom so what is this I clever light plug well it's as the name implies it has a light
[02:04] and it is a plug so what that means is you can plug this into the wall and then you can plug another device in and control that from your phone you can this button right here what makes this device very unique is the fact that it
[02:17] has a bright white ring light right here so at night if you want you can turn this on and have some lighting on the side this is great for say if you have the bathroom say it's like 2:00 a.m. or something and you don't want you to
[02:30] this light on and it provides a nice pathway for you to walk so let's take a tour around the product so on the front we have the ring light under here here plug whatever you want into it then on the sides you only have that button that
[02:43] I mentioned previously on the back you have your device information and you have your male plug that you plug into the wall or maybe a power strip if you great is that out of the box it is compatible with the Google home Amazon
[02:58] echo and IFT tee now let's talk about what comes in the box but before that let's take a tour around the box so on the front just says I clever says smart AC power plug just has the QR codes to download its app some specifications so
[03:12] download its app some specifications so it says ac 100 to 240 volts 50 to 60 it says ac 100 to 240 volts 50 to 60 Hertz power rating 1250 watts or 125 volts at 10 amps and the LED light output is 0.4 Watts
[03:26] the color temperature is 3000 K and it works with Android and iOS but what comes in the actual box is you get your documentation so this shows you how to set up the device make sure you follow exactly how this documentation says to
[03:41] set it up because I didn't think that I needed the user manual but this device is interesting because it has a hidden Wi-Fi network so you need to really use the instructions to set it up you get your warranty card and also how to
[03:54] connect it to all of its other things that is compatible with and then you also get the two bags that both of these came in and then these were just sitting in the bar but that's right with this in the Box you get you get two of these
[04:06] devices right now one of them has these jumpers and um this does not come with in the box you get both of these basically two of these ignore the wires we'll talk about this later and this device comes with an app called
[04:21] smart life which is free on the App Store and that's how you set up the of and as well as other things we talked description below also in the description follow @mk follow us on
[04:34] Instagram Twitter and snapchat because that's where I give sneak peek sound future videos and only things like a true smart home enthusiast would enjoy things that will be coming in the channel in the future but enough talking
[04:46] let's go ahead and see how it works with the app and all set up alright guys I got the device all plugged in is connected to power right here and then I also have the app that they tell you to use called smart life installed so let's
[04:58] go ahead and open it I have already gone through and setup the entire device I just have to create an account connected to Wi-Fi it's really simple nothing that we haven't done before so this is actually a pretty good app I kind of
[05:10] like it it's nice and simplistic and a futuristic it's really cool so you should see it on this screen now and so I only connected one of these because the other one is hacked at the moment but let's start at the top so you have
[05:22] the smart plug feature but actually just as a proof of concept yes I know this is redundant because this is a nightlight but I'm going to attach this light to the device alright so I'm gonna click the smart plug as you can see it turns
[05:36] blue it's a little like icicle looking thing and it turns off pretty simple in the app you also have a countdown so you can say to turn it on in one minute so
[05:48] it's pretty cool it counts down till it turns on you can also go through and schedule when you want the light to turn on and turn off so that's it for the plug portion of this device next we have the light portion so if we tap on it the
[06:00] the light portion so if we tap on it the light turns on turns off pretty simple you can also adjust the brightness of the lamp that's pretty cool and then
[06:12] just like the plug you can create a schedule of when you want them the the light to turn on turn off and you also have an all off and an all on so it turns both on both off if you click these three lines at the top you can
[06:26] modify the device name the location its network and you can connect it to all of these support things so you have the Amazon echo Google assistant I FTT
[06:38] and then you have more things like check for firmware device information feedback and stuff like that overall without hacking it is a great device on its own if you just want something simple that you can control from all from this app
[06:53] this is a great device but you know us we like to control stuff from openhab and have one nice ecosystem so we're gonna hack it but this is totally not now that we've gone over how this device works out of the box with its app and
[07:07] everything that it comes with it's time to turn this light plug into what I did I hacked it and I installed my own custom firmware so we can work make it work with open half the process is honestly very straightforward and we're
[07:21] only gonna need a couple of things a soldering iron solder next we're gonna need a small flat screwdriver we're also gonna need male-to-male dupont jumper cables and arduino uno or any arduino equivalent that you can connect it to
[07:35] a computer and finally a mobile device to set up the device and then some but make the job a lot easier a solder holder a tip cleaner and helping hands this this alone will make the job a lot
[07:50] also a solder fan so this is one that I made if you guys want to see a video on the solder fan let me know but it's pretty simple the links to all the tools and parts we'll be using in this video are in the video description but
[08:03] specifically you can pick up the Arduino Uno and the jumper cables off of em casements that comm /aa also on em case motorcycle shop you can pick up an LED you can control from openhab you can pick up blinds control sprinkler systems
[08:19] door sensors fire sensors in the future you'll be able to pick up a power strip and all the devices that I mentioned are pre flashed with firmware even the kits so if you buy a kit all you need to do is solder it together and boom you just
[08:32] connect it to your phone and from there you can connect to openhab and if you buy it assembled you just have to plug it into the wall so go ahead and head over to mkcarr comm slash shop and you're actually lucky because I have not
[08:44] finished my v2 videos so the coupon code v2 you can get 10% off your entire order so head on over um case Markov /op use promo code v2 and get 10% off your order I don't have too many kits available on the store and I
[08:59] on there so hurry in before it's all sold out alright so the first step is we need to take off this plastic cover so what you want to do is take your small flat screwdriver there you go there's mine and you want to stick it in at the
[09:15] top you want to really push it in and then it will pop out right here and then you just want to pull off this plastic piece right here and that reveals the
[09:29] Wi-Fi module so the reason that we can hack this and put our own custom firmware is because like all of our projects we cover it on this channel it projects we cover it on this channel it uses an esp8266 a variant that's really
[09:41] companies nowadays they all use esps which means we can have fun with them be soldering the male-to-male DuPont jumper cables to the I clever device and
[09:53] we're only going to need four cables we're gonna need two for power and then we're gonna need two for TX and rx before we get into soldering them let me show you where they go on the device so on the screen now arrows should have
[10:08] came up showing you where they need to be soldered so actually I'm gonna take in electrical tape roll and set it up like this so has something to rest on
[10:20] now I'm going to take my alligator holder if you didn't notice we are in my shop right now excuse the mess it is a shop but we won't be in here long soldering is quick and easy and painless so the overall idea is we want to take
[10:37] these one end of these jumper cables and attach it to this it doesn't have to be a super secure soldering job but just to be has to be enough because we're only going to be using these cables for like less than five minutes so first thing
[10:50] I'm going to do is take them all and put a little bit of solder on each one of these so I got them in the alligator clip put that off to the side I'm gonna grab my soldering iron and solder that right here also gonna take
[11:05] my soldering fan put that pretty close tin my soldering iron a little bit so I'm going to put it underneath put a little bit of solder so I'm putting my soldering iron underneath and then I'm putting the solder on top you don't want
[11:21] to put too much solder just enough put the soldering wires off to the side and the soldering wires off to the side and I'm going to tin the spots where I'm going to be soldering - so when you're soldering you also want to be careful
[11:33] plastic because the plastic will melt actually I'm gonna clean this first all see it a little better I'm going to do this one alright alright as you can see I just added a little bit of solder to these spots where we're gonna solder the
[11:48] cables - okay now I'm gonna take my red wire this is gonna be my power wire and wire this is gonna be my power wire and I'm going to solder it here see nice and
[12:01] easy I already soldered it took less than two seconds there it is nice and attached three more to go now this next cable is gonna be hard because it's right next to the rx cable but it's
[12:14] alright it's not that bad this is gonna be the hardest one that we did today side a little bit I don't know if you guys can see that and that's it for
[12:27] simple wires it's not the prettiest but it's gonna get the job done so 3.3 volts ground Rx and TX give you guys a nice little shot right there alright now like smart homes do you like projects like this then
[12:43] why not show the entire world that you love smart homes and smart home projects like this by picking up a piece of smart house society clothing so this is the and then on the back it says elite
[12:58] of the strong Society we also have hoodies in many different colors not just black and white so go ahead - smart house Society calm use the promo code elite to get 15% off your entire order which if you add it to your cart and do
[13:15] the math that's pretty cheap so wait head over to society calm now all right so now that we have the wires all connected we're gonna download the firmware from my website so I will leave a link to the exact page in the
[13:29] description below but it's going to be m'kay Schwarz calm we're gonna go to guides then we're gonna go to control scroll down and click I clever light plug and this is gonna be a link so we're gonna go to the links tab make
[13:43] this fullscreen and we're gonna download the firmware right here we're not going to download the Ino file the Ino file is the entire arduino project file so if that's right here for you but we want the firmware so we're gonna enter the
[14:00] email address is so that way in the future if I make an update to this firmware you'll be notified and click download file now click here to go to download button and it will download the file next to flash the actual device
[14:15] we're going to need a program called PI flasher so if you go back to the I clever light plug links page and go to this link click on it right there and this link click on it right there and then you click on the one according to
[14:28] your version so if you have 32-bit windows you download the 86 one if you have 64-bit windows click the 64 one and if you're on a Mac download the dmg file setup process I already have the program so I'm just gonna go to my launchpad and
[14:43] then I'm gonna click on the node MCU PI flasher 3.0 alright so this is the program we're gonna use so the first part is serial port click on the drop down and remember what devices are there now we're gonna connect the device to
[14:57] the arduino so now we're going to connect the I clever device to the arduino to do this we're gonna need one more male to male dupont jumper cable and we're gonna put that on the arduino from reset to ground there you go it's
[15:12] from reset to ground there you go it's over reset and ground alright now we're going to plug it in as follows so this black one right here this is TX so we're going to connect it to the TX slot this one right here the brown one is rx so
[15:27] we're going to connect that to the RX then this red one right here is 3.3 then this red one right here is 3.3 volts so we're gonna plug into 3.3 on the Arduino and then lastly this green one is ground so we're gonna plug that
[15:40] into another ground port all right there you go that's how it looks you can pause the video if you want take a closer look at it again you guys can pick up these DuPont jumper cables and this Arduino on my website if you want now we have to
[15:54] connect it to the computer in programming mode now unlike my normal devices this is a little bit different all right so to connect it to the computer what we have to do is first hold down the button on the side of the
[16:06] hold down the button on the side of the I clever and then we plug in the USB I clever and then we plug in the USB cable into the computer now you can let go of the button on the I clever alright now that the device is connected to our
[16:18] computer let's go back to the program click on the little refresh button click on the drop down and as you see there is a new device here we want to click on the Browse button and go to our downloads folder and then click on the I
[16:33] downloads folder and then click on the I clever dot bin file the m'kay - I clever like plug I&O generic dot bin file and click open alright now for the baud rate we're gonna do 11 5200 flash mode dual I oh
[16:45] gonna do 11 5200 flash mode dual I oh yes wipe all data and click flash note MCU alright it finished flashing because it said leaving and then done great now it said leaving and then done great now we can close that out and now we can
[16:58] we can close that out and now we can unplug the arduino from the computer and unplug the arduino from the computer and as well as unplug all the wires in between the arduino and the i clever device so that way we have just the I
[17:11] clever device right here so now this device has our own custom firmware onto it don't unsolder the DuPont jumper wires just yet wait until you have the device fully connected to openhab then once it's connected unplug the device
[17:26] and then we're gonna unsolder the wires I'll show you that later but for now let's go ahead and plug this in and set it up using our mobile device alright so the device is now connected to power one is connected you want to make sure none
[17:39] of these DuPont and jumper wires touch each other because if they do touch could short out the device so you if you want to be extra safe before you plug it in you can put electrical tape in between each of them but for me I know
[17:53] sure that they're all separated and I don't touch them again it's very bad if touch but now we're gonna set it up through the mobile device so the device is connected to power I got my mobile device the first thing we want to do is
[18:07] go to settings then we want to go to Wi-Fi and there we go we can see the mki clever light plug so go ahead and tap on that Wi-Fi network
[18:20] all right and as you can see the configuration portal popped up so let me explain what each of these are so the first one is configure Wi-Fi this is the one that we're going to tap on then this one next one is configure Wi-Fi no scan
[18:33] this is good for a few of a private Wi-Fi network and it doesn't have an IP yet like doesn't have a broadcasted Wi-Fi network you can click on that one and manually type in your SSID and password next is info this just shows
[18:46] you some info about the device not really needed and then lastly is reset which does a power cycled device so it turns it on and off or it turns it off and on all right let's go ahead and click configure a Wi-Fi alright so in
[18:59] the first section we're gonna choose our Wi-Fi network this only works with 2.4 gigahertz so you'll only see 2.4 gigahertz Wi-Fi networks I'm gonna click gigahertz Wi-Fi networks I'm gonna click on K Wi-Fi all right so the next one is
[19:12] hostname slash MQTT ID so this is how it's gonna look on your network as well as from the internal side from MQTT how we'll see the device but honestly it's just about the hostname so it's what you want it to be seen on your network when
[19:27] you go to see all the devices I'm gonna name this m'kay - I clever light plug
[19:40] one so the next one is mqtt this is how it connects to our it connects to our mqtt server so the first one is the IP address of the server this is the IP address of your open app server slash
[19:52] MQTT server depends on how you have it set up but if you're following along with my videos then the mqtt server IP address and open up server are the same alright next is the port if you know your port
[20:05] go ahead type that in but normally for us is gonna be 1883 so just leave that as that next is the M qcg topic so my mqtt topic is MK - so
[20:17] I'm gonna make this device the first I clever like plug and then I'm gonna redo all the same steps and do it on the second I clever light plug so way I'm gonna set up two of them and connect both of them to open up and next this
[20:30] false so if you haven't secured empty teetee server so that means it requires a username and password to connect to it you would change this false to a true and type in your username and password for your mqtt server but mine is on
[20:45] authenticated so I'm going to leave it at false all right next is web updater so this is the portal that is on the device and it will show you your status your settings basically how the device is set up so I'm gonna make this admin
[21:01] all right I set a username and password okay and at the bottom you can see to reset device settings unplug device and plug it back in then hold the button for 10 seconds so this is how to reset all the settings on device I'll show you
[21:13] now click Save and the way that this works if it applied the settings successfully then the Wi-Fi network should disappear from your phone and everything should close down now there we go it closed down and Wi-Fi network
[21:27] disappeared that means we're good to go now I'm going to set up the second plug the same thing as the first one and then we're gonna add it to openhab I'm gonna set this one up off-camera I have gone through and both of the I clever light
[21:42] plugs are now set up now let's go ahead and connect them to open house so the first thing we're going to need is my website up so I have a link in the description to it and we want to be on the demo page my website has all of the
[21:56] code and command line that we're going to be using for open tab and so the first thing we're going to do is SSH into our open app server so if you're on Windows use putty and if you're on Mac use terminal so since I'm on Mac I'm
[22:09] gonna go ahead and open up terminal alright so now I've SSH into my server the first thing we want to do is add the items to our items file so I'm going to copy this and paste it in it's gonna need admin password alright so this is
[22:25] my items file I'm going to put this below my yi light if you haven't seen my video on the e light LED strip go ahead and check it out on my channel it was a couple videos ago so now we're gonna take it these two big code blocks and
[22:41] go they're in so let me explain what these are so the first one first thing is the comment so this is saying that we're gonna be doing I clever light plugs this is just
[22:54] for organizational purposes it's not required but the first one has to do with one I cleverly plug and the second one has to do with the second I cleverly plug well let's go ahead and take a closer look in the items file so I'm
[23:10] to start with the first I clever light plug so the first part is switch and this is for the light so what this item does is it controls the actual light
[23:23] portion of the plug so I gave it it's a switch because you turn on and off then I gave it the name MK I clever light one then I said it's name is I clever light you want I'll probably end up changing this to left cabinet or right cabinet I
[23:40] don't remember but I'm gonna change it to yet and then this is the picture that's gonna show up in the sitemap then I'm gonna give it the switch full text that way I can turn it on and off using an Amazon echo Google home or a Google
[23:55] home or apple homekit device so Siri and then this is the MQTT declaration so easier to show on my actual website so I can highlight alright so we're going to
[24:10] be using the MQTT binding as you can see here and here we're gonna be sending a command this is the name of our broker and then this is the send command right
[24:24] and then this is the send command right here so when it we turn the switch on it's gonna send the command LED on to the topic MK smart house / utilities / the topic MK smart house / utilities / MK - i clever light plug 1 to know what
[24:40] your MQTT topic is we can go and check on the status portal so to access the status portal you type in HTTP colon slash slash u host name over your device
[24:52] so I'm just gonna do I'm gonna do I clever or no it's m'kay - I clever light clever or no it's m'kay - I clever light plug one so that's the hostname and then
[25:06] you want to write dot local click enter and it's going to ask for the username password we set when he set up the device mine is admin and then we're in so let me go over this status portal real quick so the first part is the host
[25:21] name of the device then we have the MQTT servers connected to the port it's using whether it's using authentication or not and then this is the mqtt command topic
[25:33] so this is the topic for which we send commands to it so we tell it to turn on the LED turn it on the relay and then this is the status topic so this is where it tells us its current state so whether the light is on whether the
[25:47] relay is off and then the last one is to update the firmware and so what you would do is you just open up a new tab paste that in go to dot local slash firmware and click Choose file and then choose the new firmware so if I was
[26:03] updating it I would click on the bin file and then you'd click open and then click update these reset settings ignore this this is not how you reset it I guess I'm going to have to update the firmware real quickly so before you guys
[26:16] don't even worry about it the correct way to reset the device will be up but anyway back to what we were connecting to the items so whatever you have right here in the command topic you want it to match everywhere where it has this sign
[26:33] match everywhere where it has this sign so it would be right here and right here
[26:48] and then you want this part to match right here and right here and over then that would be over here so then that's the MQTT and then at the end I'll just
[27:01] show it on here you have auto update equals false so this is so that way it works on a 2-way basis so when you send the command then this device will send you its status back so when openhab if you flick the switch and this turns
[27:18] on it'll send you the status back saying that it's on and if in but say you send a command on and it doesn't turn on say this is unplugged then the device in open app won't change alright and then the I clever light plug the second item
[27:35] is this basically the same thing as the first it just has a different name and a different picture but all of these are the same but the MQTT commands that we the same but the MQTT commands that we send our LED on and LED off so these mqt
[27:48] send our LED on and LED off so these mqt commands trigger the LED and we have commands trigger the LED and we have relay on relay on and relay off and that triggers the relay in the device so these first two items are for the light
[28:01] plug one and these two items are for light plug two I hope that was clear alright so now we're going to exile the items files we're gonna click control X then Y and enter alright so next is the sitemap file this is what we're gonna
[28:15] see gonna paste that in click enter and so I already put the first light plug in the dining room I'm just gonna add the second one as well there we go so I put the first plug here yeah the first plug and the second plug I put them in the
[28:30] end of the video but basically you want these item names to match the ones that you put in your items file so let me explain this so they're all switches so click control X then Y and enter all right so now lastly we're gonna create
[28:46] rules for the devices this step is not entirely required but I just wanted to give you guys some ideas of things that you can do with the devices so we're bottom of my rules file and as you can see I already have them paste it in here
[28:59] so what this first rule does is it turns on the lights in the I clever light plugs at 8:00 p.m. and so the reason I want to do this is so that way we're not walking and dark and so you don't need to necessarily turn on the actual light
[29:14] switches in the rooms you just have some nice light night lights so it turns them on so that's the name of the rule 8 p.m. this is the cron expression if you want to change what time in any of these rules simply go to cron May
[29:29] komm say go to chrono maker calm and then you can choose when you want these rules to occur so you can do hourly daily so say you want it every day at 2:00 o'clock so you click create cron expression you copy this and you would
[29:46] replace it and paste it in here but anyway so it sends the command on to the first light the first light and the light plug and the second light in the light plug on next rule I have is I clever outlet turn on 7:00 p.m. Friday
[29:59] Saturday and Sunday so this is going in my dining room and nice lights and the cabinets and I don't want these to turn on every day because during the week there's no point because no one's there to enjoy them so on
[30:12] people over and so they can it'll automatically turn on and we don't have to worry about it and then we have it so the I clever lights turn off at 3 a.m. we have the name of the rule here's the cron expression for 3 a.m. and it turns
[30:26] cron expression for 3 a.m. and it turns off the light in 1 and in 2 and then I have the turn off the outlets at 11:59 p.m. on Friday Saturday and Sunday so I have it plugs 1 turn it off plug to turn off alright that's it click control X Y
[30:43] and enter and I'm also going to restart openhab using this command ok and now we're going to restart openhab all right now that open app is restarted let's go now that open app is restarted let's go over to our web user interfaces then
[30:59] we're gonna go to basic UI and as you can see we have our I clever light plugs right here I'm going to right now I only have one of them plugged in but I'm going to turn on the light and as you can see the light turned on turn it off
[31:15] can see the light turned on turn it off and I'm going to turn on the plug you may have heard the click I'll put it closer to the microphone it's all nice and working alright now that it's all nice and working actually I'm going to
[31:30] test out the second I'll test out the second light plug on my own but now that second light plug on my own but now that we confirmed it that they work oh and as we confirmed it that they work oh and as you can see if I press the button
[31:47] click and you can also see that it changes in open up alright I'm gonna go ahead and test out the second line plug make sure that works and then I'm going to go downstairs and desolder the wires alright now that both light plugs are
[32:02] tested I'm gonna grab my soldering Finn got my soldering iron here and now I'm simply just going to disconnect all of the wires I'm actually gonna start with this green one right here and all I'm doing is just heating up the solder and
[32:17] popping the cables free all right I'm gonna do this black one over here boom that one is also free and this brown one right here now it is now free and then I just have this red one left and that's it and then you just want to do a quick
[32:32] check make sure none of the none of the joints our bridge ballon looks good so this one is ready to go I'm gonna do the same thing to this one right here disconnected there's one more step left and that is to put these clear covers
[32:47] back on and so all you want to do is just slide them in and just press you just slide them in and just press you want to push in and press down and they'll snap in same thing for this one just want to slide it in push it in up
[33:02] top a little bit and then just press down and it'll snap back together cool so now these things are fully set and ready to go alright so this is where I put them one of them is right here and it's attached to this cabinet and then
[33:16] the second one I have attached here and it's also attached to this cabinet alright I have the openhab app right here I'm going to scroll down to where it says dining room there it is now I'm going to
[33:30] turn on one of the lights I don't know if you can see it but it's over there curtain then I got the second light which is over there so this is gonna be
[33:45] nice when it's nice and dark then I got the first plug there you go it turned on in the cabinet lights then I'm going to turn on the second plug also turn on the lights and for the heck of it I'm just going to turn on both of
[34:00] of it I'm just going to turn on both of them both of the lamps and I'm going to them both of the lamps and I'm going to turn everything off I accidentally
[34:13] turn everything off I accidentally tapped the wrong one there we go all right so that's it all right now let me show you how to reset the device what you want to do is plug it in and then hold the button on the side hold it for
[34:27] about 10 seconds and then we will see the network of the device or the Wi-Fi network of the device yep there it is so now the device is reset and you can go
[34:39] ahead and modify the settings all right that concludes this complete guide to that concludes this complete guide to hacking the eye clever light plug if you this video whatsoever maybe the items maybe how it connects
[34:53] leave in the comments section below or head over to MK smiles comm slash forum again if you guys want 10% off my store use the coupon code v2 or you can buy maybe an LED strip like this one that's been changing colors the entire time
[35:08] that's a video coming soon probably the next video after this one or maybe blinds controls I know you guys love those and/or door sensors or the fire sensors anything you may need even the DuPont jumper cables we're using the
[35:20] video the Arduino we used all over at MK smarts comm slash shop alright once again if you have any questions in the comment section below or head over to MK smanos.com slash forum goodbye [Music]



