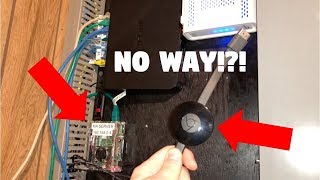

Control Chromecast with Phone & Alexa
32sInstantly shows the payoff of smart home control with phone and voice commands.
▶ Play Clip"Delivers the promised step-by-step guide, but social plugs and shop promos pad the runtime."
This video is a complete, step-by-step tutorial for connecting a Google Chromecast to OpenHAB 2. It covers installing the Chromecast binding, creating the necessary items and sitemap entries, and testing control via the Basic UI and Amazon Echo voice commands.
The Chromecast can be controlled from a phone, computer, Amazon Echo, and HabPanel. On the phone, two items appear: a control item for back, pause, play, and forward, plus a volume slider. Voice control works via Amazon Echo.
Access the OpenHAB web UI, go to Configuration > Bindings, search for 'chromecast', and press the Install button on the Chromecast binding.
After the binding is installed, click the Chromecast binding, a box pops up. Give the Chromecast a name and press 'Add as Thing'.
Use PuTTY on Windows or Terminal on Mac to SSH into the Raspberry Pi. Keep the Paper UI tab open because binding text must be copied later.
Edit /etc/openhab2/items/home.items with sudo nano. Add a Dimmer item for volume with the 'Switchable' tag and a media control item, but note the default values will not work for every Chromecast.
Go back to the Paper UI and copy the volume and control binding text from the Chromecast thing into the items file. This ensures the items point to the correct device.
Edit /etc/openhab2/sitemaps/home.sitemap and paste Default item=LivingRoomChromecastControl and Slider item=LivingRoomChromecastVolume icon=soundvolume to display the controls in the Basic UI.
Cast something to the Chromecast, open Basic UI in the web interface, and test the buttons. For voice control, say 'Alexa set Living Room Chromecast Volume to 50'.
By following these steps, you can fully integrate your Chromecast into OpenHAB, enabling control via dashboards, phones, and voice assistants like Alexa.
What command edits the OpenHAB items file?
sudo nano /etc/openhab2/items/home.items
02:55
What tag is added to the volume item to enable Alexa control?
Switchable
03:10
What are the two Chromecast items created in OpenHAB?
A volume control (Dimmer) and a media controller.
03:10
Which tool is used to SSH into the Raspberry Pi on Windows?
PuTTY
02:27
What is the command to edit the sitemap file?
sudo nano /etc/openhab2/sitemaps/home.sitemap
03:43
What phrase commands Alexa to set the Chromecast volume to 50?
"Alexa set Living Room Chromecast Volume to 50"
04:24
After installing the binding, how do you add a specific Chromecast device?
Click the Chromecast binding, give it a name, and press 'Add as Thing'.
01:58
Why must you copy binding text from Paper UI into the items file?
Because the default values won't work for your specific Chromecast.
03:10
Control from phone and Alexa
Shows the end result: two items for transport and volume, plus voice control via Alexa.
00:30Name your Chromecast by room
The thing name matters for voice commands and identification in the dashboard.
02:10Copy binding values from Paper UI
A critical technique because default values won't match your specific device.
03:10Voice control via Alexa
Integration with Amazon Echo is a key payoff and a major convenience for smart home users.
04:24[00:00] Hey guys Matt here from MKSmartHouse.com and in this video I am going to show you how to connect your chromecast to openhab. [Intro]
[00:15] In this complete guide I will show you how to connect your google chromecast to openhab so you can control it from your phone, computer, amazon echo and eventually habpanel. First let me show you how it looks on my phone, there are two items, the first one is a control
[00:30] item and from here we can go back, pause, play and go forward. In the second item we can control the volume via a slider. Speaking of volume we can also control it using the amazon echo, “Alexa set Living
[00:47] The items needed to complete this guide are the following: 1. A computer running either mac or windows, I will not be making a seperate guide for each because we are just going to be using it for ssh. 2.
[01:02] The links to all the parts and devices mentioned are in the video description. Speaking of links in the description, follow @mksmarthouse on twitter, instagram and snapchat
[01:14] because those are the place where I give sneak peaks on when videos are releasing and also where I ask for your input on topics and future videos. The first thing we have to is go to the web user interface of our openhab server and then
[01:29] If you don’t know how to access this then watch my home automation server setup guide. Anyway next click configuration and then bindings. 3. In the search bar type in chromecast. 5.
[01:45] Once you see the binding press the install button. Great the binding is now installed so let’s add the actual chromecast. After press chromecast binding.
[01:58] 8. 9. A box will pop up, give the chromecast a name and press add as thing.
[02:10] This chromecast is going into the living room so i'm going to give it a name relating to There are 2 pieces of text we need in order to make chromecast items. So, go to Configuration then things and click on your chromecast.
[02:27] Keep the paper ui tab open, you will need it later. Next, ssh into the pi so on windows use putty and mac use terminal.
[02:39] I recommend having my website open so that way you can just copy and paste commands, The first thing we have to do is create the chromecast items in the items file so type in sudo nano /etc/openhab2/items/home.items and press enter.
[02:55] Dimmer LivingRoomChromecastVolume "Living Room Chromecast Volume" <soundvolume> [ "Switchable" But, the values in what we just typed in will not work for your specific chromecast. So let's go back to your paper ui and copy the volume and control binding text from the
[03:10] paper ui to your items file. The two items we created are a volume control and media controller, we will see how they Also, in the volume item I added the switchable tag so that way I can control the volume through
[03:29] Now press control x then y and enter to save. Now we need to add the items into the sitemap so type in sudo nano /etc/openhab2/sitemaps/home.sitemap
[03:43] If you have been following along with my guides then you know I have many frames in my sitemap. Since this chromecast is going into my living room I am going to paste the following code Default item=LivingRoomChromecastControl Slider item=LivingRoomChromecastVolume icon=soundvolume
[03:58] This code simply imports the items so I can use them in the basic ui. Awesome! 19.
[04:11] First cast something to the chromecast either from your phone or your computer. Then, open up basic ui from your web user interface, you should see the chromecast items Test out the buttons in the control section.
[04:24] Finally, if you have an Amazon Echo ask alexa to set the volume. “Alexa set Living Room Chromecast Volume to 50”
[04:37] That concludes this complete guide to connecting the Google Chromecast to openhab. In the description you will find links to all the parts and devices used in the video as well as a link to mksmarthouse.com/shop where I have a wide range of smart home kits
[04:50] that you can put together such as blinds, led strips, sprinkler system and door sensors. section below or head over to mksmarthouse.com/forum.
[05:02] Good Bye!




⚡ Saved you 0h 05m reading this? Transcribe any YouTube video for free — no signup needed.