

How Price Actually Moves
40sReveals the fundamental market structure in a simple, visual way that challenges common misconceptions.
▶ Play Clip"Title promises a complete SMC strategy that works; video delivers a detailed framework with live profit example, though full plan is gated."
This video presents a mechanical trading strategy based on Smart Money Concepts (SMC), focusing on understanding market structure, order flow, and price action. The strategy is broken down into four market phases, each dictating specific entry and exit rules across three timeframes (daily, 1-hour, 5-minute). The presenter demonstrates how to identify high-probability trade setups by aligning internal and external structure, using concepts like break of structure, order blocks, and supply/demand zones.
Most traders lose because they don't understand how price truly moves. The video promises a proven, backtested mechanical strategy.
In a bullish order flow, price rises to an unmitigated supply zone, pulls back, then demand steps in to push price higher, creating a cycle of higher highs and higher lows.
Higher timeframe (daily) for swing structure and zones; medium timeframe (1-hour) for internal structure; lower timeframe (5-minute) for entry execution.
When price pulls back to a higher timeframe demand zone (from a strong low), it indicates the pullback may end, and price is about to turn bullish again.
Always ask whether supply or demand is in control. If demand is in control (bullish break of structure), trade with the trend. If supply takes over during a pullback, wait for demand to return.
The strategy splits the market into four phases based on alignment of swing (higher timeframe) and internal (lower timeframe) structure. Each phase requires a different approach.
Both swing and internal structure are bullish. Objective: ride the higher timeframe trend. Look to buy at demand zones (higher lows) and target weak swing highs. Highest probability setups.
Both structures are bearish (going against the higher timeframe trend). High risk-to-reward but tricky. Wait for a market shift (break of structure) before selling at supply zones.
Swing structure is bullish but internal structure is bearish (pullback). Objective: short-term sells at lower highs (flip zones) targeting swing lows. Use premium/discount matrix for entries.
Swing structure is bullish, internal structure is bearish but shifting to bullish. Anticipate end of pullback. Look for buy setups at demand zones after a market shift. High probability with large targets.
Presenter shows a trade where he entered using Phase 4 (buy at demand zone after market shift) and Phase 1 (riding trend). Two positions targeting an order block, resulting in $5K profit.
The video only covers part of the complete mechanical trading plan. Full version is available for students, with proven results (e.g., $25K, $10K profits).
The key to consistent trading is understanding market phases and aligning entries with the dominant order flow. By using three timeframes and identifying who is in control (supply or demand), traders can execute high-probability setups with defined risk and reward.
What are the three timeframes used in this SMC strategy?
Daily (higher), 1-hour (medium), 5-minute (lower).
01:40
What is the key question to ask when analyzing price action?
Who is in control of price: supply or demand?
04:17
In Phase 1 (Pro Swing + Pro Internal), what is the trader's objective?
Ride the higher timeframe trend by buying at demand zones (higher lows) and targeting weak swing highs.
06:47
Why is Phase 2 (Counter Swing + Counter Internal) considered tricky?
Because you are going against the higher timeframe trend, and it's difficult to predict the top; price may pierce supply zones before pulling back.
09:24
What is the recommended action in Phase 3 (Counter Swing + Pro Internal)?
Look for short-term selling opportunities at lower highs (flip zones) in the premium zone, targeting swing lows.
11:56
What defines Phase 4 (Pro Swing + Counter Internal)?
Swing structure is bullish, internal structure is bearish but shifting to bullish. Anticipate the end of the pullback and look for buy setups after a market shift.
14:00
What is a 'market shift' in this strategy?
A break of structure (e.g., price breaking a key low or high) that confirms a change in order flow, signaling the start of a new phase.
10:50
What does 'premium' and 'discount' refer to in the context of this strategy?
Premium is above the 50% level (optimal for sells), discount is below the 50% level (optimal for buys).
12:52
In the live example, what two phases did the presenter trade to make $5K?
Phase 4 (buy at demand zone after market shift) and Phase 1 (riding the trend).
20:56
Who Is in Control?
This is the core principle of the strategy: always determine if supply or demand is in control to align with the dominant order flow.
04:17Phase 1: Highest Probability Setups
When both swing and internal structure align, setups have the highest probability because all timeframes confirm the trend.
06:47Phase 4: High Risk-to-Reward Reversals
This phase allows traders to capture large moves by anticipating the end of a pullback, offering high reward for measured risk.
14:00Live $5K Profit Demonstration
Provides real-world validation of the strategy, showing how the phases are applied to an actual trade with a significant profit.
15:29[00:02] it's because you don't understand how the market truly operates and how price actually works that is why in this video I'm going to give you my exact mechanical trading strategy that has been proven and back tested this is the
[00:16] same strategy that has allowed countless of my students to get funded and Bank consistent profits so without further Ado let's dive straight into it so what you see on the screen right now is basically how price actually moov on a
[00:30] fundamental level and I know it might looks very complex and confusing right through step by step and dissect this entire chart diagram for you so first of all price in an uptrend in a bullish orderflow price will go up right and
[00:44] reach some sort of unmedicated Supply zone right which you can find on the start pulling back right once you start pulling back more demand step back into the market to push price up even further and eventually what happens next you are
[00:57] just anticipating or rather waiting for price to start pulling back again so swing high now creating your bullish break of structure we can expect price to start pulling back right so when price does that you know eventually come
[01:12] Zone once again you look towards your left you identify any sort of point of Interest Supply Zone aut block or flip Zone whatever and then your job is to just anticipate a pullback to happen at that point of Interest so that is what
[01:27] it did right here so once price start pulling back back what you can do is to narrow your focus to a certain part of price so that you don't confuse yourself right so you basically do that by actually marking up your strong low and
[01:40] also your weak high right here which is the highest point before price starts mention but for this strategy we are only going to be using three time frames right we're going to focus on three main time frame our higher time frame medium
[01:53] time frame and lower time frame the higher time frame the daily time frame identify the swing structure to find out whether price is actually bullish or bearish whether price is in the continuation phase or the pullback phase
[02:06] structure like what we have done here right and we are also going to use it to mark up any sort of unmitigated Supply or demand zones so that's the purpose of the higher time frame is to allow you to build a narrative and actually allow you
[02:19] to understand what's going on with the market right now and then for the medium hour or the 1 hour time frame and this is where you can identify the internal structure right what is price doing within this swing range itself and then
[02:33] you can also Mark up any sort of medium time frame point of interest and then the 5 minute time frame these are the time frame that we are actually going to be executing our trade on right so these are the time frame that you want to look
[02:45] for your entry models price is going to turn bearish for a short amount of time to facilitate the pullback of the higher order flow so that is when price start turning bearish in the internal
[02:58] structure creating a lower High you know lower low lower high lower low like I said it's just facilitating the pullback that is why price is going to turn bearish and then eventually price pulls back pulls back and it pulls back all
[03:10] the way down to where your demand Zone that is Created from the strong low right so this is when price actually pivoted right and created your last that's going to be demand that's going to be buyers waiting for this at this a
[03:26] to actually push price up so that is when price get to this Dem zone right this higher time frame demand Zone and at this strong low that is when we know that this pullback could potentially end soon and that is when we know that price
[03:38] is going to turn bullish again right shift of structural shift of order flow flip from Supply to demand and right now the internal structure is aligned with the external structure the swing structure and yeah basically it's
[03:50] structure is bullish external structure or swing structure is bullish and right now you can look for price to actually create that higher high and higher low and most likely you can see price come up to our Wick high that we have right
[04:04] Above This wiek High creating your higher highs and higher low break of structure when that actually happens this whole cycle repeat itself right so this is just how price actually works on a fundamental level I did not create
[04:17] this this is just how price actually is when you look at the chart right the main thing you want to ask yourself is who is in control of price whether the supply or the demand in this case right here where price is actually creating
[04:30] That Swing structure demand is in control right price is bullish demand is this bullish break of structure but the minute price starts pulling back right like I said it's going to turn bearish for a short amount of time to facilitate
[04:44] that pullback that is when Supply take control of the market and eventually right here and then demand step back into the market and Take Over Control of price and that is when price start turning bullish again to be aligned with
[04:58] yeah this is a question that you want to ask yourself at all times who is in control of price because if you can answer that question you can be on the right side of the market and you can actually win rather than lose your
[05:11] hearten money and now that you have a broad overview of how price actually work your next question is okay Brett cool now when exactly do we enter on how do we actually trade this do we enter for a sell right here doing the pullback
[05:25] or do we enter for a buy uh say right here at this low or do we enter for a buy here or do we enter for a sell here right where exactly can we actually trade from that is when we move on to the next part of this lesson which is
[05:39] your Market phases right you need to understand which phase of the market is it in right now and then deploy your trading strategy accordingly right this
[05:51] means different Market phases you must be doing different thing and this is the main thing that so many Traders get it wrong right a lot of Traders what they do is that they try to buy at all these week lows right here right they try to
[06:06] right which doesn't make sense whatsoever because price is still bearish and it's still pulling back so if you enter for a buy right here you are going against the internal structure the internal range and then some people
[06:20] they try to enter for a sell right here where price is already done bullish that time frame OU flow and you're still trying to go against the trend right go against the internal Trend and the swing Trend which just doesn't make sense
[06:33] whatsoever so yeah now I'm just going to explain to you how this different Market phases actually work and I mainly split it into four phases right so let's go through one by one so firstly we have the pro swing plus pro internal face
[06:47] right and you can see the color of the face it's correlated to the color of the boxes so you can just match the face of the market to the color of the box right so first phase is the pro swing plus pro internal phase what this means is that
[07:03] the swing structure the trend the order flow is the same as the internal structure internal order flow right so this phase happens when price has finished pulling back right it has finished pulling back and then right now
[07:16] it's continuing with the higher time frame outlow right so in this case your objective is very simple is just to write the higher time frame Trend and Order flow right this means you can look for buy at all these demand zones right
[07:28] here demand Zone demand Zone and then after you have entered for buy at this demand zones at these higher lows right you can Target this weak swing highs likely going to gravitate towards and
[07:40] and create another higher high and higher low right so this is one part of towards your left after price actually create that break of structure right
[07:52] before price starts pulling back you can also look for some buying opportunity doing this push phase obviously price will not just go up in a straight line like this you'll most likely do something like this go up go up
[08:06] go then come out to our supply Zone and start pulling back so within this push phase with this minor correction this minor little pullback right you can actually look for buy position right but be in mind like I said it's a very
[08:19] this buy position compared to this buy position because this is fresh right this is just fresh out of Oven price has just finished pulling back and right now price is turning bullish to facilitate
[08:31] the higher time frame out the flow but over here after price created that breakout structure it's most likely going to start pulling back soon so if you enter for a buy right here bear in mind that you have to be fast in terms
[08:44] of taking profit right you have to get in and get out of fast because you never ever know when price will start pulling back when the high time frame orderflow will come up to some sort of unmitigated Supply Zone and start pulling back so be
[08:56] careful and like I said last thing is this area right this phase of the market this is where you are able to get the most highest probability trade setups because this are the phases where the internal structure right the lower time
[09:10] frame trend is bullish the medium time frame trend is bullish the higher time is also bullish so you can see everything just align itself like clockwork baby so this is really when you can be more confident in terms of
[09:24] These phases so the next phase is the counter swing plus counter in interna phase this phase is a little bit trickier because this is where we are going against the higher time frame aut flow and the lower time frame UT flow
[09:38] and a medium time frame aut flow right we are going against the trend we are going against the current of the wave in the ocean right but this is also where you are able to capture those high risk to reward ratio trade setups right you
[09:53] can Target all the way down here at this demand Zone but the difficulty comes with when you are trying to predict the top of the market because it's very very the top of the market right you never ever know when price will start pushing
[10:08] even higher before it starts pulling back right andure this higher time frame Confluence but there always a chance that it's going to pierce past it before it starts pulling back so this is where you want to look for reversal setups all
[10:22] right so ideally like I said after price created a break of structure we are anticipating price to start pulling back okay so knowing that where is Price back at some sort of unmitigated Supply zone so the minute price actually
[10:36] reached that unmedicated Supply Zone I wouldn't actually recommend you to because like I said price can always just Pierce past it so what you can do in this case is to wait for your Market shift to happen to wait for that shift
[10:50] of structureal to confirm to you that price is turning bearish to facilitate that pullback right and you will only get that after price create that market so I wouldn't recommend you to actually enter for a sell here immediately once
[11:05] if you want to get that sniper entry you can actually enter here immediately but Confluence and please don't enter immediately if you are a beginner who is not consistently profitable yet whatsoever now when price create a
[11:20] market shift give up that shift of structure we have a confirmation that price has officially turned bearish now that price turned bearish when price happened there was a demand zone right here price comes down to this demand
[11:32] Zone created a fi reaction right here now when he created this fi reaction right it created a flip Zone that we have right here right so if this demand Zone were to do is job price were just going to go even higher but no it
[11:44] created a FP reaction created a lower high right here giving us our demand to supply flip zone now we got our demand to supply flip zone right there so that is when we can move on to phase three phase three is when you want to look for
[11:56] short-term selling opportunity to write the the pullback because right now we know that price is turning bearish to facilitate the pullback so we can actually capitalize on this fact and actually look for sell position at all
[12:09] these highs right here all these lower highs being formed right here so your job your objective for this phase is to just play that pullback right or like I said if the higher time frame permits this can even be a reversal right this
[12:21] can even be a reversal and price could just go down and crash all the way down not then price is more slightly going to pull back to the demand Zone that is at the strong low where demand will step back into the market and push price up
[12:35] again so within this phase like I said you are looking for quick trades very right so short-term selling opportunity you can sell here at this flip Zone and lower high or flip Zone whatever you can look for another sell position here and
[12:52] bear in mind this is very very important when you actually put on your premium and discount Matrix you realize that above this 50% level this is where price is at premium pricing so this is where it's Optimum for you to actually enter
[13:05] for a sell if you are trading the pullback and then once price actually get into the discount Zone it's a whole different story because this is when price could potentially start reversing and go up now right because price is
[13:19] within the discount range and this is where there's going to be some sort of Demand right so be in mind that is a very different story to actually sell here compared to selling say right here right because right here price has
[13:32] already done bullish the internal structure is already bullish so it enter for a sell right here where the internal structure and the swing structure is both bullish right so bear in mind when it comes to this be careful
[13:47] opportunity like I said shortterm keyword here is shortterm if you want to enter for a sell here take profit at this low right here enter for sell here take profit at this low right in and out and then last but not least my favorite
[14:00] phase to trade is the pro swing plus counter internal phase this is where you are able to get those high risk to drop ratio traits and is actually high probability compared to this one which is low probability right because this is
[14:16] when you got that swing structure which is bullish the IND structure is bearish is bullish the IND structure is bearish but then it is Shifting to bullish so continuation phase so if you're able to get in right here for a buy guess what
[14:32] you can capitalize on such a huge move right here because price is most likely going to go up to the wick high that we have right here so this is where you are anticipating the end of the Swing pullback right so this is price pulling
[14:45] going to pull back to where like I said some sort of demand Zone at the last actually get here to this Zone this is when you can actually look for that reversal right your reversal setups and how you do that is to wait for once
[15:00] confirmation there's a shift of structure this pullback is done the bars back into the market and take control and then price is going to turn bullish and then I'll personally until after that market shift happens I get some
[15:15] wait for price to get to my point of Interest being created right here either a flip zone or a aut block or a extreme point of Interest bam get my entry and I trade it all the way up here right and yeah this is basically how you actually
[15:29] trade the markets so just to show you this strategy actually works I'm actually up like 5K using this strategy right this is just prove that I'm not just sitting over here and just yapping to you guys about a strategy that
[15:42] haven't been proven whatsoever like I said this actually works right and yeah actually the trade that I actually entered on using this mechanical trading strategy and right now this is the result right making about 5k right now
[15:57] so I'm just going to EXP explain the top process about this trade and how to actually apply this Market phases thing towards that trade right and like I said knowledge is absolutely useless if you don't apply it into the market so let's
[16:11] look at the market and let's try to apply the different Market phases so right here after price created a breakout structure you know price is bullish and this is when you can look for like I said your short-term buying
[16:24] opportunity because you know price is going to start pulling back soon and you don't want want to get caught in the pullback so you can actually enter for a being form right here you can easily enter for a buy here or another buy at
[16:37] this AA here but the minute price actually get up to that unmedicated buy whatsoever so if you enter for a buy right here guess what your take profit will be at this Supply zone right very in very in and out fast and then also
[16:52] here as well right which I'm going to discuss later and then next price you look towards your left right what do we have here Supply zone right Supply Zone this is where smart money have entered in the past right there's a lot
[17:05] of Supply step into the market and push price down so yeah this is where phase two actually happened right Supply step back into the market take control and price started turning bearish to once again facilitate That Swing structural
[17:18] pullback right so over here we got that market shift happened right here after price actually broke through this last low right here right Market shift right fit reaction before price goes down even lower creating your lower high and lower
[17:32] low right lower high lower low and then in this case you can actually drop your medium time frame Supply zone right here so if you want to enter for a sell right where you are trading counter swing and pro internal and this is when you can
[17:46] easily look for some selling opportunity right here and be in mind if you want to recommend you to take quick targets once again and where it should be targeting is at this swing low right here right so this last swing low low right right here
[17:59] or here or if you want to swing for the fences right what you can even do is to just Target this strong low that we have right here right this would be a very good setup as well but it won't be the most highest probability because if you
[18:12] right here that is a demand zone right here so there's always a chance that right get down to this demand Zone and price will just continue and going up ask you if you are looking for short-term selling opportunity right
[18:27] here right you're Trading phase three be conservative with your take profit and just take profit at the next low right and eventually price comes down right come back down to our strong low that we have right here and what do we have if
[18:40] have right here and what do we have if you look towards your left this is your see this is actually an aut block if you want to refine it to this candle right over here we got a little bit of liquidity being swep as well right where
[18:54] there's liquidity being buil up below these lows price SW the available liquidity and bam that is where demand step back into the market and push price up so this is a very strong demand Zone this is a very valid point of Interest
[19:07] so we can definitely depend on it because there was inbalance there was lots of demand lots of buying momentum and price has also s available liquidity at this strong low right so this is when we can look for your face force trades
[19:20] right this is where you can anticipate that this pullback could potentially end and right now price is about turn bullish to be aligned with my higher so I can actually enter for a buy somewhere right around here and then
[19:32] this is where I will be targeting where my weak swing high right which is all my weak swing high right which is all the way up here right so yeah that is basically how you actually do it and then later on price goes up creating
[19:46] then later on price goes up creating that what do we have right here this is actually your Market shift right this is the last lower high and over here we got that market shift happened just get rid of this got Market shift happened right
[20:00] here and after market shift price pull back and if you notice what do we have here as well there's a supply zone right here okay Supply Zone and then it there's actually a flip zone right here right so there's actually a flip zone
[20:14] right here this is where you can actually look for your entry right so market shift and price starts pulling back this could be your first point of probably get the lower time frame Market shift you could have entered right here
[20:28] would have been somewhere right around here right started pulling back to some right here and this could be your second point of entry and if you miss this setup and this setup guess what you're waiting for price to pull back and where
[20:42] pull back to this flip Zone that haven't been mitigated yet right and that is when price come down to this flip Zone this could have been your third point of entry right and yeah that's basically how the different Market phases work and
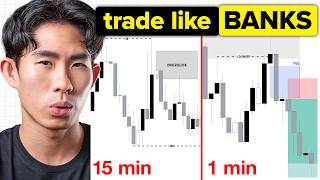
[20:56] I'm in right now I actually entered doing phase 4 and phase one right so this was my first setup so immediately after price actually created that market shift on the lower time frame be in mind this was on like the 1 minute time frame
[21:11] swing low right my valid point of interest that swept liquidity my strong order block right so price comes down market shift waited for liquidity to be swept right got all my Confluence then I
[21:24] right so I was actually looking for my second opportunity but I didn't get any there was no uh valid point of Interest being created until price actually come up to this Supply Zone created a f reaction
[21:38] like I mentioned just now creating a flip Zone and Bam I was I'm just waiting zone right and then eventually price keep on going up keep on going up and then right now price has officially pull back tap into that flip Zone that is
[21:51] where I look for my second position right so this is where I actually entered for my second trade so that is why if you look at meta Trader 4 I have two trade in place running to my overall take profit which is all the way up here
[22:04] at this little aut block right here right so yeah that's basically how I whatever I just explained to you this is obviously not the complete mechanical trading plan that our students have because I can't be giving away
[22:19] everything right I will give you as much as I can but we need to keep some for the students right so if you are interested in the complete mechanical Trading plan that has allowed Aria to actually make 25k some to make 10K and
[22:32] countless of our students to pass funding challenges and actually Bank first link in the description and from the bottom of my heart I genuinely hope that this video has allowed you to gain extreme Clarity and confidence when you
[22:46] you want to learn more about this strategy you can check out this video right here and as always remember you're just one trade just one trade away like this video If enjoyed it buddy



⚡ Saved you 0h 23m reading this? Transcribe any YouTube video for free — no signup needed.