How to add moving sparkles to your Live2D model
41sVisually stunning demo immediately hooks viewers interested in Live2D effects.
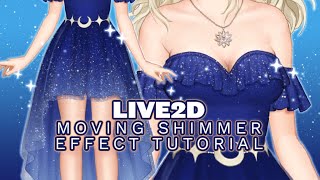
▶ Play ClipThis tutorial explains how to create a shimmer effect in Live2D that moves with a character's motion. The creator, Ivy, demonstrates a two-part technique using a control object and a glitter image. The effect is subtle but adds visual interest to areas like hair.
The creator introduces the tutorial, noting their beginner status but sharing a method they find pretty and useful.
The shimmer effect has two parts: a control object (orange region) and the actual shimmer image. The control is made identical to the area being decorated.
The control is placed on top of existing meshes and warps, matching the underlying area to ensure it moves with the character.
The control's opacity is turned to zero, making it invisible. Its art mesh ID is noted for clipping.
The art mesh ID of the control is copied, essential for the clipping process.
A large glitter image is added, which will be clipped to the control area.
The glitter image contains multiple colors for variety, and is resized as needed.
The clipping ID of the control is applied to the glitter layer, and the blend mode is set to additive.
The character moves, and the glitter sparkles in response, confirming the effect works.
The creator finds the effect realistic and notes it can be further animated for more motion.
This tutorial provides a simple method to add a moving glitter effect to Live2D characters. It is ideal for subtle, shimmering details that follow character motion.
"The title accurately describes a tutorial for rigging moving glitter/shimmer effects, and the video delivers exactly that."
What are the two main components of the shimmer effect?
A control object and the actual shimmer (glitter) image.
1:02
How do you make the control object invisible?
Set its opacity to 0.
2:07
What must you copy from the control object to use clipping?
The art mesh ID.
2:12
What blend mode is used for the glitter layer to make it sparkle?
Additive blending.
3:21
Effect Working
Demonstrates the successful result of the tutorial—glitter moves with the character.
3:37Realism of Shimmer
The creator notes the effect looks realistic compared to actual shimmer.
3:47Two-Part Structure
Provides the core technique: control object + glitter image.
1:02Clipping Setup
Required technical step to confine glitter to the control area.
3:07[00:00] [Music]
[00:09] hi youtube it's ivy and i thought i
[00:12] would throw together this little live 2d
[00:14] tutorial i'm still a beginner but i
[00:16] haven't seen a video on this and i think
[00:18] it's really pretty and that people would
[00:20] really like it if they knew how to do it
[00:22] so
[00:23] what i'm going to be teaching today is a
[00:26] shimmer effect that moves with motion so
[00:28] let me show you an example of what i
[00:30] mean
[00:31] so right here you can see that she has
[00:33] some little sparkles in her hair right
[00:36] here it's pretty subtle but they are
[00:38] there
[00:38] and as her hair moves they go glitter
[00:42] glitter
[00:43] and it's really simple effect but it's
[00:46] pretty and it adds a little bit of
[00:47] motion i think in areas that might not
[00:50] have it and since it's pretty like
[00:53] spread out and not too precise i think
[00:55] it can be applied to a large area which
[00:58] is nice so yeah let me show you how i do
[01:00] it
[01:02] so this is made up of two parts i'm
[01:04] going to apply it to this section next
[01:07] so you're going to want a control and a
[01:10] actual shimmer and i'll show you what i
[01:12] mean by that the control
[01:14] is this orange bit that you see right
[01:17] here
[01:18] so i made it exactly the same as the
[01:21] part that i want to apply it to
[01:24] that just makes it easy to stick it
[01:26] right on top of any warps or you could
[01:28] even glue it if you were using a lot of
[01:29] mesh editing instead of warps but for
[01:32] this particular case i can just plop it
[01:34] in with this mesh and its warps and it
[01:37] should move
[01:38] with the spot underneath so need to mesh
[01:41] it so it kind of moves a little bit
[01:44] better than it will right now
[01:46] and we'll just plop it into the warp
[01:47] with the existing ruffle there
[01:56] [Music]
[01:58] okay it's now in with this uh bubba
[02:01] ruffle
[02:02] and it should move with the body yeah
[02:05] all right but obviously you don't want
[02:07] this orange stuff here
[02:09] so we're actually going to
[02:12] go to this uh control object
[02:15] and turn this opacity down to zero
[02:19] and you're also at this point gonna want
[02:20] to make a note of what the art mesh idea
[02:23] is because this uses clipping
[02:26] so i'm gonna copy that
[02:28] all right and then you'll need to add
[02:30] the actual glitter
[02:32] which i just have one big image so
[02:35] there's a lot of glitter to like
[02:38] move around as this uh animates
[02:41] so let me show you what my actual
[02:44] shimmer looks like
[02:47] all right this is my shimmer
[02:49] i put different colors in it because i
[02:51] thought it might show up with some
[02:53] different stuff
[02:55] and uh yeah it's obviously a huge mess i
[02:57] think i'm actually going to resize it a
[02:59] little bit for this one
[03:01] make it a little bit smaller
[03:04] and now with that uh
[03:07] mesh of the control the id we're going
[03:10] to add a clipping id for the control
[03:14] [Music]
[03:15] make that this clipping id
[03:18] and now it will just show up on the
[03:20] control
[03:21] and i will make this into an additive so
[03:24] it's nice and sparkly
[03:26] now in theory when she moves it should
[03:29] sparkle so let's test it out
[03:34] wow
[03:37] yeah so it's a really simple effect but
[03:40] i think it looks really nice and i also
[03:42] think it looks pretty realistic as far
[03:44] as like how
[03:45] shimmer actually looks
[03:47] so yeah i'm really enjoying this effect
[03:50] and i hope you guys get some use out of
[03:52] it
[03:53] you can also animate the shimmer itself
[03:56] if you want it to move a little bit
[03:58] more uh but yeah i think it looks really
[04:00] nice
[04:02] all right i hope that was helpful
[04:05] uh go make your baby sparkly okay bye
[04:10] [Music]
[04:22] you
⚡ Saved you time reading this? Transcribe any YouTube video for free — no signup needed.