
Why I Ditched DD-WRT for Ubiquiti UniFi
56sRelatable frustration with inconsistent Wi-Fi drives viewers to see the fix.
▶ Play Clip"Delivers on the promised hardware upgrade walkthrough, but it's part one with results pending and a sponsor segment padding the runtime."
Matt from MK Smart Home kicks off a multi-part overhaul of his home network, replacing existing routers and access points with Ubiquiti UniFi hardware including access points, a PoE switch, a security gateway, and a Cloud Key. He walks viewers through the current setup, connects the new equipment, and troubleshoots issues with PoE voltage and manual firmware updates, setting the stage for a full rewire in part 2.
Matt introduces the video, explaining that he will upgrade and overhaul his home network with Ubiquiti UniFi equipment. He mentions that this will be a multi-part series.
Matt previously upgraded router firmware to DD-WRT, but he experienced inconsistent performance and bandwidth issues, prompting the decision to move to dedicated access points and a proper UniFi system.
PCBWay is sponsoring the video. They offer PCB prototyping, assembly, SMD stencils, and have a November/December shopping festival with discounts and coupons. Matt provides a coupon code for viewers.
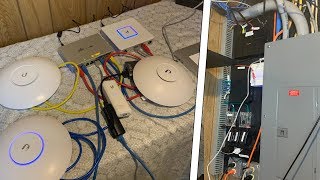
Matt introduces the new hardware: two UAP-AC-Pro access points, one UAP-AC-LR (long range) for the garage, a UniFi Switch 8 60W PoE switch, a UniFi Security Gateway as the main router, and a UniFi Cloud Key for management and metrics.
Matt shows his existing network: an Arris Surfboard SB6141 modem, a 16-port switch, a TP-Link Archer C7 router, two Raspberry Pis running OpenHAB and Home Assistant, a surveillance network with a Lenovo ThinkStation running Blue Iris, and an APC UPS for backup power.
To avoid disrupting the many users on his network, Matt plans to set up the entire new UniFi network first, then simply swap the main cable from the modem to the new security gateway for a seamless transition.
All Uniquiti hardware is connected: three access points to PoE ports on the UniFi Switch, Cloud Key to the first PoE port, a computer to the switch, switch to the UniFi Security Gateway, and the gateway to the modem.
The UAP-AC-LR access point does not power up because it requires 24V passive PoE, but the UniFi Switch 8 provides 48V PoE. This may have fried the AP, though it might be fixable by replacing a diode.
The UniFi Switch 8 and one access point failed to auto-adopt via the Cloud Key. Matt manually updated the AP firmware through the Cloud Key's URL setting, and SSH'd into the switch to copy and execute an update command.
The network is operational and shows 'everything is good' with 6-8% signal quality, though the two access points are too close together causing some interference. Matt plans to tear down and rewire everything in the next episode.
Part 1 of the network upgrade successfully connects and configures the core Ubiquiti UniFi hardware, but reveals important pitfalls such as PoE voltage incompatibility and manual firmware updates. The real test comes in part 2, where Matt will tear down and rewire the entire network for optimal placement and performance.
What are the two PoE voltage standards mentioned in the video?
24V passive PoE and 48V standard PoE.
09:23
Why did the UAP-AC-LR access point fail to power on?
It requires 24V PoE, but the UniFi Switch 8 provides 48V PoE, potentially frying the device.
09:23
How did Matt update the firmware on the UniFi Switch 8?
He SSH'd into the switch, copied the firmware file to it, and executed the update command.
11:26
What is the purpose of the UniFi Cloud Key?
It manages all UniFi devices, records metrics, and provides the web portal for configuration.
04:22
Which software were the two Raspberry Pis running?
One ran OpenHAB and the other ran Home Assistant.
05:16
What is the model of the cable modem used in the setup?
Arris Surfboard SB6141.
05:16
How did Matt plan to minimize downtime during the network swap?
By setting up the new UniFi network first and then swapping the main cable from the modem over to the new security gateway.
07:59
What does Matt propose to do with the surveillance network traffic?
Put it on its own VLAN so that it doesn't need a separate router and doesn't affect main network bandwidth.
06:09
Setup new network before swapping
A practical technique to avoid network downtime during hardware upgrades.
07:59PoE voltage mismatch can damage devices
A critical hardware pitfall where 24V passive PoE devices can be fried by 48V PoE switches.
09:23Manual firmware updates sometimes required
Even 'plug-and-play' UniFi gear may require manual intervention via SSH or Cloud Key URL settings.
11:14Use VLANs to isolate network traffic
A smart approach to keep surveillance traffic separate without extra hardware.
06:09[00:01] society Matt here from MK smash a calm and in this video we're gonna be upgrading and overhauling my network setup so if you've been following along
[00:26] with the channel you know that we started off with going over the network and how to set it up well since then I've made some changes by adding some things over here some servers and stuff as well as the surveillance system i've
[00:40] also upgraded the firmware on the routers that i have around the house to dee-dee-dee wrt but i don't know sometimes it's like inconsistent sometimes it becomes slow bandwidth becomes an issue so i decided to upgrade
[00:56] to a bunch of stuff from ubiquity now those of you who are following me on instagram and open my social medias link is below it's a ten case my house everywhere you would have already known that I have been working on all of this
[01:10] stuff because that's where I post that I sneak peeks that trip on the thews just would enjoy so this is probably going to be a multi-part series because there's a network and it's just going to be a super long video if I did it in one part
[01:25] you know what doesn't take super long PCBs from PCB way and that's because they have super fast turnaround times they have high quality PCBs they do PCB prototyping PCB assembly and SMD stencil and they have super fair pricing 24 hour
[01:40] customer service no minimum requirement and free DFM right now PCB way is having their big sale which is a november and december shopping festival right now in november for thanksgiving from the 27th to the 29th
[01:56] their wheel and win some free beans which you can then exchange for either cash for your orders or you can get hardware such as an arduino or other type of electronic components but it's not called a PCB way big sale for
[02:11] nothing they've up to seven percent off their PCB services then next month in December they're gonna have their Christmas coupons which I'll talk more about in the next episode but if you use my cash coupon which is on the
[02:25] your order which depending on how many PCBs you get could make your order free so head on over to PCB hue calm now so what are we exactly going to be doing gonna be upgrading it with all this ubiquity hardware which I'll go over in
[02:40] reorganizing it a little bit over here actually I'll stand over here we're organizing it a little bit I got the Shelf installed so we're going to be putting the servers and other stuff up here and also mounting stuff to the
[02:53] shelf and also going to be changing this up a little bit redoing a little bit of the wiring and changing some of the positions of the access points and we're also going to be adding stuff into the process but without further ado let's go
[03:08] ahead and see the ubiquity hardware that we're going to be adding so starting we're going to be adding so starting from this side left to right we have to ubiquity AC Pro wireless access points I've currently in my network I've been
[03:23] using routers and repurposing them as access point but this time I decided to go with actual access points and then I have one AC I believe this is an LR this have one AC I believe this is an LR this is a ubiquity a CLR so this is the long
[03:37] range one and this one is going to go in the garage because in the garage you because you're not going to be there that often so why spend extra money and so i just got an a CLR I'll go over the exact way that I'm gonna wire it in a
[03:51] little bit well these are all Power over Ethernet so I needed another Power over Ethernet switch and that's where the unify switch 860 watt comes in so I'm and then I'm going to connect it to the main router which is getting changed to
[04:09] main router which is getting changed to this the unified security gateway so this is me the main router for the entire house and then to manage all of the different Ubiquiti unify stuff I needed a cloud key so that way it also
[04:22] records the metrics and stuff and it's the web portal to configure everything so that's what this is and this is also Keowee so it's also going to get plugged into the switch over there and then over here I just have
[04:35] some miscellaneous cables and my computer that I'm gonna use to connect at all before we go ahead and set up the new ubiquity stuff I'm gonna show you what I have right now in my network all right so let's we'll start from the top
[04:49] so up here we have all of the that's actually an EM case my house fire sensor but up here we have all of the Ethernet wiring and that goes into the main router of the house which also has some antennas and then we have the main
[05:04] switch for the house and I believe this is a 16 port not exactly sure I don't remember and this is the modem that we're using this is an air surfboard SB
[05:16] one six four one oh and this is a d-link switch and then we have two raspberry PI's and these are running open hat one is running open ham and one is running home assistant then here is just the power and then this is for the fire
[05:29] power and then this is for the fire sensor and then down here we have all of the cameras these need to be installed so right now they're just sitting here and I'm also running tests on them which they are sitting on my file server over
[05:43] there when it's up on the shelf I'll show you guys that in a better location show you guys that in a better location and then we have another tp-link oh yeah the one up there is a tp-link Archer c7 and so I got another one of these this
[05:57] and so I got another one of these this is the entire surveillance network so I is the entire surveillance network so I gave that its own router so that way all of the traffic is contained and it doesn't the bandwidth doesn't get
[06:09] affected into the main network setup but what I'm hoping to do with the unify is put this on its own VLAN so that way I don't need an entire box it could just be on a VLAN and that's sitting on a power over ethernet switch and these are
[06:26] running to all the different cameras and is also running back to the main or the is also running back to the main or the surveillance server router and that is sitting on the surveillance serve so this is a Lenovo thing station I
[06:41] forget the model number but this is running blue iris and again if you guys follow me on instagram you will have seen me documenting the process a little bit and then there's just a power strip sitting over there oh and all of this is
[06:54] powered by an APC I know the biggest thing that you guys were complaining thing that you guys were complaining about in my original network hardware video guide that I didn't have an APC so I got one and so now if the power goes
[07:07] out everything is powered by this and I can safely shut it down if I need to oh here's a closer look at all of the unify stuff I'm so excited to get this installed I've been I've had this sitting in my room for about like two
[07:21] installed and today I finally have a chance but hopefully all of this will turn out nice and it'll be nice and contained using this shelf and over here
[07:33] and then now I'm going to show you the two other access points that I have in my house currently so this is another one of the access points that I have it one of the access points that I have it is in the second floor and so this is
[07:45] what where all the devices in the second floor as well as in my room connective alright so in order to minimize downtime because I have a lot of people using my network I'm going to first set up this network and then just swap over the main
[07:59] cable coming in for the modem so that way that'll be just seamless transition so I'm going to go ahead and do a time lapse of me wiring up all of this stuff and then I'll show you how its wired up [Music]
[08:28] so all of the ubiquity hardware is connected to the modem now so let me go connected to the modem now so let me go over how this is all connected so we are all three of these access points are connected to these three p OE ports and
[08:42] then we have the cloud key connected to the first p OE port and then I connected my computer to this port right here and then it's connected to the security gateway right here and then the security gateway is running all the way to the
[08:57] modem over there so let's and see if the computer is already connected so let's go ahead and get this all set up so a few hours later and I finally gotten all the software set up on the ubiquity well not all of it I sell to configure all
[09:11] the ports and stuff but like the main connectivity and all the devices are talking together except for I ran into a couple issues actually so the first
[09:23] issue that I ran into was that the access point this one doesn't work and so I plugged it in and I went it in the software and I couldn't find it and none of the lights were coming up and then I realized I'm gonna do this I realize
[09:42] realized I'm gonna do this I realize that this device is 24 volt p OE not 48 that this device is 24 volt p OE not 48 so which I was under the impression that
[09:56] this was a for evil because ubiquity on their website they said that these two devices are compatible and then I read on the forums and on the forums some people were saying that there's two different models of the what is this the
[10:13] different models of the what is this the LR yeah the APA CLR and it turns out that there is no different model number in between the 24 volt and the 48 the 48 are the newer ones because you make what he realized that they should have done a
[10:26] he realized that they should have done a 48 to begin with so I may have fried my AP a CLR which is I don't think is a big deal because I was also reading on the just need to replace adaiah in here and then it should be working so
[10:42] I might I don't remember but that switch that I have over there might be 24 volts so I might be able to just plug it into there or I might buy an adapter I think but we'll have to figure this out we should figure this out by the end of
[10:57] this series well let's see here what other oh another issue that I ran into other oh another issue that I ran into was these firmwares so this one connected no problem and the cloud key connected no problem but the switch 8
[11:14] and this access point had a problem connecting to the cloud key so I had to manually upgrade these firmwares but two different ways so this one I had to
[11:26] upgrade it by going through the cloud key and then in the cloud key I set the URL on where to upgrade I tried the same thing for the switch 8 but the switch 8
[11:38] just refused so I had to SSH into the actual switch I had to copy the file on to the switch and then I had to execute an update command so this process is honestly taking much longer than I expected I thought that maybe this was
[11:54] naive of me but I was expecting the ubiquity hardware to play more along together because it like discovers everything and so I was hoping that guess like everything there's some modifications that you have to do and
[12:07] some settings you have to change but we have it all figured out this I just need to fix and then figure out how I'm gonna connect it but overall see this number it says everything is good 6 to 8% I think that's because these two access
[12:22] points are too close to each other so it's not optimal but regardless now we're gonna take everything start tearing this down and put it all you're right past Matt we will be doing that next but that'll be in the next
[12:38] episode or the next part in this series however you want to call it which should come out next week in the description you'll find links to all the parts and tools used in this video as well as link to MK smart comm shop where of a wide
[12:53] vices and kits that you can put together such as smart blinds this network has taken so long to put together so please leave a like it really helps with the I very much will appreciate it all right thank you guys so much if you found this
[13:06] video helpful again smash that like button if this is content that you like it then go ahead and press the subscribe button and join the other smart home enthusiasts on this channel I'll see you guys in part two if
[13:18] you have any questions leave them in the comment section below or head on over to MK Starcom slash forum goodbye [Music]




⚡ Saved you 0h 13m reading this? Transcribe any YouTube video for free — no signup needed.