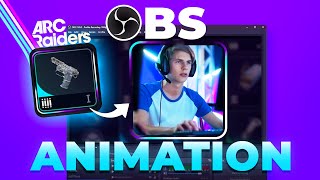

Recreating Arc Raiders UI Animation in OBS
45sTaps into the curiosity of gamers and streamers who want to replicate a game's UI effect using free tools.
▶ Play Clip"Delivers exactly what the title promises: a step-by-step OBS tutorial for recreating the Arc Raiders inventory animation."
This video is a tutorial on recreating a UI animation from the game Arc Raiders using OBS Studio. The creator demonstrates how to use color sources, the Advanced Mask plugin, and the Move plugin to create a scanning animation effect, and also shows how to adapt it for other uses like banners or alerts.
The creator noticed a UI animation in Arc Raiders and wants to recreate it in OBS Studio.
The animation uses white, cyan, and dark purple colors that blend together.
In OBS, add color sources for purple, cyan, and white, adjusting sizes and positions.
Apply the Advanced Mask plugin to the white source to create feathering and blending effects.
Group the colored sources and use the Move plugin to animate the group's position over time.
Clone the scene to create a separate animation scene, and use the Advanced Mask to create a border effect.
Adjust the mask shape to create circular or other custom border animations.
Record the animation and use it as a GIF for stream deck buttons or other overlays.
The video demonstrates that complex-looking animations can be created entirely within OBS Studio using its built-in features and plugins, offering a free alternative to dedicated animation software.
What colors are used in the Arc Raiders inventory animation?
White, cyan, and dark purple.
00:43
What plugin is used to create feathering and blending effects in OBS?
Advanced Mask plugin.
02:19
What is the purpose of the Move plugin in this tutorial?
To animate the position of the group over time, simulating the scanning effect.
04:48
How can you create a circular border animation?
By using the Advanced Mask with a circle shape and adjusting the radius.
09:40
What is the recommended way to export the animation for use as a stream deck button?
Record the animation in OBS and convert it to a GIF.
11:03
Color Analysis
Shows a simple method to deconstruct any UI animation by observing colors and blending.
00:28Advanced Mask Plugin
Introduces a powerful OBS plugin that enables complex masking and feathering effects.
02:19Move Plugin for Animation
Demonstrates how to create keyframe-like animations within OBS without external software.
04:48Exporting as GIF
Shows a practical application of the animation beyond OBS, such as for stream deck buttons.
10:34[00:00] and there's a little something that caught my eye. And it's that little UI animation, not only just the scanning, And I kind of want to recreate it.
[00:13] where I could do this in like a couple of minutes. since most of my viewers are live streamers, a little bit and show you how to do it with, well, what you already have.
[00:28] and if you ever found yourself wondering how do they how do you do this? Just look at it. What are the colors we see white.
[00:43] do those colors blend in together. Or just like using your eyeballs lesson here because I think it's important.
[00:55] We see white kind of fades into into cyan and then. The purple is kind of a dark purple ish.
[01:07] and then find a website that allows me Okay, so we're here in OBS studio and we know that we need to bring in some colors. By adding color sources we're going to click on the plus to add a new source.
[01:20] And it'll be our purple. Let's bring it down a little bit. And ideally we want kind of thinner lines.
[01:34] So for the height here I might go with 600 maybe more 800 something like that. Click copy to copy it. to create another one that's the same but not the same.
[01:49] and pick our teal, our cyan, Bring that up. I'm going to paste duplicate again. Make sure it's white.
[02:04] So we're going to go with 1200 for example. we're going to achieve that by using the advanced mask plugin. So while I have the white selected here also you should absolutely name
[02:19] And the Advanced mask plugin is a plugin. that you need to download, install and then restart OBS. And you can see it created something weird here.
[02:34] to what is interesting to me, which is the feathering. And we're going to bump it up quite a bit, but not too much. And then from there, all we need is to set the width to take the full thing.
[02:49] that it blends into. And, that looks pretty good. click on our source that has that filter, click Copy Filters
[03:04] and right click on our teal and paste filters. you can see that it's not having the exact effect. I can play with the feathering and I can see that
[03:17] okay, it's only feathering the top part and not the bottom part. If I scroll up a little bit and I go to center y, I can move it. centered on the layer itself and bring that up a little bit.
[03:31] Now I can right click on this one. Copy filters. We can select everything by holding shift, clicking on all of them, right clicking
[03:44] group selected items and call the group whatever you want. we were able to recreate something that we saw in OBS studio. So in the animation I'm going to click on the top here to rotate the whole group.
[04:02] Goes up, slows down a little bit and then flies out right. Now I need this to be huge to be able to cover the whole canvas.
[04:16] Set that to canvas. to be able to manage stuff outside of the main canvas. then basically simulate the coming up slowing down and then a flying out.
[04:33] So I'm going to preemptively set it around here because I know Now how do you move stuff in OBS studio. You use the move plugin, which if you have installed.
[04:48] and we're actually going to add the filters to the scene itself. So when I right click filters and I'm going to add a move source filter. So I'll call it position one.
[05:03] the duration for the first position since this is out of frame is actually zero, because this is our reset position, We want it to instantly go to it.
[05:15] to record the position. And here we'll have position two okay. Same source, except this time the custom duration should be the duration
[05:29] That middle point where it kind of slows down or whatever. So 3000 milliseconds. And now I need to manually move my source to set position.
[05:41] So if it's coming in I want it to be like this. Nice. So now I have two position. There
[05:54] I messed up and put the last three at least seconds. This is the type of issues that you're going to run into if you type So custom duration is 3000 milliseconds, not end delay.
[06:07] And it's going to slowly fly in. Now let's do the fly out. This one is position three. Nice.
[06:20] All the way out of frame. 2500 milliseconds Nice. So position one will be here.
[06:35] Position two will be there okay. And position three will be right outside of the frame. Well, on position one we can scroll all the way down and tell it
[06:48] So next move will be position two. Next move position three okay. So we can set that back to position one.
[07:04] Now I can do this and observe I want it to slow down a little bit. And that's how you can do this type of animation in just a couple minutes
[07:21] this has nothing to do with the actual UI in the game. How can I make that happen? Well. Let's make another scene. To make it easy.
[07:36] either bring this as a scene itself or clone Do a source clone, Tap that in Google gonna call this one our clone, The clone type is a source.
[07:49] Scene three, as you can see here. You can always put like a black background if you want. And the same advanced mask plugin that we used to create those feathered
[08:03] Okay. Because like in the game it's for the inventory, but what can we use it for? It can be a banner. It can be used for an outline.
[08:18] If you have like if you have a podcast, if you have guests on your stream, Okay, so I was saying, right click on it, click filters.
[08:31] can probably go for something that looks more like the actual, inventory thing. And I just realize I'm zoomed in and you guys can't see anything. Sorry I didn't advance.
[08:46] then the corner radius is right there. Then I'm going to duplicate that advanced mask. And on the second one I'm going to click Invert Mask.
[09:02] And all we have to do now is reduce the height and the weight So I'm going to hover over this and I'm going to scroll down with my mouse.
[09:14] There we go. Same thing for the height. if you're doing a perfect square, but we're just eyeballing for now. And this is kind of resembling what's actually in the game.
[09:28] can also make that happen. Right. So if you want it to be on the side, for example, and for some reason have that shape instead,
[09:40] and you want like a circular animation for it. Except this time shape is going to be a circle. the screen with it without going past something like that.
[09:56] And then from there, just lower the radius to have the thickness of your borders. Now, again, I can understand not wanting to have that as an element.
[10:09] But it can be a cool thing around your alert. and then have like super simplistic art creators themed, let's.
[10:22] to have this whole animation thing going on inside of OBS at all times. Especially if you don't want to have, like, an extra scene and all that stuff,
[10:34] you can just record this right when the screen is black, like right now, and then fly out and then stop recording there. this in like, in a software like Adobe After Effects or something like that,
[10:51] Just put it on the loop. If it has a black background, just set the blending mode to add and you got it. example, I wanted to make it, an animation for my stream deck
[11:03] Like this is from OBS studio. but there's probably other places that you can turn them into GIFs. made an animation in OBS studio and then turned them into a stream deck button.
[11:17] All I did was make like a thin rectangle and then add my corner radius all types of cool effects that you can do. anyways, if you spend time, you can make it look exactly how you want it to look.
[11:34] in two seconds and Adobe After Effects or any other editing software. That's amazing. I'm so happy for you. So, hopefully you can understand that. Look at that.
[11:47] And, of course, you can pair this with a bunch of other filters. Yeah. and, you know, find all the possibilities and see what OBS can actually do.
[12:03] do something without having to learn a brand new software or pay for inexpensive software. It is capable. That's all.
⚡ Saved you 0h 12m reading this? Transcribe any YouTube video for free — no signup needed.