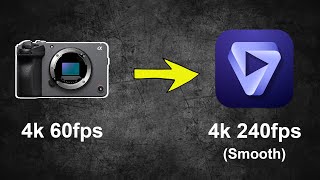
From 60fps to 240fps slow-mo!
45sShows the dramatic transformation of a clip from 60fps to 240fps, which is visually impressive and educational.
▶ Play ClipThis tutorial demonstrates how to use Topaz Video AI 4 to slow down 60fps footage from a Sony FX30 to 240fps at 4K full sensor readout, using frame interpolation. The workflow involves editing in DaVinci Resolve, exporting a clip, processing it in Topaz Video AI, and reimporting the result.
The creator aims to slow down 60fps FX30 footage to 240fps at 4K full sensor readout using Topaz Video AI 4.
The workflow is shown in DaVinci Resolve but applies to Premiere or Final Cut. The clip is duplicated, one copy is slowed down as a placeholder, and the other is exported for processing.
Duplicate the sequence, right-click the lower clip, go to Retime Controls, and extend it. This creates a jittery placeholder for editing.
Export the top clip using Apple ProRes 422 at source resolution. Set in/out points to isolate the desired segment.
Download Topaz Video AI from topazlabs.com. A free trial is available; the software is currently on sale for $249.
Open the exported clip in Topaz Video AI. Enable Frame Interpolation, set speed to 4x slower (converting 60fps to 240fps), then export.
Import the processed clip back into DaVinci Resolve. Compare the jittery placeholder with the smooth interpolated result.
Topaz Video AI 4 can effectively create smooth slow-motion from standard frame rates, but it requires a workflow of editing with a placeholder, exporting, processing, and reimporting.
"The title is slightly exaggerated but the tutorial delivers a solid frame interpolation workflow with impressive results."
What frame rate was the original footage shot at on the Sony FX30?
60 frames per second.
What is the target frame rate after using Topaz Video AI?
240 frames per second.
00:06
Why did the creator not shoot at 120fps on the FX30?
Because 120fps has a significant crop, and they wanted full sensor readout for bokeh and environment.
03:20
What codec and settings are recommended for exporting the clip from DaVinci Resolve?
Apple ProRes 422 with 'Render at source resolution' checked.
02:14
What is the current sale price of Topaz Video AI mentioned in the video?
$249.
03:06
What is the purpose of the placeholder clip in the editing workflow?
To allow editing the entire video before processing, so the final clip can be replaced with the interpolated version.
01:39
Goal: 240fps from 60fps
Demonstrates a practical use case for frame interpolation to achieve high frame rate slow motion without hardware limitations.
Placeholder Workflow
Explains a key workflow tip: edit with a jittery placeholder and only process the final clip to save time.
01:39FX30 Crop Limitation
Highlights a real-world camera limitation and how frame interpolation can bypass it.
03:204x Slow Motion Setting
Shows the exact setting (4x slower) to convert 60fps to 240fps in Topaz Video AI.
03:49[00:00] today I'm going to take this clip that I
[00:01] shot on the fx30 at 60 frames per second
[00:04] full sensor readout at 4K and I'm going
[00:06] to slow it down to 240 frames per second
[00:09] full sensor readout still at 4K using
[00:12] topaz video ai4 okay so before I dive
[00:15] right into toaz video 4 AI I think it's
[00:17] important for me to show you just a
[00:18] little bit of workflow here so in this
[00:20] example I'm using Da Vinci resolve
[00:22] however this would work in Premiere or
[00:23] Final Cut or any other editor as well so
[00:26] you'll notice if we scrpt through this
[00:27] clip you'll notice how right at the end
[00:28] here she starts to like move the
[00:30] butterfly away a little bit but I just
[00:32] want to slow down the part where she
[00:33] turns her head and looks at that
[00:35] butterfly and then all the rest of this
[00:37] here I want to take out so right where
[00:38] she turns her head we'll go ahead and
[00:41] just put a little marker there and then
[00:43] we'll cut back to that marker okay so
[00:46] now we'll play this clip
[00:47] back okay so it's too short here so
[00:50] we're going to use topaz video ai4 to
[00:53] slow this clip down and make it longer
[00:55] and make that moment stretch out a
[00:57] little bit longer where she's looking at
[00:59] that butterfly so first things first
[01:01] what I'm going to do is I'm going to hit
[01:04] the option key on the Mac or I believe
[01:07] it's ALT key on the Windows computer and
[01:09] we'll just go ahead and duplicate that
[01:10] sequence there keep that above and then
[01:12] for the one below I'm going to click on
[01:13] it and then right click and then go to
[01:16] rtime controls and then I'm going to go
[01:18] ahead and extend this out okay now let's
[01:20] disable this top clip here I'm just
[01:22] going to hit D on my keyboard and let's
[01:24] go ahead and play back this bottom one
[01:26] okay so you'll notice how it looks just
[01:28] really jittery really slow so that's
[01:30] what happens when you slow something
[01:31] down in uh just a regular video editor
[01:33] whenever I have a clip that needs to be
[01:35] slowed down I just manually slow it down
[01:37] in viny and yeah like the frame looks
[01:39] super jittery and weird but basically
[01:41] all that clip is is a placeholder so I
[01:43] go through I edit my entire video and
[01:45] then when I have my edit locked then I
[01:47] go over to Topaz video AI but not until
[01:49] then okay so next we're going to export
[01:52] this top clip up here okay so click on
[01:54] this little rocket ship down here for
[01:56] deliver all right the next thing I'm
[01:57] going to do is I'm going to check that I
[01:59] want to just export individual Clips
[02:02] here and then I'm going to come over
[02:03] here and we're at the start of my clip
[02:05] and I'm going to hit o on my keyboard
[02:07] okay and then I'm going to hit I my
[02:08] keyboard okay now we just have that one
[02:10] clip selected there okay so just to keep
[02:12] the quality consistent here we're going
[02:14] to change the codec we're going to go to
[02:15] Apple proes and we'll just do Apple Pro
[02:17] reses 422 and we're also going to check
[02:20] this little box right here that says
[02:22] render at source resolution okay and
[02:24] then we'll choose where to save the
[02:27] file so I'll just save it here
[02:32] and we'll just call this
[02:34] lady holding butterfly and then we'll
[02:37] just add that to our render queue and
[02:39] then we'll export that out okay so
[02:41] before we dive into topaz video ai4 I
[02:44] realized that a lot of you probably
[02:45] don't have the software yet so when you
[02:47] get to their main site topaz labs.com
[02:49] you're just going to come up to
[02:50] downloads so you're going to come over
[02:52] here to Topaz video aai choose which
[02:54] system you have so I'll choose Mac and
[02:56] then I'll go ahead and hit save and then
[02:58] what it does here is it just in installs
[03:00] a a free trial for you okay so to buy
[03:03] the software at least right now it's
[03:04] showing on their site that it's on sale
[03:06] for
[03:07] $249 there okay so I have topaz video AI
[03:10] pulled up here so I'm going to go ahead
[03:12] and hit browse okay so we'll go ahead
[03:14] and select the clip that we just
[03:16] exported from Da
[03:17] Vinci okay so originally I recorded this
[03:20] clip on the Sony fx30 at 60 frames per
[03:23] second full sensor readout here because
[03:25] the fx30 it does record in 120p but it
[03:27] has a very significant crop to it and so
[03:29] I still wanted to have the full sensor
[03:31] in use during this clip and just be able
[03:33] to show the bokeh and show more of the
[03:35] environment rather than just cutting in
[03:37] really close on her face at that 120p
[03:39] okay so now that I'm in topaz video AI
[03:42] version 4 what I'm going to do is I'm
[03:43] going to come over to this tab here so
[03:45] this tab has all sorts of things you can
[03:47] do so in this tutorial I'm just
[03:49] specifically focusing on this Frame
[03:51] interpolation one so we'll go ahead and
[03:53] turn that on so right away you'll notice
[03:55] how there's this little tab called slow
[03:57] motion so let's go ahead and tab down
[04:00] and let's go ahead and make the speed
[04:04] four times slower so basically what
[04:06] we're doing here is we're taking the 60
[04:09] * 4 and we're turning this clip into a
[04:11] 240 frames per second clip at 4K full
[04:16] sensor readout on the Sony fx30 okay so
[04:19] the next thing I'm I'm going to do is
[04:20] I'm going to hit export okay so to view
[04:22] the clip that I just exported I'm just
[04:24] going to click on this part where it
[04:25] says click to view export and you'll
[04:27] notice here how it's pulled up this clip
[04:29] so we'll take a look at
[04:34] it okay okay so now we'll bring in the
[04:37] new clip that we just made so I'll hit
[04:39] command I or control I on my keyboard
[04:41] here okay so we'll go ahead and click on
[04:43] our clip here all right soad and put it
[04:45] in here okay so this clip is a little
[04:47] bit longer here than that
[04:50] portion so what we can do is we can just
[04:52] select a part of this clip here that we
[04:56] like okay so this is what it looked like
[04:58] before
[05:03] so that's just the clip extended out no
[05:06] interpolation going on here okay and
[05:07] this is the topaz clip that we
[05:09] interpolated in that
[05:14] program okay all right so that's how you
[05:16] can use topaz video ai4 to slow down the
[05:19] frame rates on the footage you shot with
[05:22] your
[05:22] camera
⚡ Saved you time reading this? Transcribe any YouTube video for free — no signup needed.