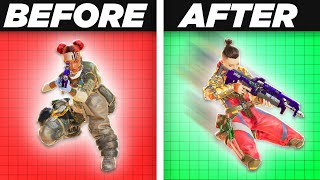
Air Strafing Explained
45sAir strafing is a core movement mechanic in Source games that many players don't fully understand, and this clear explanation with visual examples makes it highly educational and shareable.
▶ Play ClipThis video teaches advanced movement techniques in Apex Legends, covering air strafing, lurching, slide jumps, wall jumps, bunny hopping, zipline super jumps, and tap strafing. It emphasizes that mastering these techniques improves speed, evasion, and overall gameplay.
The video aims to teach movement techniques not covered in the basic tutorial, applicable to all platforms but recommends PC players bind scroll wheel to forward input and jump.
Air strafing combines movement input and aim to control mid-air direction. Lurching allows changing direction or stopping mid-air using only movement keys, enabling redirects and slides in any direction.
Sliding and canceling with a jump provides a velocity boost and makes you harder to hit. Timing is key: initiate slide when the running hand falls a second time. Sliding downhill is beneficial for speed and healing.
Sliding off a ledge gives a small speed boost, which can be combined with a jump at the ledge's end for extra speed during rotation.
To wall jump, slide towards a wall, jump, release movement keys, and jump again upon hitting the wall. Advanced: add backward/sideways input for more momentum and control. Avoid climbing by using side input on short ledges.
Bunny hopping retains momentum by jumping before hitting the ground. Spam jump input (scroll wheel helps) and combine with air strafing for distance. Crouch bunny hop makes you smaller and harder to hit.
Stand under a zipline, look up, interact, and immediately jump (scroll wheel helps) to perform a high jump. Useful for reaching elevated positions.
Tap strafing uses scroll wheel to spam lurch inputs while turning and adding side movement, enabling sharp turns. Requires practice but is fundamental for advanced movement.
Climb farther by adding left/right input at peak. Cancel fall stun by touching a wall before landing. Octane jump pad punch bounce. Horizon tactical speed boost for distance.
Mastering these movement techniques—from basic air strafing to advanced tap strafing—will significantly enhance your speed, evasion, and overall performance in Apex Legends.
"Title accurately promises a movement guide and delivers comprehensive techniques."
What are the two components of mid-air movement control?
Movement input and aim.
00:43
What is lurching used for?
To adjust movement and gain horizontal velocity on the spot, allowing direction changes or stopping mid-air.
01:25
How do you perform a redirect?
Run, jump, and use movement keys to change direction mid-air.
01:37
What is the benefit of slide jumping?
It provides a velocity boost and makes you harder to hit.
02:25
When should you initiate a slide for optimal run slide timing?
When the running hand falls a second time.
02:41
What is edge boosting?
Sliding off a ledge gives a small speed boost, which can be combined with a jump for more speed.
03:29
How do you perform a basic wall jump?
Slide towards a wall, jump, release movement keys, and jump again upon hitting the wall.
04:02
How can you avoid climbing when wall jumping off short ledges?
Let go of forward input and use a side input when bouncing.
04:43
What is the key input for bunny hopping?
Spam the jump input (scroll wheel recommended) just before hitting the ground.
05:19
How do you perform a zipline super jump?
Stand under a zipline, look up, interact, and immediately jump.
06:29
What is tap strafing?
Using scroll wheel to spam lurch inputs while turning and adding side movement for sharp turns.
06:54
How can you cancel fall stun?
By touching a wall before landing.
08:04
Air Strafing Foundation
Covers the fundamental mid-air control technique that underpins most advanced movement.
00:26Run Slide Efficiency
Explains the most frequently used movement technique for speed and evasion.
02:12Wall Jump Mastery
Provides detailed steps and advanced variations for a key rotational tool.
03:46Tap Strafing Power
Introduces the advanced technique that maximizes lurching for sharp turns.
06:46[00:00] if you've ever played Apex you've
[00:02] probably played a tutorial this is where
[00:03] the game teaches you basic concepts but
[00:05] one of the things it misses out on is
[00:07] movement so in today's video I'm going
[00:09] to be teaching you just that the guide
[00:11] isn't PC specific but if you are a PC
[00:13] player make sure that you've bound your
[00:14] scroll wheel to the forward input for
[00:16] either scroll up or scroll down and then
[00:18] the opposite scroll input for jumping
[00:20] it's not really a necessity for most of
[00:22] the tricks here but it will make it much
[00:24] easier and before we start going into
[00:26] the cool flashy techniques I want to
[00:28] cover a pivotal part of movements that
[00:30] most guides don't really cover and that
[00:32] is air strafing air strafing is
[00:34] something that most Source game players
[00:35] know about but if you're new to Apex or
[00:37] Source games in general this might just
[00:39] sound like complete Greek To You air
[00:41] strafing along with lurching are mid-air
[00:43] movement inputs which allows me to do
[00:45] this so basically middle movement
[00:47] properly controlling your movement while
[00:49] mid-air is composed of two parts one
[00:51] being your movement input and the other
[00:53] being your aim let me switch to oxygen
[00:55] to give you a better example keep in
[00:56] mind that what I'm showing you isn't
[00:58] necessarily just for octane or what you
[00:59] you take the jump Pad but the jump pad
[01:01] gives me a little bit more space to show
[01:03] you what's happening if I just take a
[01:05] jump pad and hold the movement key while
[01:06] mid-air I'll be moving a little bit to
[01:08] the side if I just turn my aim nothing
[01:10] really happens I just keep going the
[01:12] same direction but if I combine the two
[01:14] by slowly rotating my view in the
[01:16] direction of which I am turning with my
[01:17] movement key I can make a much wider
[01:20] turn the same principle allows When
[01:22] jumping normally off the ground and
[01:23] really whenever in the game lurching can
[01:26] also be used to adjust your movement and
[01:27] gain any horizontal velocity on the spot
[01:30] for example if you are running in One
[01:31] Direction and jump by using only your
[01:34] movement Keys you can actually change
[01:35] the direction of the jump you can even
[01:37] do a backwards input to stop yourself
[01:39] mid-air this is something that's known
[01:41] as a redirect also a quick tip you can
[01:43] use this to slide in any direction that
[01:45] you want to confuse your enemies all you
[01:47] have to do is run jump use your movement
[01:49] inputs to gradually control yourself in
[01:51] the direction which you want to slide
[01:52] and then Crouch when you're going to hit
[01:54] the ground if done properly you can
[01:56] actually enter a backward slide from a
[01:58] forward running position it's a good get
[02:00] to spend extra time getting a good grasp
[02:02] of air strafing and lurching as these
[02:04] are the bases for most movement
[02:05] techniques and having a good feeling for
[02:07] how to abuse them will make every
[02:09] subsequent movement technique that much
[02:10] easier to pull off but now let's start
[02:12] off with the moving technique that
[02:14] you'll be using most of the time during
[02:15] the game and that is the Run slide or
[02:17] slide jump or whatever it goes by when
[02:19] you are running or rotating you want to
[02:21] initiate a slide and after a little
[02:22] while make a jump to cancel that slide
[02:25] sliding and canceling makes you harder
[02:27] to hit but most importantly will give
[02:28] you a little bit of a velocity boost
[02:30] making it faster than just running in a
[02:32] straight line keep in mind though that
[02:34] doing this up or down Hills will affect
[02:36] the slide but just continue doing it and
[02:38] you'll get the hang of it as for when
[02:39] you should initiate a slide keep an eye
[02:41] on the left hand on your screen as you
[02:43] are running once the hand falls down a
[02:45] second time and a little while after you
[02:47] are safe to initiate a slide and get the
[02:49] most efficient timing when it comes to
[02:50] the Run slide meaning that you'll be
[02:52] able to pull more of these off and
[02:53] rotate faster than anyone else in the
[02:55] lobby keep in mind that you're still
[02:57] able to slide uphill but depending on
[02:59] the slopes you probably won't see much
[03:00] of a benefit of going for the slide jump
[03:02] sliding up Health also poses a risk of
[03:04] getting dead slides which means you
[03:06] randomly get stuck in the ground so it's
[03:08] not really worth it sliding down slopes
[03:10] is worth it as you might recall it being
[03:12] mentioned in the tutorial you will get
[03:13] even more speed if you start a slide on
[03:15] a downhill slope even if it's a shorter
[03:17] one unlike the Long Hill that you slide
[03:19] down in the firing range if you have to
[03:20] escape an enemy and heal up at the same
[03:22] time you want to try to pop your healing
[03:24] items while sliding down any Hill as
[03:26] this minimizes your movement's penalty
[03:28] and this is when we're going to start
[03:29] introducing Edge boosting this is a
[03:31] phenomenon in the game where sliding off
[03:33] a ledge will give you a small speed
[03:35] boost this can be combined with a jump
[03:36] at the very end of the ledge to get even
[03:38] more speed and is something you want to
[03:40] look out for especially when you're just
[03:42] rotating and start jumping around
[03:43] between point a and point B moving on
[03:46] we're going to take a look at wall jumps
[03:48] I've been wall jumping since the
[03:49] technique was discovered in like early
[03:51] 2019 and I believe I developed Flawless
[03:53] techniques since then the trick is to
[03:55] constantly do it when you are rotating
[03:57] because this adds a little bit of extra
[03:58] speed and it makes rotation is a lot
[04:00] less boring to deal with to do a simple
[04:02] wall jump run towards a wall and
[04:04] initiate a slide follow this by jumping
[04:06] and timing your jumpsuit that you hit
[04:08] the wall at the peak of your jump also
[04:10] after you've jumped let's go with all of
[04:11] your movement Keys once you hit the wall
[04:13] you'll also hear a thump jump again to
[04:15] get launched in the direction of which
[04:17] you were going you can also level up
[04:19] your wall jumps by instead of completely
[04:21] letting go of your movement after
[04:22] jumping by adding a backwards and or
[04:24] sideways input in the direction of which
[04:26] you are going at the same time as you do
[04:28] the jump input when hitting the wall
[04:30] this gives you even more momentum and
[04:32] control of the direction of which you
[04:34] are going you can also get more precise
[04:36] control of where you are going by
[04:38] turning your view around after the
[04:39] bounce if you try wall bouncing off
[04:41] objects that are a little bit shorter
[04:43] that normally would make you climb make
[04:45] sure to let go of your forward input and
[04:46] do a side input when you would bounce
[04:48] away from it this stops the game from
[04:50] starting a climb animation in the first
[04:51] place and that's because if you jump at
[04:53] the ledge while holding your forward
[04:55] input you will initiate a climb also
[04:57] it's good to know that you can jump at
[04:59] Ledges with a 4 forward input and then
[05:00] stop moving in any direction after
[05:02] latching on as this will make your
[05:04] Legend hang over the edge until you
[05:05] decide to climb up or I guess drop off
[05:07] moving on we have bunny hopping this is
[05:10] another OG technique that gaming
[05:12] veterans might recognize which allows
[05:14] you to keep most if not all of your
[05:15] momentum by bouncing before you hit the
[05:17] ground and let it slow you down to pull
[05:19] this off all you have to do is build any
[05:21] momentum in this case we'll do a slight
[05:23] jump and then spam the jump input
[05:25] without any additional inputs necessary
[05:27] as I'm about to hit the ground it does
[05:28] help if your scroll wheel is bound to
[05:30] jump you can get farther by using a
[05:32] version of the air strafing I mentioned
[05:33] earlier namely turning your view to the
[05:35] left or the right combined with side
[05:37] input simultaneously retaining momentum
[05:39] is especially huge if you've gotten a
[05:41] high velocity move off such as taking a
[05:43] jump pad a gravity Cannon or you name it
[05:46] you can also hold Crouch when initiating
[05:48] The Bunny Hop to get the slide off this
[05:49] gives you a little bit of less side
[05:51] movement but will make you smaller and
[05:53] harder to hit this can also make you
[05:54] harder to hit after popping a battery
[05:56] although this isn't as strong as it used
[05:57] to be it still allows you to keep moving
[05:59] and maybe around that corner while being
[06:01] difficult to hit if you're playing
[06:03] octane you can easily combine a Crouch
[06:05] Bunny Hop your stem and popping a
[06:07] battery and not actually seeing any
[06:08] movement penalty let's continue with the
[06:10] zipline super jump there is a lot of
[06:12] different variations of the zipline
[06:13] jumps but seeing as this is a beginner's
[06:16] guide we'll cover the most important and
[06:18] basic one the zipline super jump allows
[06:20] you to pull off a super high jump by
[06:22] abusing a zipline and it looks something
[06:24] like this it might seem a bit difficult
[06:26] but is actually pretty simple once you
[06:28] get a hang of it to do a super jump
[06:29] stand under a zipline while looking up
[06:31] at it interact with it and then
[06:33] immediately do a jump input afterwards
[06:35] this also helps if you jump with your
[06:37] scroll wheel the timing does take a
[06:39] little while to get down but this small
[06:40] movement technique will give you
[06:42] infinite value to climb certain
[06:43] buildings all over Apex and of course to
[06:46] top it off let's cover the reason why I
[06:48] asked muscle cable users to binder
[06:50] forward input to the scroll wheel we're
[06:52] talking about the Forbidden technique of
[06:54] tap strafing this technique uses a mix
[06:56] of air acceleration and takes lurching
[06:58] to the max by spamming Lurch in inputs
[07:00] with your scroll wheel and despite what
[07:01] people tell you is very simple to pull
[07:03] off with enough practice the core part
[07:06] of the tap strafe is basically the same
[07:07] movement that I taught you about air
[07:09] acceleration at the start of the video
[07:11] after getting some speed turn your view
[07:13] around while adding side movement inputs
[07:15] in the direction of which you are going
[07:16] but only this time you're also going to
[07:19] be using your scroll wheel for the
[07:21] entire duration of the Turn The Wider
[07:23] the turn the longer your scroll needs to
[07:25] be this takes a little bit of practice
[07:26] to get down but it's extremely simple
[07:28] and tap shaping is a fundamental
[07:30] technique when it comes to movement it
[07:32] can be combined into infinitely more
[07:34] movement techniques but that's for
[07:35] advanced users and if you would like to
[07:37] you can learn more about that later by
[07:39] checking out the rest of the videos on
[07:40] my channel specifically uh this one and
[07:43] wow we're almost 8 minutes in so as a
[07:45] thank you for watching this far I'd like
[07:47] to give you some extra quick movement
[07:49] tips that will elevate your movements
[07:50] that much more also since you did end up
[07:53] watching this far make sure that you've
[07:54] hit the Subscribe button you can climb a
[07:56] little bit farther by adding a left or
[07:58] right movement input at the very peak of
[08:00] your climb right when you're about to
[08:02] start jumping off you can cancel the
[08:04] fault stun by touching a wall of bytes
[08:06] before landing if you stand right by
[08:08] octane's jump pad and punch towards it
[08:10] in the way that the punch wind-up puts
[08:12] you on the jump pad this will make you
[08:13] bounce straight up on the jump pad
[08:15] without actually going anywhere exiting
[08:17] Horizon's tactical will give you enough
[08:19] of a speed boost to launch you about 20
[08:21] meters horizontally if you jump off at
[08:23] the peak the jump Arch will give you
[08:25] about a 27 meter distance also if you're
[08:27] interested in more advanced movement
[08:29] check out the video on the screen thank
[08:31] you so much for watching and I'll see
[08:32] you all tomorrow
⚡ Saved you time reading this? Transcribe any YouTube video for free — no signup needed.