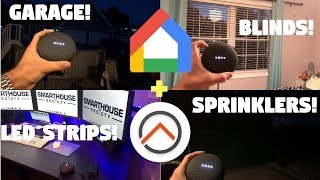

Google Home Supported OpenHAB Item Tags Explained
43sThis quick tag reference saves smart home owners hours of trial and error when setting up voice control.
▶ Play Clip"Delivers a genuine step-by-step guide, but includes several minutes of promotion and assumes viewers already know OpenHAB basics."
This video is a step-by-step tutorial showing how to connect a Google Home device to an OpenHAB 2 smart home system. The host, Matt, explains how to add Google Home-compatible tags to OpenHAB item files, create rules for garage door voice control, and link everything through the Google Home app via myopenhab.org. The video also demonstrates several voice commands to control lights, garage doors, sprinklers, and LED strips.
You need a device running iOS or Android, a computer (Windows or MacOS), an OpenHAB 2 server, and a Google Home device. The guide assumes Google Home is already set up and you have an items file and a rules file in OpenHAB.
Use 'sudo nano /etc/openhab2/items/home.items'. Google Home supports tags: 'Switchable' (Switch, Dimmer, Color, Rollershutter), 'Lighting' (for lights), 'CurrentTemperature' (temperature reporting devices), and 'Thermostat' (a Group with CurrentTemperature, TargetTemperature, and homekit:HeatingCooling).
Matt's example items file shows 'Switchable' tags on Switch items and Rollershutter dummy items, and 'Lighting' on color LED strips. Save the file with Ctrl+X, then Y, then Enter.
A dummy Rollershutter item is created for garage doors because Chamberlain MyQ does not like the command Google Home sends. The dummy items use the 'Switchable' tag.
If a Rollershutter item needs on/off control, edit the rules file with 'sudo nano /etc/openhab2/rules/home.rules'. The rule takes the percent value from the dummy items and sends ON/OFF (or UP/DOWN if needed). Save with Ctrl+X, Y, Enter.
Open the Home app on your mobile device, tap the plus sign, scroll down and select OpenHAB. You will be taken to a web browser page where you enter your myopenhab.org username and password, then press Allow.
The app shows all the items found by OpenHAB. After pressing Done, you can control devices with voice commands like 'Ok Google, turn on MK Light', 'Ok Google, set Garage Door 1 to 0%', 'Ok Google, set Desk LED Strip to Blue', and 'Ok Google, set MK Blinds to 100'.
The device is now connected and working. The video description contains links to all parts, guides, and mksmarthouse.com/shop for smart home kits.
Connecting Google Home to OpenHAB 2 requires adding specific tags to your items, optionally creating rules for special devices like garage doors, and linking the systems through the Google Home app. Once set up, you get full voice control over your smart home devices.
What tags does Google Home support in OpenHAB 2?
Switchable, Lighting, CurrentTemperature, and Thermostat.
02:07
Which item types can use the 'Switchable' tag?
Switch, Dimmer, Color, and Rollershutter item types.
02:07
What should you do before starting the setup as described in the video?
Ensure Google Home is installed and working, and that you have an items file and a rules file in OpenHAB.
01:08
Why did Matt create dummy Rollershutter items for his garage doors?
Because Chamberlain MyQ does not like the command Google Home sends, so dummy items are used to handle the conversion.
03:25
What command opens the OpenHAB items file for editing?
sudo nano /etc/openhab2/items/home.items
02:07
How do you save a file after editing with nano?
Press Ctrl+X, then Y, then Enter.
03:54
What step is required to link Google Home to OpenHAB via the mobile app?
Open the Google Home app, tap the plus sign, select OpenHAB, and sign in with your myopenhab.org username and password, then press Allow.
05:03
What voice command example was given to set an LED strip color?
Ok google, set Desk LED Strip to Blue.
06:06
Google Home supports four OpenHAB tags
This is the core configuration requirement for connecting Google Home to OpenHAB, making it the key technique for the entire process.
02:07Dummy switch workaround for MyQ garage door
Shows a practical problem-solving approach when a third-party service does not respond well to Google Home commands.
03:25Rules convert percentages to ON/OFF commands
Demonstrates how OpenHAB rules can bridge the gap between Google Home's voice commands and device-specific control protocols.
04:06Voice control is confirmed with examples
Provides concrete, testable voice commands that users can immediately try, proving the integration works.
05:31[00:00] Hey guys Matt here from MKSmartHouse.com and in this video I am going to show you how to connect the Google Home to your OpenHAB 2 System. I love the Google Home and think it is an awesome device that makes controlling smart
[00:18] You can be in another room and yell to google and tell it to turn on a device for you. In this video we will be connecting google home to our openhab 2 system so it can control
[00:30] For this video we are going to need a device running IOS or android, a computer running Windows or MacOS, an openHAB server and the star of the show a google home device.
[00:42] The links to all the devices, parts and guides mentioned are in the video description. Speaking of links in the description, follow @mksmarthouse on twitter, instagram and snapchat because those are the place where I give sneak peaks on when videos are releasing and also
[00:55] where I ask for your input on topics and future videos. Lately I have also been posting things that only a true smart home enthusiast would appreciate. For this guide I am going to assume you already have the google home installed and it is running
[01:08] perfectly using the setup instructions google provides and you can control it and can access I am also going to assume that you have a items file and a rules file. If you do not then go take a look at my video where I explain how to setup the configuration
[01:23] I will not be making two separate videos using Mac and PC because the process is really similar the only difference is that on mac you use Terminal to ssh and on PC you use putty.
[01:37] of the smart home community then check out smarthousesociety.com for premium quality Supplies are limited so check out the link in the description now!
[01:51] I recommend having my website guide open when you do this so that way you can just copy Now type in sudo nano /etc/openhab2/items/home.items and press enter.
[02:07] Now we are going to add the tags that the Google Home supports to the items. The Google Home supports the following tags. [ “Switchable” ] This tag is used with the Switch item type, Dimmer item type, Color
[02:20] item type, as well as the Rollershutter item type, but you would not use this for a light [ “Lighting” ] This tag is used for lights with the Switch item type, Dimmer item type, [ “CurrentTemperature” ] This tag would be used with a device that reports temperature
[02:37] [ “Thermostat” ] This tag is used with an item that has a Group item type and has the following devices in the Group [ “CurrentTemperature” ] [ “TargetTemperature” ] [ “homekit:HeatingCooling”
[02:50] ] I personally do not use the tags associated with the Thermostat and have never used them but if you want more information on them then check it out the github, link is on my website, I just use the Lighting and the Switchable one, in the future we may be using the Current
[03:06] Alright let's take a look at my items file because I have already put in the tags. As you can see I put the Switchable tag next to the items that are the Switch item type I also put the switchable tag into the GarageDoorShutterDummy items because they are of the Rollershutter
[03:25] Rollershutter GarageDoorShutter1Dummy "Garage Door 1" <garagedoor> [ "Switchable" ] I created a dummy switch for the garage doors because chamberlain myq does not like the command it receives when the google home talks to it so I created the dummy Rollershutters
[03:39] I will talk more about this later. I also used the lighting tag for my color led strips. If you guys have any questions on these tags leave them in the comments because chances
[03:54] are someone else probably has it too. Anyway once all your tags are in place, press control x then y and enter to save.
[04:06] it uses percents so let’s fix it. This step is optional and only if you have a Rollershutter item that needs on and off Type in sudo nano /etc/openhab2/rules/home.rules and press enter.
[04:20] rule "Garage Door 1 Voice Control" when sendCommand(GarageDoorSwitch1, ON) } I pasted it in twice and modified it because I have two garage doors.
[04:35] All this rule is doing is taking the percent from the dummy items and then either sending If your device requires up or down then change the ON to UP and OFF to DOWN. Now press control x then y and enter to save.
[04:50] The items are now ready, so the next thing we are going to do is connect the Google Home. So grab your mobile device that already has the Home app installed and open the app. 10.
[05:03] In the bottom right click on the plus sign. It will bring up a list smart devices you can add to the google home, scroll down and It will open up a web browser page, so type in your myopenhab.org username and password
[05:19] It will load a new page, press allow. Once that is finished it will say something like authorized or connected. After it will show you all of the items it found, if you want you can go through and
[05:31] Then hit done. The google home now has access to all your devices and you can control them with voice “Ok google, turn on MK Light” “Ok Google, set Garage Door 1 to 0%” “Ok Google, turn
[06:06] on Sprinklers Zone 1” “Ok google set Desk LED Strip to Blue” “Ok google set MK Blinds
[06:35] to 100” Great! The device is connected and working! That concludes this complete guide to connecting the google home to openhab 2.
[06:51] In the description you will find links to all the parts and devices used in the video as well as a link to mksmarthouse.com/shop where I have a wide range of smart home kits that you can put together such as blinds, led strips, sprinkler system and door sensors.
[07:06] section below or head over to mksmarthouse.com/forum. Good Bye!




⚡ Saved you 0h 07m reading this? Transcribe any YouTube video for free — no signup needed.