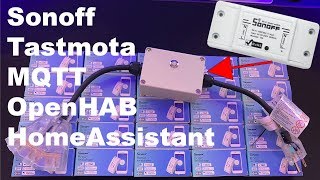

DIY Smart Plug: What You Need
45sQuick overview of tools and requirements hooks DIY enthusiasts and smart home beginners.
▶ Play Clip"Delivers a thorough, step-by-step guide as promised, though sponsor segment and repetitive explanations add some padding."
This video is the third part of a four-part series on building a DIY smart plug using the Sonoff Basic R2. It focuses on the software side: flashing the device with Tasmota firmware, connecting it to an MQTT server, and integrating it with either OpenHAB or Home Assistant. The tutorial covers hardware setup, firmware flashing, Wi-Fi configuration, and MQTT setup, followed by detailed integration steps for both home automation platforms.
The Sonoff Basic R2 is a popular device in the smart home community, used to turn on/off any plugged-in device. It works with Home Assistant, OpenHAB, Siri, Amazon Echo, and Google Home.
PCBWay is a company that offers PCB prototyping, SMD stencils, and PCB assembly. They are having Christmas coupons, and using the code on screen gives $5 off. Link in description.
You need an OpenHAB or Home Assistant server with MQTT running. Tools include an Arduino (Uno or Mega) as a serial-to-USB converter, jumper cables, a mobile device (iOS/Android), and a computer (Mac/Windows).
The creator offers pre-flashed and assembled options on his website, allowing viewers to skip flashing and go straight to setup.
The video will cover flashing Tasmota firmware, setting up MQTT, and connecting to OpenHAB/Home Assistant. A giveaway for a fully assembled and flashed Sonoff Smart Switch is announced.
Go to the website, download the Tasmota firmware file, and download the 'py flasher' program (works on Windows and Mac).
Connect Arduino to Sonoff: jumper between reset and ground on Arduino, then connect 3.3V to first pin, RX to next, TX to next, and ground to last pin. Plug into computer while holding the button to enter programming mode.
In pyFlasher, refresh, select the new device, browse for the firmware file, set baud rate to 115200, select 'dual output', wipe all data, and click flash.
After flashing, unplug and replug to get a green light. Press button 4 times to enter AP mode. On mobile, connect to the 'sonoff-xxxx' Wi-Fi, enter 2.4GHz SSID and password, set hostname, and save.
In a web browser, go to http://<hostname>.local to access the Tasmota interface. Configure module: set GPIO for sensor to relay 2 to control the button.
In Tasmota, go to Configuration > Configure MQTT. Enter the host (IP of OpenHAB/Home Assistant), port (default), and topic (e.g., 'sonoff-basic-2'). Save.
Use MQTT.fx to connect to the MQTT broker, subscribe to '#' to see all messages. Publish to 'cmnd/<topic>/power' with 'on'/'off' to control relay, and 'power2' for LED.
SSH into OpenHAB server, edit items file, add switch items for relay and LED. Use MQTT binding with topics matching Tasmota. Set auto-update false for two-way communication.
Add items to sitemap for UI control. Create rules to sync LED with switch and schedule on/off times using cron expressions (e.g., 5 PM on, 11 PM off).
In Home Assistant, go to Config > HACs > Configurator, edit configuration.yaml, add MQTT switch entries for relay and LED. Validate config and restart.
Create automations to turn on/off LED when the switch is toggled. Use state triggers and switch.turn_on/off services with service data.
Use customization to hide LED entities from the UI for a cleaner look.
The creator couldn't figure out time-based automation in Home Assistant and asks viewers for help in comments.
The Sonoff Basic R2 is successfully flashed with Tasmota, connected to MQTT, and integrated with both OpenHAB and Home Assistant. The next video will cover the physical deployment and connecting the ends.
What is the Sonoff Basic R2?
A popular smart home device that can turn on/off any plugged-in device, works with Home Assistant, OpenHAB, Siri, Amazon Echo, and Google Home.
00:29
What is the purpose of the Arduino in this tutorial?
It acts as a serial-to-USB converter to flash the Sonoff with Tasmota firmware.
02:20
How do you enter programming mode on the Sonoff?
Hold down the button on the Sonoff while plugging it into the computer via USB.
08:01
What settings are used in pyFlasher to flash the Sonoff?
Baud rate 115200, dual output, wipe all data, and select the firmware file.
08:30
How do you enter AP mode on the Sonoff after flashing?
Press the button on top four times when the device has a green light.
09:31
What is the default topic for the first Sonoff Basic?
sonoff-basic-1
12:50
What command topic controls the relay in Tasmota?
cmnd/<topic>/power
14:20
What is the purpose of setting auto-update false in OpenHAB items?
To prevent OpenHAB from changing the icon/status unless it receives a status back from the Sonoff, ensuring two-way communication.
18:20
How do you schedule automatic on/off times in OpenHAB?
Use cron expressions in rules, generated via cronmaker.com.
22:25
What is the state topic in Home Assistant MQTT configuration?
It indicates whether the device is available and expects a command back when a command is sent.
25:45
Sonoff Basic R2 Overview
Establishes the device's compatibility and purpose, setting the stage for the tutorial.
00:29Flashing with pyFlasher
Provides exact settings for successful flashing, a critical step for beginners.
08:14MQTT Configuration
Shows how to connect the device to an MQTT server, essential for home automation integration.
12:07Two-way Communication in OpenHAB
Explains the importance of auto-update false for reliable state synchronization.
18:20Time Automation Limitation
Highlights a common challenge in Home Assistant and invites community solutions.
31:02[00:01] society met here from MK smart calm and in this video we're gonna be covering the software for this the sawn-off DIY the software for this the sawn-off DIY smart blog so the sound off basic smart
[00:29] plug is a cheap DIY smart home device that I show you how to make which means there will be four videos demo hardware software and deploy which you can see right here this is the third video these software video where I show you how to
[00:43] flash the device with desmona firmware and how to connect it to openhab and know the sawn-off smart plug is a device that you can turn on and off anything that you plug into it it works with homelessness and openhab siri amazon
[00:57] echo and google home for more info and to see it in action you can check out the demo video which is in the cart right here the brains of this device is the sound off basic r2 which is a popular device in the smart home
[01:10] community another thing that's popular in the smart home community is PCB way those of you that don't know PCB way is a company that makes prototyping very a company that makes prototyping very easy they offer PCB prototyping SMD
[01:25] stencil and PCB assembly and right now they are having their dazzling christmas coupons so i'm a PCB wage website right now i'll leave a link in the description not only this PCB way already have great prices for PCBs and everything that they
[01:41] do but right now you can use any of these coupons which are pretty good and check them out they're also going to be giving away gifts to random people so go ahead check it out link in the description below and also you can use
[01:55] the cash code on the screen now to get $5 off your order and I'd like to thank PCB wave for sponsoring this video and continuing their support of my channel so what are the requirements for this video well you're either going to need a
[02:07] open app server or a home assistant server this works on both and on each one of these you need to have and UDT up and running but moving right along what tools are we gonna need well you're gonna need an Arduino of some
[02:20] kind this community in uno or Omega this is going to be our serial to USB converter and you're also going to need some jumper cables which I've already them later you're also going to need a mobile device that is either iOS or
[02:34] Android and lastly you're obviously going to need a computer which can be Mac or Windows I won't be making separate videos on each one because it's it out links to all the parts and tools are on my website which is in the
[02:48] description below also on my website for your convenience I have a kit with everything you need to make this device except for the extension cord part I cord options in the description below I don't include the extension cord for
[03:01] two reasons I ship worldwide so yes I ship to your country wherever you may live and so second you can choose to whatever end type you want so for at the end you know if three sockets one socket all up to you so you can provide
[03:15] your own extension cord I don't have many available so if you want one go ahead and check it out now I also have an assembled option well put it all together for you and so you can skip the other videos and go right to this one
[03:27] and I also have an option where I can flash taz nota firmware for you so we can skip the next part in this video as well and go right to connecting it and setting it up with open up more home assistance also if you get the assembled
[03:40] extension cord ends if you pick up a kit you can follow along with all the videos and again you can go to MKS marcom slash shop and pick one up and I have fast USA smart house on Twitter Instagram and snapchat because that's where I post
[03:56] things when I'm not on the YouTube channel as well as things that true SMO enthusiasts would appreciate so right here you will see everything we will be timestamps so that way you can skip to whatever parts you need I'm gonna be
[04:09] doing everything in one videos that way you have one central place to look for doing is talking about the giveaway that I'm gonna be doing with this sawn-off device a second we're going to flash the sound off with hezmana firmware then
[04:23] we're going to set up and connect the song off to the MQTT server of which would be the either open app or home assistant depending on your the device in openhab and lastly configure the device and home system so
[04:36] jump to whatever parts you may need for example if you bought an assembled with tez Moda you don't need to watch how to flash the tez Mota instead you just need to watch the setup and connect to the MQTT server and then either open have
[04:49] need to watch the setup to connect it to your mqtt server of choice and you need assistant from now on every device that I show you how to make I will be giving
[05:01] away so for example right now we're gonna be giving away the son off Smart Switch not this one exactly but one without the ends and this is going to be a fully assemble to fully flash with tez moto so all you're gonna need to do is
[05:14] provide your own ends 10 or the giveaway it's really simple go to the link in the description below and it has all the details there and there's multiple ways you can get entries so we have a great chance of winning so good luck to
[05:26] how to flash these on off alright so the first thing we're gonna do is head over to my website link is a description and we want to go to the written guide for this video that I'm making then we wanna head over to links scroll down and enter
[05:43] for an email address is if there's a future tab motive for more that I like then I'll go ahead and update it and let you know then just click download file go to the download page and click the green download button alright it's
[05:58] downloaded the next thing you're gonna need is a program called PI flasher it's called py flasher and so if you don't have it go ahead and go to this link and download it to your computer it works on Windows and Mac so now we're gonna go
[06:14] ahead and open PI flasher I have it down here in my dock because I use it so much so next you want to click on the drop down or remember what devices are in this list now we need to connect the Arduino to the sawn-off so I'm going to
[06:31] Arduino to the sawn-off so I'm going to move that around ok so to get the Arduino situated you want to first put a jumper in between jumper in between reset and ground on the Arduino right
[06:46] there reset and ground and now you just want to match them all up so next thing we're gonna do is 3.3 volts alright so I've gone ahead and put this orange cable into 3.3 volts then I'm going to put it into the first pin of the
[07:02] sawn-off so I've pulled up the pin out for your convenience which is on the screen right now and we're just gonna match up the pins from the Arduino to the sawn off so I'm going to take this this gray cable and put it from rx on
[07:15] this gray cable and put it from rx on the Arduino to the next pin on the Sun off then I'm going to take at this purple jumper put it from TX and put it on the next pin on the sawn off and lastly gonna take this green one
[07:30] and lastly gonna take this green one from ground and put it in the last pin so basically you just need to match them all up 3.3 to 3.3 on the sawn-off etc
[07:46] now we're going to plug it into the computer so I have the USB from the Arduino and then my computer right here you can either hold down the button on the sawn-off itself which I've right here or you can hold down the button on
[08:01] the panel I'm just gonna hold the panel and then you want to hold it and then and then you want to hold it and then plug it into the computer so that way it goes into programming mode alright now we're back to the PI flasher click this
[08:14] little refresh button and go to the drop down and you should see a new device right here then you're going to browse for a new firmware go to your downloads folder and click on the sell off bin file click open you want to keep it 11
[08:30] file click open you want to keep it 11 5200 change it to dual output and yes 5200 change it to dual output and yes wipe all data and click flash alright it finished flashing and now that it's done flashing you can unplug it unplug the
[08:46] Arduino and then plug it back in you'll see it flash a little bit but that's it firmware now we're gonna go over and set it up using our mobile device alright at this point we are going to be setting up the
[09:01] sawn-off now if you bought a pre flash sawn-off from my website or assembled then you want to skip to my final or deploy video and watch how I connect the deploy video and watch how I connect the ends so that would be like this so in
[09:16] these and then jump back to this video and how to set it up because you're ahead and then I connect it to power but if you didn't get it pre flash from my website simply unplug and plug back in the USB and you want to get it to where
[09:31] it is a green light okay so once you have a green light press the button on have a green light press the button on top four times and it will start flashing now on your mobile device I have my iPhone right here go into
[09:47] settings and then go to Wi-Fi as you can see a device called sawn-off seven two to six came up you're gonna click on it and then a portal should pop up there we
[09:59] go alright now for a p1 SSID you want to type in your 2.4 gigahertz Wi-Fi SSID actually I forgot you can click scan for Wi-Fi networks and it will scan it'll
[10:11] find so you want to click on your Wi-Fi and then you want to type in the password alright and then at the bottom you can change the host name make sure you remember what your host name is so I'm gonna call mine m'kay - sawn-off
[10:26] basic - since I already have one sawn-off basic which is the one with the clear end alright and then just click Save and the device should restart over
[10:38] there and the Wi-Fi network should disappear alright the Wi-Fi network has disappeared so I'm going and the screen recording and we are done with using a mobile device now we're gonna go over to a web browser and you want to go to HTTP
[10:55] colon slash slash and then you want to do the hostname that you typed in at the bottom of when you set up the sawn-off so I did m'kay - sawn-off basic
[11:08] to dot local and click enter and there we go the Taz motive firmware is up and running super simple very easy to do ok so now we're going to go to configuration and then we're going to configure module and
[11:25] you want to make sure the GPIO for sensor is set to relay 2 so this is so that way we can control the button right here on the lid click Save it'll restart
[11:39] the Sun off alright so I'm going to go back to the main menu and there we go we back to the main menu and there we go we have two toggles what to actually turn off the relay and so if I click toggle to the ring on the button turns blue and
[11:55] then we just turn it off so this button is now the ring is now MQTT controlled speaking of let's now configure the MQTT so go back into configuration then go to
[12:07] so go back into configuration then go to configure MQTT and then here you want to type in the host so this can either be the host name of your open app server or your home assistant server or if you have an external MQTT server but for the
[12:21] purpose and make it easy we're just gonna say the hosts are the IP address of your open app server or home assistant so I'm gonna type in mine port know but otherwise I'll just leave it at default yep yep yep topic I'm gonna call
[12:37] default yep yep yep topic I'm gonna call it
[12:50] since this is my second one I'm gonna make it too but if this was your first one you can just leave it at sawn-off basic one all right and then click Save all right so mqtt is now saved to your device I'm gonna go to main menu and
[13:03] there we go we're back to the main so in theory right now the sound off basic is all set up but let's go ahead and test out the MQTT and make sure it works so I
[13:15] have a program called MQTT dot FX and this is like an mqtt it you can send commands and you can receive commands it basically taps into your MQTT server and
[13:27] then you can see all the commands if you want to see more detail about MQTT dot effects and check out my door sensor software video it's in the beginning of my channel I cover mqtt effects how to set it up and all that so all I'm gonna
[13:41] do in mqd d etat effects make my broker address the IP address of either a home assistant or openhab all this is fine click apply I'm gonna click cancel and
[13:53] then I'm gonna connect it's green so successfully connected then I'm going to subscribe so that way I can see and type in the pound symbol so I can see everything that goes in and out so now if I press the power button on the song
[14:07] if I press the power button on the song off basic I'll see that the relay turned off basic I'll see that the relay turned on and turned off so it shows you everything that goes through but if we want to turn on the relay so to turn on
[14:20] the relay you want to do command and then the topic that you typed in the MQTT settings when you set up this on/off so mine is actually 2 and then you want to do slash power and this controls the relay and then just type on
[14:35] controls the relay and then just type on and you will see the light turns on and was the relay now if we want to turn on the button you just add a two to the end and then click publish and you can see the LED ring
[14:49] publish and you can see the LED ring turned on and you can reverse it by turning publishing off and it's just power and there we go they both turned off so there we go the sound off basic is now connected to our Wi-Fi
[15:04] off basic is now connected to our Wi-Fi and to our and qtt so at this point you want to either watch the openhab part or the home assistant part alright so now we're going to connect the sound off basic device to openhab and to do this
[15:17] basic device to openhab and to do this we want to first go to terminal and ssh into our open app server alright i've ssh into my open happy in' or open app server i'm gonna put that off to the side and so I recommend having my
[15:33] side and so I recommend having my website open up right here and then you want to go to software link is in the description below and I recommend having it open so that way you can see all of these all of this code and everything
[15:47] thing we want to do is go into the items file and create an item for both the button and the relay on the sawn-off so we're just going to copy this right here type it in and press Enter
[16:02] type in the admin password so this is the items file now I'm going to scroll down and as you can see I already have one sawn-off basic that is the one with the clear plug and so what I'm going to do is just simply copy this but if this
[16:18] include this comment just so you can have some organization and then I'm have some organization and then I'm going to go below this one so you can see it right there and then I'm going to change all the ones to two's but if this
[16:33] is your first one and you're following exactly then you can just keep it at once alright I've changed all the ones to twos in my second item so as you can see I have my first signup basic so this is
[16:45] Christmas lights one and then I have my second one which is Christmas lights too so let me explain a little bit of what everything is so first both of these are switch items then this is their item names this one is not going to be seen
[16:59] in the user interfaces so I didn't give it a nice little text but I did for this one so this one is Christmas lights one this one is two you can change this to one you want say you had it connected to a coffee maker you can name it coffee
[17:13] maker and then I gave it the image of a power outlet us if you go to openhab items you can see all the different I mean go to open have icons you can see all the different icon names that you can have and then I gave each one a
[17:28] switchable tag so I can control it from either the Google home or the Amazon either the Google home or the Amazon echo and then here is the mqtt echo and then here is the mqtt information so we're using the MQTT
[17:40] binding we are sending a command and then this is the topic we're sending it to this is the actual topic that you typed in when you set up the mqtt on the
[17:52] sawn-off so remember when we call the Sun off basic one or actually no we called it sound off basic 2 so this is the part you would change if you wrote with something else there and then we have power this is the relay and power 2
[18:06] have power this is the relay and power 2 which is the LED ring then the next part is where openhab receives a command or the state of the item or the the sound the state of the item or the the sound off basic device so if it it goes on a
[18:20] 2-way basis when you send a command it expects a command back saying that it did indeed update so you have some two-way communication and which is why we have auto update false so won't change openhab the actual icon and the
[18:34] status unless we receive a status back from the sound off alright that's it for the items file so press control X Y and enter next we're going to port the items into our sitemap so we can see it and interact with the button so we're gonna
[18:50] interact with the button so we're gonna go back to here and copy this command so we're gonna copy this right here we're only going to be importing the
[19:06] that's what we're gonna be controlling we don't really need to control the led that'll be automatically done in our rules file and because there's really no need to manually turn on and off the LED and change the 1 to a 2 so he
[19:23] I said it's a switch itemtype I put it in my demo frame because it's a seasonal thing but maybe eventually I'll put it in like one of my rooms or something in a different frame so I got a sign up basic one and some basic two and each
[19:35] one of these are switches let's now press ctrl X Y and enter and you know what let's go ahead and see how they look I'm going to go to my
[19:47] interface and I'm gonna go to basic UI because it's pretty easy to look at and here we go we got Christmas lights too right here there we go see it controls the LED light which controls the relay so now let's control this LED ring right
[20:04] here as well as give it another rule where it'll automatically turn on and automatically turn off the entire device so that way say for example I'm gonna have this outside in my Christmas lights so I want the Christmas lights to turn
[20:16] off on at 5:00 and off at 11:00 so let me go ahead and show you how to do that oops I forgot to add it in here into the guide I'll have it there before you guys see this video but anyway you want to go to you want to go to your rules file
[20:30] I'll update the command and the guide all right here is our rules file and so as you can see I have it for the first Sun off but I'm gonna do it for the other one all right sorry guys about the webcam I didn't notice that it went a
[20:45] webcam I didn't notice that it went a little bit yellow on you anyway so for the rules I'm not gonna do all of these because I already have these so I'm just gonna add on to it but you'll see what I mean but if this is your first Sun off
[20:57] basic then make sure you have all of these unless you don't want to one that you really do need is this one right here the Sun off LED button so I'm gonna put this at the bottom down here and then I'm gonna change all the ones
[21:14] to choose all right so what does this do exactly so this detects if the switch and openhab change to on or off and if it notices that it did change then it
[21:26] will turn on and off the LED accordingly so say an open up you turn on this switch when you turn on this switch then the blue LED ring will also turn on and vice versa if you turn it off the which then this LED ring will turn off
[21:40] this one does now this one right here I'll move it over in the middle yeah there you go so what this Christmas lights on at 5:00
[21:53] p.m. what this does is at 5:00 p.m. it will turn on a sawn-off basic one and at it'll turn off sawn-off basic one so I'm gonna add on to it and control the second sound off as well so I added on to it and I said to also turn off turn
[22:09] on the sound off basic two and turn off sonic basic sawn-off basic two so add on sonic basic sawn-off basic two so add on so it controls both sound off basics now to change what time then you want to go to a website called cron maker comm and
[22:25] then here this is where you generate your cron expression because this part right here this is called a cron expression this controls when it turns on and off so say I wanted it every every week once a week and Tuesday and
[22:39] every week once a week and Tuesday and Thursday and I wanted at one o'clock I'd Thursday and I wanted at one o'clock I'd click create cron expression copy this click create cron expression copy this part and paste it in right here in
[22:51] part and paste it in right here in between the two parentheses all right that's it now press ctrl X Y and enter and now I'm also going to restart openhab just so everything is saved and synchronized all right
[23:05] so now that I will put this restart command also on my god I forgot to put it in but by the time you see this it'll be down here anyway so now that openhab is restarted let's go ahead and open it open back up the basic UI and if we so
[23:21] open back up the basic UI and if we so now if we turn on the switch both the relay turns on and the ring turns on and the same thing we can press the button the same thing we can press the button the ring turns off and so does the relay
[23:36] BAM so there we go thus on/off basic is now fully connected to openhab and we have a rule set in place where at 5:00 p.m. it'll turn it on and then not 11:00 p.m. it'll turn it off so at this point you
[23:50] the sound off basic is fully connected to open hub we also made a roll where it controls the LED ring and it automatically turns on at 5 p.m. and off at 11 p.m. and I also showed you how to change it so you can skip to the end of
[24:06] the video for the closing remarks and where to go from here ok so now we are going to connect the sound off basic to home assistant the first thing you want to do is go to your home assistant IP address mine is right there alright once
[24:21] you're logged in go to the 3 to the menu on the side by clicking the 3 lines go to config go to haseo go to the configurator and open the web UI login
[24:33] and click sign in alright once you're signed in we're going to go to the configuration yamo file and then scroll down to the bottom
[24:45] so as you can see I already have the sawn-off basic one stuff so I recommend having my website open up to the guide link is in the description you want to be on the software tab and then you want to scroll down to where it says home
[25:00] assistant and the configuration demo file and then you're simply just going file and then you're simply just going to copy what's here and paste it in so I'm gonna put it underneath the 1 BAM and now I'm gonna change all the ones to
[25:15] two's since this is my second SoundOff basic my first sign-off basic was the one with the three plugs on the end that clear one which is my personal favorite one alright so let me go over what we did I'm gonna go over the sign up basic
[25:29] probably gonna be doing you're gonna be doing your first one so we're using the Christmas like one you can change this to whatever you want like coffee maker if you plugged into like a coffee maker this is the state topic so this is
[25:45] this is the state topic so this is whether this is if it's available and if you send a command it expects the command back and so this part right here this is what we typed in to the sawn-off basic when we set it up the MQTT
[26:00] settings so you'll want to make sure that is the same thing as here and goes for all of these all right so this is where we send commands this is if it's available to be sent or if it's online that's what's cool about home
[26:12] assist and you can see whether device is online or not we're gonna be telling you when we turn on we want to send on and when we turn off we want to send off and then this is the LED it's basically the same thing once that's all done just
[26:25] click the Save button then we're gonna go back into home assistant go over to configuration and then we want to go to general and validate the config all checks out and now we're going to restart home
[26:41] assistant alright and then you want to go to go to the homes that way you can see all the items and if I press the switch for Christmas light to the LED turns on and a slight click comes from the relay and if I click Christmas light
[26:57] the relay and if I click Christmas light to LED the ring on the cover comes on or the button but what we want to do is make it so I when we turn on the device then it also turns on the LED so it'll be like our status indicator so we need
[27:10] automation so we're gonna go to configuration then we're gonna go to automation and as you can see I have done this already for the first sign up for the second one alright so the first thing we're gonna do is turn on the LED
[27:26] right here so the first thing we have to do is name the automation I'm going to do is name the automation I'm going to call it sawn off basic two LED on and
[27:41] then I'm gonna say it's a state and it's going to be the entity of oh there we go and then you want to scroll down till you find Christmas light too because
[27:55] it's gonna be for the second sama basic this was the first one you would say that it's your first one so you would sell them up basic one LED and look for Christmas light one or whatever you called it and we are looking from off to
[28:07] on and then we're gonna scroll down to action and call service and we're gonna action and call service and we're gonna say automation dot turn on or no my bed say automation dot turn on or no my bed and we want to go to switch dot turn on
[28:22] and now we're going to need the service data to find that go back to your home assistant open up a new tab and go to the main page again then you want to go
[28:35] to developer tools click on this little remote thing and then you want to for remote thing and then you want to for the service you want to go to switch dot turn on and then you want to click on the entity and we want the Christmas to
[28:49] LED and there we go so now just copy this go back to your automation and this go back to your automation and paste it in for service data once all of that is set you just click the Save button and I can go back now we need to
[29:04] button and I can go back now we need to do the same thing for off so click on do the same thing for off so click on the plus call it sawn-off basic to led the plus call it sawn-off basic to led off we're going to do make sure the
[29:19] trigger type is state we're gonna do entity Christmas light to from on to off and then we want to do these for the action we want switch switch dot turn
[29:36] off and then go back to the other tab that you had and you want to do switch that you had and you want to do switch to turn off go back we want to call the to turn off go back we want to call the LED entity copy this go back for the
[29:53] service data paste it and click Save alright let's test it out there we go so when we press the button the ring turns on and so does the relay press the
[30:06] button ring turns off so does the relay and we can even test it out from the and we can even test it out from the actual home page so let's go ahead and actual home page so let's go ahead and turn on the Christmas light too so what
[30:21] I did was I went ahead and I hid the LED for the Christmas light and you can do the same I hid the LED for the Christmas light one
[30:33] so to do that you want to go to customization and then you want to go to customization and then you want to go to the Christmas light to LED pick an the Christmas light to LED pick an attribute hidden hide from you I click
[30:46] Save and then if we go back to the home it's hidden just so that way it's a little bit cleaner I also went ahead and hit all of these automations to I hid the LED automations alright so one thing is that I could not figure out how to do
[31:02] is that I could not figure out how to do is how to have the sawn-off basic turn on automatically at a certain time from home assistant I'm still a little bit new to home assistant this is one thing that I haven't touched too much with
[31:16] that I haven't touched too much with what is the time automation so this is what I have I couldn't get it to work maybe you guys know how to get it to work if you can let me know in the comments below and if so I'll pin your
[31:29] comment is that way other people can see how to do it otherwise that's it we've connected the sawn-off basic smart plug device to both openhab and home assistant so that's it the device software is done and next video we will
[31:44] talk all about the deploy and how to connect the ends and how I use it in the find links to all the parts and devices used in the video as well as a link to
[31:56] MK smart accomplish shop where I have a wide range of smart home kits you can wide range of smart home kits you can put together such as this one or if you found this video helpful click that like button and if you are smart you belong
[32:09] on this channel so hit that subscribe button if you have any questions in comment section below or head over to the community forum @ MK smart comm slash forum good bye [Music]




⚡ Saved you 0h 32m reading this? Transcribe any YouTube video for free — no signup needed.