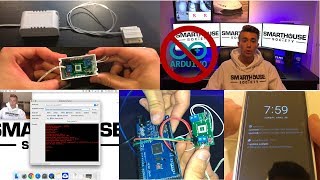

Upgrade Your Door Sensor Firmware in 30 Seconds
38sShows a simple browser-based firmware update that makes smart home tinkering feel instantly accessible.
▶ Play Clip"Delivers exactly what the title promises — a complete, cross-platform guide with only minor sponsor interruptions."
This video is a full walkthrough of the MK Door Sensor v2, explaining how to flash the firmware, configure the device through its Wi-Fi portal, verify MQTT communication, and integrate it with OpenHAB on both Mac and Windows. It also covers wiring an ESP-based sensor to an Arduino for flashing, plus setup of sitemap entries and notification rules.
The MK Door Sensor is built on a custom PCB. The video is sponsored by PCBWay, a full-feature PCB prototype service offering stencils and PCB assembly in addition to standard boards.
Firmware v2 adds mobile-device setup through a Wi-Fi portal, MQTT authentication support for secured servers, and a status portal that shows the MQTT subscribe topic, update path, and device settings.
You need an OpenHAB server with MQTT set up, a Mac or Windows computer for SSH (Terminal or PuTTY), an iOS or Android device for the sensor setup, and an Arduino with jumper cables only if the sensor is not pre-flashed.
From the MK Smart House links page, enter your email address and download the door-sensor-v2 .bin file. The email list is used to notify about future firmware releases.
V1 users can update directly on the device by visiting http://<hostname>/firmware, entering the username and password from the initial flash, choosing the new .bin file, and clicking Update.
The ESP Flasher (pyflasher) can be downloaded from GitHub for Windows or macOS and lets you flash the firmware directly without the Arduino IDE.
Set the jumper to PGM, bridge the Arduino reset-to-ground pins, then connect TX to TX, RX to RX, GND to GND, and 5V to 5V between the Arduino and the door sensor.
Select the serial port, browse to the firmware .bin, set baud rate to 115200, flash mode to dual IO, and erase flash to yes. Then click Flash and wait for the process to complete.
Use your phone to join the sensor's Wi-Fi access point, open the web portal, and choose Configure Wi-Fi to scan for your network. You can also use 'configure Wi-Fi no scan' for hidden networks.
Enter the MQTT server IP, port, subscribe topic (e.g. mk-smart-house/security/mk-door-sensor-2), and enable authentication if needed. Also set a username/password for the protected status portal and confirm the firmware upgrade URL.
Use MQTT.fx to connect to the MQTT server, subscribe to the # wildcard, and physically trigger the sensor to confirm it publishes 'open' and 'closed' messages.
Add a contact item to the OpenHAB items file with the MQTT binding configuration, then add it to your sitemap under a security frame so the door status appears in the Basic UI.
Add a rule in the OpenHAB rules file that sends a phone notification when the door opens while the security switch is enabled, making the sensor useful as a security alarm.
Unplug the sensor, plug it back in, quickly move the jumper from run to program, wait 10 seconds, move it back to run, and power-cycle again to return to setup mode.
The MK Door Sensor V2 is a practical, cross-platform smart-home upgrade that simplifies flashing, configuration, and OpenHAB integration. With the provided steps, even intermediate users can have a fully working door/window sensor with MQTT-based notifications.
What does the MK Door Sensor detect?
It detects whether a door or window is open or closed.
00:28
What extra hardware is needed to flash a non-preflashed door sensor?
An Arduino board and jumper cables.
03:20
What baud rate should be used when flashing the ESP-based sensor?
115200.
11:08
What flash mode is recommended in the ESP flasher?
Dual IO.
11:08
How do you turn an Arduino into a serial converter for flashing?
Jumper the reset pin to ground to bypass the on-board chip, then connect TX-TX, RX-RX, GND-GND, and 5V-5V to the sensor.
08:31
What URL do you use to open the firmware update page on a v1 device?
http://<hostname>/firmware
05:27
What is the purpose of MQTT.fx in the setup flow?
It connects to the MQTT server so you can subscribe to all topics and confirm the sensor publishes open/closed messages.
16:07
Which OpenHAB item type is used for the door sensor?
The contact item type, because it represents open or closed states.
19:04
What driver might you need for a Chinese clone Arduino?
The CH340 driver.
10:25
What is the full reset procedure for the door sensor?
Unplug it, plug it back in, quickly move the jumper from run to program, wait 10 seconds, move it back to run, unplug and plug it back in.
25:47
V2 adds browser-based setup and MQTT auth
This removes the need for serial configuration and makes the sensor accessible to less technical users while supporting secured MQTT servers.
01:24Exact pin mapping for Arduino flashing
Clear wiring instructions (TX-TX, RX-RX, GND-GND, 5V-5V, plus reset-to-ground) prevent one of the most common beginner mistakes.
08:03Web portal configuration replaces manual code editing
All Wi-Fi and MQTT settings are entered through a phone browser, dramatically lowering the barrier to entry.
11:36OpenHAB MQTT binding integration
The video shows the exact contact item configuration needed to expose the sensor in the OpenHAB UI.
17:28End-to-end automation with notifications
The rule example turns raw MQTT data into a real security feature, demonstrating practical smart-home value.
23:59[00:01] how society Matt here from MK smart house calm and in this video we're going to be talking about for more v2 for the door sensor those of you that don't know
[00:28] what my door sensor is it's like the name implies it's a door sensor it shows open or closed if you haven't seen my other videos on it there will be links in the video description or a playlist or a card to the playlist in the top of
[00:41] your screen as you may have noticed this device is made on a custom PCB people from and recently I've been getting my PCBs from PCB way PCB way has been in
[00:54] business for a long time and is a full feature custom PCB prototype service that makes high quality PCBs they also do SMD stencil and PCB assembly which other PCB companies do not offer PCB you it has the best value of fast
[01:09] turnarounds on time worldwide shipping and low minimums speaking of low minimums you can get 10 PCBs for $5 the link to PCB you a will be at the top of firmware for the door sensor you now have support where you can set up the
[01:24] device through your mobile device you just open up Wi-Fi it brings up a portal and you can set up the entire device I'll go over that later on in the video assistant but we won't be covering that
[01:36] I've shown you guys how to install home assistant on your Raspberry Pi or whatever your servers may be there's also a big thing which is mqtt authentication support which if you have a secured mq TV server you can now
[01:50] connect this device to your secured server there's also a status portal so server there's also a status portal so you can see what your MQTT subscribe topic is how you can update it what your settings are it's pretty cool I'll show
[02:06] you that also later on in the video so all the devices now on my website come pre flashed from the door sensor blinds draw all the devices they are now pre flashed that way if you buy a DIY kit all you have to do is solder all the
[02:19] then connect at your open half and you're done and if you got it assembled configure it and you're done now to celebrate this great achievement you can use the promo code b2 to get 10% off of your entire order on the website so
[02:35] after the video is done or right now if you want go to MK smiles.com slash shop and use promo code v2 at checkout to get 10% off your order that's a great deal you're getting a pre flash device or a pre flashed kit and you can connect to
[02:49] video you need to have a fully setup openhab server with MQTT you will need a Mac or Windows computer I won't be making two separate videos because it's very similar the only differences on Mac use SS terminal to SSH into your open
[03:06] app server and on Windows you use putty to SSH into your server I forgot to mention you are also going to need an iOS device or an Android device this will be used to set up the actual door sensor if your device is not pre flashed
[03:20] or you want to flash it again you will need an Arduino and jumper cables but but if you bought it pretty flashed or you have a device slash with firmware version 1 then you don't need it links to all the parts and devices used will
[03:35] be in the DV description also in the description follow MK strong house on twitter instagram and snapchat because that's where I give sneak peeks on a future videos and I post things that only a true smart home enthusiast would
[03:48] enjoy so now if you bought a pre flashed door sensor you can skip to this part on the screen now where we go ahead and set up the device using the web portal downloading the firmware uploading it to the device either manually through an
[04:03] the device either manually through an Arduino or through the web portal now version tube so the first thing we have to do is go to Google Chrome then we have to go to MK smart house comm and we're going to go to God's sensors and
[04:20] door sensor and then finally links instead of you guys clicking I will leave a direct link in the video description so you don't have to do all of it alright so now we are in the links page so you
[04:33] want to scroll down and then where it says m'kay - door sensor B - firmware and then here you want to type in your email address the reason I asked for an email address is so that way if I ever released a new firmware I can go ahead
[04:48] firmware available and you can just download it right away then you want to click download file and then click on click here to go to downloads page and
[05:01] then you want to click on this green download button it'll download the download button it'll download the firmware and boom you got it downloaded
[05:15] the version 1 firmware installed then all you have to do is go to that devices update page so what that is is HTTP colon slash slash and then they hostname
[05:27] or IP address of the device so mine is m'kay - door sensor - and then dot local to write down local and you go to slash firmware so what this is going to do
[05:42] update page and then it's going to ask us for the user and password to update it and this username and password you get when you first flashed it so if you have the v1 firmware this is what you typed into the Arduino file and so you
[05:58] want to just type in that username and password and click Sign In boom it grants you access to the page now we're going to click Choose file go to our
[06:10] downloads folder and click on the m'kay door sensor or v2 dot bin file and click and then now we're going to click update so now what it's doing is you can see
[06:22] there is some percents at the bottom of the page what it's doing is updating device flashing the new firmware and then once it's done that you'll have the new firmware and then you can just set up the device now it is rebooting and
[06:36] going to download the program that will directly flash my firmware on to the door sensor so that way we no longer need the Arduino IDE and it'll just be a direct download so what we want to do is head over to the links page again on my
[06:53] head over to the links page again on my website and scroll down to PI flasher flasher then you want to go to their github and as you can see these are the latest releases all right so you want to download the one according to your
[07:06] operating system so if you're running 64-bit windows you want to download this 186 bit windows this one and then if you're on a Mac you want to download the dmg file so since I'm on a Mac I would click this one and then you want to go
[07:20] through the entire software installation routine that they have I already have the software so I'm not going to download it and so once it's downloaded you want to go to your Launchpad or wherever it is and open it
[07:33] mine is right here if you're on Windows you can type it into the taskbar of the search bar and it should pop up alright so let me go over how this all works so the first thing is your serial port this is where you choose which port on your
[07:47] computer is the actual ESP or door sensor device so remember what is on sensor device so remember what is on this list and now we're gonna go over and connect the door sensor to the Arduino alright so now we are going to
[08:03] connect the door sensor to the Arduino so the first thing we want to do is make so the first thing we want to do is make sure the jumper pin is over PGM or program this will put the ESP into programming mode see it's over program
[08:16] programming mode see it's over program now we the Arduino we need to make sure that turn this basically into a serial converter so you want to take the jump converter so you want to take the jump the pin from reset to ground and this
[08:31] the pin from reset to ground and this will bypass the on-board chip and we'll just use as a serial converter now we want to jump the pins so we want to put from TX to TX so let's go ahead and actually you know it's color code that
[08:45] actually you know it's color code that so we're going to take a 2 pins from TX so we're going to take a 2 pins from TX and rx go ahead and plug that in there you need to use a little bit of force so this pin is TX so we're going to go
[08:59] ahead and connect that to the TX and then this one is rx so we'll connect that to rx so many wires are getting jumbled up
[09:12] connect the ground pin so plug in and ground over here and connect it to over here the ground pin on the Arduino and then finally take the jumper and put it
[09:26] from five volts over here to five volts on the Arduino so basically all the pins should match up which they do give you guys a little close-up over here see TX
[09:39] 2 TX Rx to rx ground to ground and 5 volts 1 2 5 volts and also don't forget about the jumper from re s to ground now that it's all connected we can go ahead and plug it into the computer now that the device is connected through the USB
[09:55] port through the Arduino click this little refresh button click on the drop down and as you can see there is a new device here now if you don't see a new device here that is because a couple things some of your connections might be
[10:09] off I would check those again in between the Arduino and the door sensor also make sure the USB cable is plugged in and if none of that works then you might not have the driver for your Arduino for the serial chip so if you have a Chinese
[10:25] Arduino like me then you need this special ch3 for one driver and download special ch3 for one driver and download this just and go through yeah basically if you're on Windows it should be no problem and you shouldn't be having this
[10:39] issue all right so now that we've got our device connected the next one is the choose the firmware we're going to flash so click the Browse button go to your
[10:51] so click the Browse button go to your downloads folder and click on the firmware so that would be the door sensor v2 dot pin file click open now the next one is the baud rate and you want to click 11 5200 flash mode do dual
[11:08] want to click 11 5200 flash mode do dual IO and erase flash click yes just to make sure it's a clean and nice install and now finally just click flash note MCU it'll connect to the chip figure out all of its settings
[11:23] right now it's erasing the flash it says it'll take a while but it doesn't really it'll take a while but it doesn't really take that long and now it is flashing the firmware onto the chip alright that's it firmware is flashed now let's
[11:36] go ahead and set up the device if you're our smart home enthusiast like me and of the smart home community then check out smart a society com check out the link in the description and grab yourself a premium quality
[11:49] hoody shirt or hat all right now let's go ahead and set up the actual door sensor I have my door sensor plugged in ready to go it is in the run mode then
[12:01] can be I O S or Android you want to open it up to settings and then go to Wi-Fi you should see the door sensor yep there it is click on it it will now bring up
[12:15] it is click on it it will now bring up the web portal there it is and then so let's go over the things that are into the web portal the first button is configure Wi-Fi this is the button will press after I go over all the buttons
[12:27] and this will scan for the Wi-Fi in all of our settings the next one is configure Wi-Fi no scan so this is the option you would click on if you have a hidden Wi-Fi network where there is no SSID broadcast the next button is info
[12:43] and this one just shows you some info about the device the chip ID flash chip ID a bunch of settings you don't really need to know them and then the last one is reset well this will do is just power cycle the device but we want to click
[12:56] configure Wi-Fi and scan for the Wi-Fi network because mine is not private network because mine is not private there we go and here it scanned for all the Wi-Fi networks and it found them so I'm going to connect UK Wi-Fi so I'm
[13:08] just gonna tap on it then it's gonna prompt me for the password alright my blurred it so you can't see it sorry hackers so the next part is the
[13:20] sorry hackers so the next part is the hostname slash MQTT ID I'm going to name hostname slash MQTT ID I'm going to name this one MK - door sensor - while you can name it whatever you want just make sure you remember because this is how
[13:32] we're going to access the devices web page status portal and see page status portal and see it's different information so the next section is MQTT and so what you would do here is in the first section where you
[13:45] see areas an IP address is type in the IP address of your mqtt server or open up server next is the port you really don't need to touch that most of you there next is the SUBSCRIBE topic so the one
[14:00] that i typed in is m'kay - smart house slash security slash m'kay - door sensor - this is the second door sensor in my house that is why I had a - in the host name and why I have a - in the topic but again you can change the topic to
[14:15] whatever you want the next one where it says false this is what declares on if says false this is what declares on if you have a secured server or not so I don't require a username and password to access my MQTT server so I have it false
[14:29] but if you do have a username and password for your mqtt server then you want to change this false to a true and then type in the username and password then type in the username and password right over here so the next is web
[14:42] talking about so with here you're gonna able to see the settings of device and also upgrade the firmware in the future if I release anything the status portal is protected so in here you want to provide a
[14:56] username and password we're just going to do admin and admin basics what you somebody access this they can upgrade the firmware if they want to do and then
[15:08] so that's the username and password and then after that is the URL to upgrade the firmware so it'll be from in my case m'kay - door sensor - dot local / firmware but you can change it to what you want I would recommend keeping it as
[15:22] what it is so that way it's common and you can understand it and then lastly show you how to reset the device at the end of the video so in the future if you ever need to change any settings change Wi-Fi this is what you would do and it's
[15:38] at the end of the video alright that's it go ahead and press the Save button and all these settings will be saved to your device alright so the way this to connect to your Wi-Fi network and if it's successful the Wi-Fi network will
[15:52] it's successful the Wi-Fi network will disappear just like that and if it does something wrong alright so your device is now configured now let's go ahead and add it over and open up our smell data device is set up and connected to Wi-Fi
[16:07] let's see if it connected to our MQTT server in order to do that we are going to launch MQTT dot effects if you don't have this program check out my home automation server setup guide where I go over MQTT effects how to install it how
[16:22] to use it and all of that what MQTT that effects does is it connects to our MQTT server and it sees all the different messages you can publish messages it's basically another client for your server so go ahead and
[16:36] click the connect button and then you want to go to subscribe and type in the pound symbol and click Subscribe it's not what it'll do is it'll see all the messages that are going through your server and it subscribes to all of the
[16:49] topics alright so now take your door sensor got it right here and take the little part that's going to go on to the door and trigger it and put it together as you can see on the screen it says closed and
[17:01] can see on the screen it says closed and when you go like this it'll say open there you go says open the reason I have some extra stuff in here is because I have it connected that way when I open the door the LED strip behind my
[17:15] video covering that if you're interested link in the description alright but anyway if you see it say open and closed then that means it works good and now we
[17:28] can go ahead and add it to open him alright for some reason my webcam turned yellow but weird we'll just continue on in the video so now you can go ahead and in the video so now you can go ahead and close mqtt dot FX and go over to my
[17:41] website and as you can see here these are the commands that we our commands you're going to put that off to the side down here but now we need to SSH into our open app server so if you're on Mac we're gonna go ahead and open up
[17:56] terminal right here and then we're gonna SSH into openhab but you're on if you're on Windows go ahead and open up putty and SSH into your server now the first command we are going to do is edit our items file so
[18:09] going to do is edit our items file so copy/paste this alright so this is the items file as you can see I have a lot of things in here but don't worry about
[18:22] that now I've went ahead and already pasted this into my items file I have these security items right here Bam's right there and next take the
[18:34] security switch copy and paste that into your items file I have the switchable tag this is the way I can control it from my elbow my Amazon echo my Google home and from Siri I have videos covering all of that on my channel and
[18:49] covering all of that on my channel and then finally you want to take the actual item and paste it in here but let me go over what each part of the text does so the first part is contact and this is declares the item type since this is a
[19:04] door sensor just an open and closed which is what contact does next is the name of the item I just did m'kay door sensor one and iterated through for all
[19:16] my other door sensors next we have the text that shows up in the site map I wrote side-door for this one front door for this one an MK door for this one and then your % as this is how it's formatted make sure you that's there and
[19:31] next is the image that shows up in the site map I want the door and it's cool because there's like a little animation when the doors open it's open and when it's closed it's closed pretty cool we'll see that later in the site map and
[19:46] then finally we have the binding config so we're using the MQTT binding we are little symbol means we're using the broke that's the name of the broker if
[19:59] you are following along with my home automation server guide thing that's what we named our server and then this is the actual topic so if we go back
[20:11] into mqtt dot effects as you can see that is the that is the topic and it is right here you can also if you remember your host name you can go to http double dot slash slash and
[20:27] then the host name of your device so - MK dure dure sense or - and then dot local it'll ask for the username and password that this is the username and
[20:40] password you used when you set it up click Sign In Oh actually I typed it in click Sign In Oh actually I typed it in wrong well click sign in and then this
[20:54] is the Status page hours talking about it shows you the host name of the device it shows you the host name of the device the mqtt server it connects to the port it's using if it has authentication enabled which is if you use your
[21:08] username and password on your when you set it up for mqtt next is the app topic so this is the mqt topic that it sends the open and closed State - so that's
[21:22] the open and closed State - so that's what we are using right here right there what we are using right here right there so if yours is different you want to paste that in right there and then next this is where you would update the
[21:35] firmware so you can just copy this paste this and then when I release a new this and then when I release a new firmware you just go to this page you just go to this page click Choose file and then click update with the new bin
[21:50] file if you're unsure on what I was talking on what I mean by update you can talking on what I mean by update you can watch behind in the video I talked about it when I said upgrading from v1 to v2 you want to continue that process if I
[22:04] you want to continue that process if I release something new but and then lastly this just tells you how to reset the settings on your device but let's go back to the items file so as you can see this mqt topic I have right here and you
[22:20] want to do the same thing if yours is different anyway and then that's it in the items file so now you can just click control X then enter it but since I didn't make any changes posted like that but you
[22:36] would normally click ctrl X then Y and enter alright so now that we created the the site map so we want to add it to the site map so we can see it so click so paste in this command and open up your
[22:53] sitemap file if you don't have any of these files check out my configuration files video and if you're following along you can see I have a bunch of different frames in my site map well we
[23:06] want to take a look in security so as you can see I have these two items right here that's where you want to have them so the switch item this is the switch
[23:18] that turns on and off the notifications but we still haven't made notifications yet so you won't see em and then we have all three door sensors now once you've
[23:30] done that you just click control X than Y and enter let's go ahead and take a look at the door sensors so first we want to go to our open tabs main page want to go to our open tabs main page and then we're gonna go over to basic UI
[23:44] and then we're gonna go over to basic UI and there you go here we have all of the and there you go here we have all of the different doors and if you go ahead and do yours see it says close open close and the
[23:59] little animation on the screen is moving too so that works alright now that the that rule so I when the door opens it sends you a notification to your advice
[24:11] so we're gonna type this in sudo nano /et see slash rules slash home dot rules well open up to let just paste that in okay so this is the rules file and here
[24:24] you can see all my different rules from all my different doors so if you want just the basic just notification then you would just copy this right here this whole piece right here and paste it into your rules file now I have these extra
[24:41] this is all for the LED strips so when the door opens I not only does the LED strip flash but also I get a notification on my phone if the security
[24:54] system switch is on so if this switch is on then I'll get our notification on my phone all right now that's it press control X Y and enter to save let's test
[25:06] it out so I'm going to turn on at the security system and then I'm going to security system and then I'm going to close it and open it and you may have
[25:18] heard the milah metric clock went off there would be a video on that coming soon and you may have noticed that it turned yellow on the screen and then went back to normal that was the flash and if we look on my phone there you go
[25:34] and if we look on my phone there you go it said it's kind of bad anyway it's there it says front door open now if you needed to change any settings let's go over how to reset the device alright guys so to reset the device what you
[25:47] want to do is unplug the device then plug it back in and when you plug it plug it back in and when you plug it back in quickly move the jumper from run back in quickly move the jumper from run to program wait 10 seconds so 1 2 3 10
[26:03] and then you want to move the jumper back to run and unplug the device and back to run and unplug the device and plug it back in and then it should go
[26:17] into programming mode where you can set it up on your phone that concludes this complete guide to MK door sensor firmware or v2 in the description you devices used in the video as well as a link to MK smiles.com slash shop where I
[26:32] have a wide range of smart home kits that you can put together which are now pre flashed all right if you found this video helpful click that like button and if you are our smart home enthusiast like me you belong on the channel so hit
[26:44] that subscribe button if you have any questions leave it in the comment section below or head over to MK smart calm slash forum goodbye calm slash forum goodbye [Music]




⚡ Saved you 0h 27m reading this? Transcribe any YouTube video for free — no signup needed.