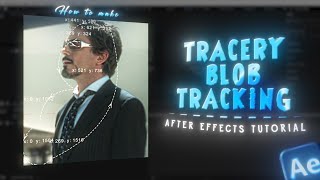

Make This Viral AE Animation in Minutes!
43sOpens with a promise of a simple plugin and quick result, hooking viewers looking for easy trendy effects.
▶ Play Clip"Short and to the point; delivers exactly what the title promises for beginners."
This tutorial demonstrates how to create a trending blob tracking animation in After Effects using the Trace 3D plugin. It covers key settings like bounding box, center markers, and line properties to achieve the effect.
Need clips, Twixtor, and Zooms, but main plugin is Trace 3D.
Pre-compose each clip and add the Trace 3D plugin.
Set border thickness to 1 in bounding box settings.
Optionally disable the text on the bounding box.
Open center marker settings and choose marker type and color.
Choose the preferred connection type.
Set line opacity to 1, line thickness to 0.7, adjust dash length and gap.
Optionally disable dashes. Animation ready.
By following these simple settings in Trace 3D, viewers can quickly create a professional-looking blob tracking animation in After Effects.
What plugin is used to create the blob tracking animation?
Trace 3D plugin.
00:19
What is the first step in creating the animation?
Pre-compose your clips and add the Trace 3D plugin.
00:19
What is the recommended border thickness for the bounding box?
1.
00:45
How can you remove the text from the bounding box?
Disable the text in bounding box settings.
01:05
What settings are adjusted for the center marker?
Marker type and color.
01:23
What are the recommended line opacity and thickness values?
Line opacity 1 and line thickness 0.7.
01:48
Bounding Box Thickness
Setting border thickness to 1 creates clean, minimal outlines for the tracking effect.
00:45Center Marker Customization
Allows choice of marker type and color to match visual style.
01:23Line Opacity and Thickness
Critical for making the tracking lines visible and aesthetically balanced.
01:48Dash Customization
Ability to disable dashes gives flexibility for different animation looks.
02:04[00:02] animation? To create this, you will just need one plugin and it is super easy to make. So, without wasting time, let's start the Make sure you have your clips ready along with twixtor and zooms.
[00:19] Pre-compose your clips one by one. Now, add the trace 3D plugin to your Now, add the trace 3D plugin to your clip.
[00:45] Go to bounding box settings and set the border thickness to one.
[01:05] according to your preference. You can also disable the text if you don't want a bond on it. Next, open center marker settings and Next, open center marker settings and choose whichever marker type you want.
[01:23] You can also adjust the color of the marker. Choose whichever connection type you
[01:35] Choose whichever connection type you prefer.
[01:48] Set the line opacity to one. Set the line thickness to 0.7. You can also adjust the dash length and gap values.
[02:04] And if you do not want dashes, you can simply disable them. Your trending tertiary blood tracking animation is ready.
[02:16] Let me know in the comments which tutorial you want next, and thanks for tutorial you want next, and thanks for watching.

⚡ Saved you 0h 02m reading this? Transcribe any YouTube video for free — no signup needed.