
How to Download VTube Studio for Free
44sShows how to get the popular free VTubing software, appealing to aspiring VTubers.
▶ Play Clip"The title accurately describes the video as a setup guide and tutorial for streaming, and the content delivers exactly that."
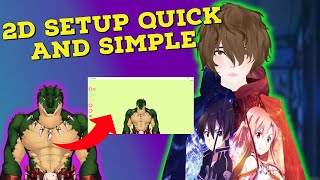
This video is a comprehensive guide to setting up VTube Studio, a free 2D live2D application for VTubers. It covers downloading the software, importing avatars, configuring settings for webcam tracking, and integrating with OBS for streaming on platforms like YouTube and Twitch.
VTube Studio is the number one free 2D application for VTubers, used by both small and large creators.
Open Steam, search for VTube Studio, click the free button, download, and install.
Click the Avatar icon at the top left to select a default avatar or import your own by clicking 'Import your own model' and dragging the file into the opened folder.
Hold left or right mouse button to move the avatar, use scroll wheel to zoom.
Click the image icon, scroll to background number 8, select it to get a green screen background for chroma keying in OBS.
Double-click on the VTube Studio window to bring up the menu, then click the gear icon.
Under the webcam tab, choose your camera, set resolution, frame rate (e.g., 60 FPS), and color format (YUY2).
Set tracking quality to 5 for best performance, or lower for older systems. Choose face tracking or face and hand tracking if supported.
Set webcam FPS to match your camera's capability and enable auto start cam with VTS.
Enable start server in connection settings, copy IP, and connect via the mobile app for iPhone facial tracking.
Enable external plugins like Twitch integration by starting the API and setting the port number.
Double-click, go to image section, click the green star, select an item (e.g., Red Bull), adjust position and size with mouse.
In OBS, add a Game Capture source, select VTube Studio window, enable allow transparency, then add a Chroma Key filter to remove green screen.
By following these steps, you can set up VTube Studio with your avatar, configure tracking, and integrate it with OBS for streaming. The video provides a complete beginner-friendly guide to get started with VTubing.
What is the first step to download VTube Studio?
Open Steam, search for VTube Studio, click the free button, and download.
0:27
How do you import your own avatar into VTube Studio?
Click the Avatar icon, click 'Import your own model', then drag and drop your live2d avatar into the opened folder.
0:59
What background should you select in VTube Studio for chroma keying in OBS?
Background number 8 (green screen).
1:54
How do you access the settings menu in VTube Studio?
Double-click on the VTube Studio window to bring up the menu, then click the gear icon.
2:16
What color format should be selected for the webcam in VTube Studio?
YUY2.
2:55
What tracking quality setting is recommended for most users?
Number 5.
3:05
How can you use an iPhone for facial tracking with VTube Studio?
Enable start server in connection settings, copy the IP, and connect via the VTube Studio mobile app.
4:15
How do you add an object (e.g., a Red Bull can) to your avatar in VTube Studio?
Double-click, go to the image section, click the green star, select the item, then adjust its position and size with the mouse.
5:24
What setting in OBS's Game Capture source removes black borders from VTube Studio?
Allow transparency.
7:16
What filter is added in OBS to remove the green screen from VTube Studio?
Chroma Key.
7:33
VTube Studio as top free 2D VTuber app
Establishes the tool's credibility and popularity among VTubers.
Green screen setup for OBS
Essential step for integrating VTube Studio with streaming software.
1:49Tracking quality optimization
Provides performance tuning advice for different system capabilities.
3:00Mobile app for iPhone facial tracking
Enables high-quality tracking using iPhone's TrueDepth camera.
4:15External plugins and API integration
Allows integration with Twitch and other services for interactive streaming.
5:10[00:00] vtube studio is the number one free live
[00:03] 2D application used by small and large V
[00:06] tubers alike in today's video I'm going
[00:09] to show you on how to set up V2 studio
[00:11] and some little neat features built into
[00:13] it if you happen to find today's video
[00:15] helpful make sure you like comment and
[00:17] subscribe it really does help out the
[00:19] video and really helps out the channel
[00:21] any and all links mentioned in this
[00:23] video will be in the description down
[00:25] below the first thing we gotta do is
[00:27] head over to steam to download vtube
[00:29] studio with steam open all we need to do
[00:31] is type in vtube studio
[00:35] find it and click on it scroll down just
[00:38] a little bit hit the free button and
[00:40] then download wait for the program to
[00:42] download and install and then open it up
[00:44] to import an avatar into vtube studio
[00:46] all we need to do is at the top left
[00:48] hand side click on the Avatar icon
[00:52] we can select from any of the free ones
[00:54] that YouTube Studio gives us
[00:58] just like so
[00:59] or we could import our own by clicking
[01:02] again on the Avatar icon click on import
[01:04] your own model
[01:06] click on open folder the application
[01:09] will then open the folder that you need
[01:11] to drag and drop your live2d avatar into
[01:15] so you're just going to find it wherever
[01:17] it is on your computer and then drag it
[01:19] into this particular folder right here
[01:21] then what we'll want to do is close the
[01:23] application and then reopen it
[01:25] with the application reopened we want to
[01:27] click on the Avatar icon again then find
[01:30] your avatar click on it and then wait
[01:32] for it to load
[01:34] and here we are to move your avatar
[01:37] around all you got to do is hold down
[01:38] the left click or the right click of
[01:40] your mouse to move it or zoom in using
[01:43] your scroll wheel to make it fit where
[01:45] you want it but we're not done just yet
[01:49] we now have to get ourselves ready for
[01:51] OBS to do that we got to click on the
[01:52] little image icon scroll down to
[01:54] background number eight
[01:56] hit select you'll see we now have a
[01:59] green screen and now we are ready to add
[02:01] to OBS or the people that only wanted to
[02:04] know on how to import an avatar into
[02:06] vtube Studio you're all done a little
[02:08] time will pop up on the screen now to
[02:10] tell you where to go in the video to set
[02:13] this up in OBS let's now Deep dive into
[02:16] some settings to bring up the menu in
[02:18] vtube studio all we need to do is just
[02:19] double click and as we see the menu now
[02:22] appears what we want to do next is click
[02:24] on the gear icon and as we see it brings
[02:28] up the webcam tab what we want to do now
[02:30] is choose camera vast majority of you
[02:33] will be doing this find your webcam hit
[02:36] select find your default resolution for
[02:39] your webcam so whatever it is find out
[02:42] click it and then hit select we want to
[02:44] select frames we want to select the best
[02:46] frames for our webcam or what our webcam
[02:48] supports I'm going to hit 60 yours might
[02:51] be 30 or even 15. hit select next we
[02:54] want to hit
[02:55] y-u-y2 hit select and then we're good to
[02:59] go next thing we want to take a look at
[03:00] is tracking quality so we're going to
[03:03] click on tracking quality
[03:05] obviously number five is probably going
[03:07] to be the best one for the vast majority
[03:08] of you but if your system is a little
[03:11] bit older we might want to select
[03:12] something a little bit down here this
[03:14] can help with performance with vtube
[03:17] Studio but for the vast majority of you
[03:19] I would select number five or you can
[03:21] experiment and try it with RTX if you
[03:23] have an RTX GPU but we're going to
[03:26] select number five and hit select next
[03:28] what we're going to look at is tracking
[03:30] type so if you have built-in hand
[03:32] tracking we want to click on face and
[03:33] hand tracking but the vast majority of
[03:35] you is going to be by default on only
[03:37] face tracking I would make sure webcam
[03:40] FPS you move it to whatever your default
[03:42] FPS that your webcam can handle and I
[03:45] would click on auto start cam with VTS
[03:47] so every time you open up vtube Studio
[03:49] your camera starts capturing all the
[03:52] other settings I would leave at default
[03:54] you can play with them if you are having
[03:56] some trouble but I would actually leave
[03:58] them at default for the most part add
[04:00] application FPS if you do have an older
[04:03] system changing the FPS from 60 to 30
[04:06] can really improve it but if you can run
[04:09] S60 please do if your system can't
[04:12] handle it definitely lower it to 30 FPS
[04:15] if you use a vtube studio mobile
[04:17] application for your facial tracking
[04:19] we're now going to cover that what we
[04:22] want to do is click on the gear icon
[04:24] scroll down just a little bit and under
[04:26] connection settings yours will be off by
[04:28] default what you want to do is turn on
[04:30] start server click on show IP list copy
[04:33] your IP
[04:35] and then open up your phone on your
[04:37] YouTube Studio mobile app you're going
[04:39] to open up the settings as well you're
[04:41] going to click on connect to PC stream
[04:43] mode and you're going to enter in the IP
[04:45] of your computer then you're going to
[04:47] select find server once you're done
[04:49] entering all the settings on both of
[04:51] YouTube Studio desktop application and
[04:54] your vtube studio mobile application
[04:55] your facial tracking should Now activate
[04:58] and now you'll have proper iPhone facial
[05:00] tracking since we're here in the gear
[05:02] icon section of YouTube Studio we're
[05:04] just going to scroll down just a little
[05:06] bit more and we're going to see that
[05:07] YouTube Studio allows external plugins
[05:10] external plugins like twitch's
[05:11] integrated throwing system all we need
[05:14] to do is just click on start API give
[05:16] the application the port number of
[05:18] YouTube studio and for the most part
[05:20] that's it you're all done and good to go
[05:22] let's now add object to our Avatar in
[05:25] vtube studio
[05:26] we just need to double click in vtube
[05:28] studio and under the image section we
[05:30] gotta click on the little green star we
[05:33] see that there's a whole bunch of
[05:34] different items that now appears and
[05:36] we're just going to select on the
[05:38] Beverage Red Bull and then click select
[05:42] item order this moves the item either in
[05:44] front of you in front of other items or
[05:47] behind you or behind other items so the
[05:50] higher the order the more on top the
[05:52] item will be and below the order queue
[05:56] is well more behind it goes then what we
[06:00] can do is we can also flip image we can
[06:03] pin the item to the model itself and for
[06:05] fun effects we could add the sensor
[06:07] option but we're just going to click ok
[06:11] and as we see the Red Bull items there
[06:13] to adjust the Red Bull item what we need
[06:16] to do is just move it around with our
[06:18] Mouse like we would with our Avatar but
[06:19] we have to make sure our little pointer
[06:22] is over the item itself and not on the
[06:25] Avatar hold down the item and then
[06:28] scroll on the Wheel to adjust the size
[06:31] and there you go dependent all you got
[06:34] to do is just let go and as you see it
[06:36] moves with the Avatar the other sections
[06:39] of V2 studio is more for advanced users
[06:41] so we're not going to really cover it in
[06:43] this video but what we will do is now
[06:45] move to the OBS section so now let's add
[06:48] vtube Studio to OBS in OBS under sources
[06:52] what we're going to do is we're going to
[06:53] select the plus icon and we're going to
[06:55] select game capture in-game capture
[06:58] we're gonna call It v-tube studio
[07:01] I'm gonna call my V2 Studio too because
[07:03] I already have one and then I'm going to
[07:04] click ok
[07:06] then under mode I'm going to select
[07:08] capture specific window window I'm going
[07:10] to change that to vtube Studio
[07:15] then what I'm going to do is scroll down
[07:16] a little bit and select allow
[07:18] transparency and what that will do is
[07:20] get rid of the black borders in vtube
[07:22] studio and then I'm going to click ok
[07:24] then I'm going to right click on YouTube
[07:26] studio and go to filters
[07:29] with filters now open we're just going
[07:31] to select the plus icon and I'm going to
[07:33] select chroma key I'm going to press OK
[07:36] and now we see chroma key remove the
[07:39] green screen so now we're going to just
[07:40] hit close we're going to move the Avatar
[07:42] to wherever we want in OBS resize it and
[07:47] just like that we're good to go now that
[07:49] you have YouTube Studio installed tell
[07:51] me how you like it in the comments down
[07:53] below and make sure you share this video
[07:55] with your fellow YouTubers because it
[07:56] could really help them as well again I'm
[07:58] your YouTuber Senpai ice cream here on
[08:01] YouTube every Monday and Friday so come
[08:04] on by say hi and well
[08:06] I'll catch you in the next one bye
[08:09] special shadow goes out to chitra thank
[08:12] you so much for your continued support
⚡ Saved you 0h 08m reading this? Transcribe any YouTube video for free — no signup needed.