EASIER way to add physics to Live2D model!
40sPromises a simpler method for augmented physics, appealing to beginners overwhelmed by complex rigging.
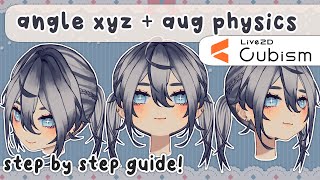
▶ Play ClipThis tutorial covers rigging head angles (X, Y, Z) in Live2D, including a simplified method for augmented physics to add lifelike movement. The creator demonstrates step-by-step how to deform the face, eyes, nose, ears, and hair to create the illusion of 3D head rotation, and then set up physics parameters for a bouncy, natural feel.
The video will cover angles X, Y, Z and augmented physics (movement physics for the model). Augmented physics add life; the creator uses an easier, cleaner method that sacrifices some rigging complexity.
Create new parameters (e.g., angle X physics) with ranges -30 to 30. These will be used as output for the physics system, driven by the default angle X input.
Hide hair to work on the bald face. Ensure face is symmetrical. Group face line and face skin under one warp deformer.
Copy mesh from face skin to face line, then select both and Ctrl+G to glue vertices together. This makes them move as one when deforming.
Add three keyforms on angle X. Deform the face to the right (positive 30) by dragging green corners, then adjust bezier divisions and conversion divisions for smooth curves. Use 'smooth all' bezier edit type.
Select both face line and skin, add path deformers along the edge. Edit keyforms on angle X physics to fine-tune the face shape when turning.
Add three keyforms on angle Y. For looking up, curve the face upward; for looking down, curve downward. Think of the face as a ball.
Synthesize corners by copying angle X keyforms and editing them to squeeze the face inward when looking up+side or down+side. Reflect horizontally for the other side.
Place each feature under its own angle XY warp deformer. For the nose, add path deformers to create a line when turning. Use orb deformer on eyes to make them appear rounded.
Use an inverted clipping mask (copy of face skin) to hide the ear when facing forward, then reveal it by moving the clip layer when turning. Set opacity to zero on the clip layer.
Group all front hair under an angle XY warp. Deform to follow head rotation. Add individual warps for each hair section to create depth (e.g., flicks jutting out).
Rig mid hair to reveal when turning. For pigtails, use angle Z warps so they fall to the side when tilting the head.
Create a neck clip layer (copy of face skin) with inverted mask on the face line. Set opacity to zero and warp it to fade the jawline when looking up, enhancing the illusion.
Use a rotation deformer on the entire head. Place the pivot point at the neck. Add three keyforms and tilt the head. Avoid overusing rotation deformers to prevent mesh issues.
In Physics settings, add a new group. Set input as angle X (as angle, effect 100), output as angle X physics parameter. Adjust duration (10), shaking (0.8), reaction (1), acceleration (1). Repeat for Y and Z.
"Title accurately describes a step-by-step guide for head angles XYZ rigging with easy augmented physics."
What are the three head angles used in Live2D rigging?
Angle X (left/right), Angle Y (up/down), Angle Z (tilt).
0:29
What is the purpose of gluing vertices in Live2D?
To make two layers (e.g., face line and face skin) move together as one when deformed.
4:42
How do you set the bezier edit type to smooth all?
In the warp deformer properties, change 'Bezier Edit Type' from 'Retain Control Structure' to 'Smooth All'.
8:19
What is the recommended range for angle X physics parameters?
Negative 30 to 0 to positive 30.
2:35
How do you create a clipping mask to hide ears when facing forward?
Copy the face skin layer, paste it above the ears, set it as a clipping mask on the ears, and enable 'Invert Mask'. Then set the clip layer opacity to 0.
24:08
What tool is used for angle Z (head tilt) instead of a warp deformer?
A rotation deformer (the circle with a point icon).
38:48
What physics settings are recommended for augmented angles?
Duration 10, Shaking 0.8, Reaction 1, Overall Acceleration 1.
45:04
Why should you avoid using too many rotation deformers with warp deformers?
Using the wrong combination can mess up the regular rig and cause mesh issues.
40:02
What is the purpose of the neck clip inversion mask?
To fade the jawline when looking up, enhancing the illusion of the head tilting back.
35:45
How do you reflect a keyform horizontally in Live2D?
Select the keyform, then use the 'Reflect Horizontal' option (or Ctrl+Shift+R).
9:10
Gluing face layers for unified deformation
This technique ensures the face line and skin move perfectly together, preventing gaps during head turns.
4:42Using smooth all bezier edit for clean curves
Switching to smooth all makes the warp deformer produce organic, curved deformations rather than rigid ones.
8:19Inverted clipping mask for ear popping
A clever use of clipping masks to hide ears when facing forward and reveal them when turning, adding 3D depth.
24:08Neck clip inversion for looking up illusion
Fading the jawline when looking up creates a more natural head tilt effect without complex rigging.
35:45Simplified augmented physics setup
The creator's lazy augmented method uses only input/output parameters with physics settings, making it accessible for beginners.
43:36[00:00] [Music]
[00:00] foreign
[00:11] last time we went over math forms and
[00:14] the mouth opening so if you want to
[00:16] check out that video before this one
[00:18] feel free to there are some tips there
[00:20] that I am gonna use in this video but
[00:22] that goes for all my other Ricky videos
[00:25] So today we're gonna work on head angles
[00:29] we're going to be doing angles X Y and Z
[00:31] and I will also be going over augmented
[00:34] physics now if you don't know what
[00:36] augmented physics are it's basically
[00:38] movement physics for your model that
[00:40] gives you a little more life there are
[00:42] different ways to add these physics in I
[00:45] do an easier way that I think looks
[00:47] cleaner but it does take away some of
[00:50] the rigging I will explain that later
[00:52] just follow along and we'll figure it
[00:55] out together so first of all just like
[00:58] the mouth rigging video we're gonna look
[01:00] up a guide I feel like the head angles
[01:02] for a model can really set apart a good
[01:04] rig from a bad rig maybe even more so
[01:07] than the mouth a good model that has
[01:10] good angles can really show the depth of
[01:12] the model and make it look more 3D
[01:14] rather than 2D if you're an experienced
[01:16] artist and you regularly draw head
[01:19] angles like three-fourths looking up
[01:21] looking down this will be a lot easier
[01:23] for you if not as I said we're gonna
[01:25] look up a guide so you can just go on
[01:27] Google and just Google up head angles
[01:29] but if you want to be more specific you
[01:32] can look up head angles live 2D I think
[01:34] a couple good guides will show up that
[01:36] you can use as reference I will say I
[01:38] think the hardest part about making head
[01:40] angles look really good are the corners
[01:43] and we'll be going over that hopefully
[01:45] it will make sense and then once you
[01:47] have your guide let's get into live TV
[01:49] okay as I mentioned in my first video I
[01:52] do have my angle separated differently
[01:54] as you can see here in my inputs
[01:56] parameter folder I have all the default
[01:59] angles that come with life today my
[02:01] angle X Y and Z and also body X Y and Z
[02:03] basically these are what you're
[02:05] inputting into your program when you
[02:08] move your head to the left and right
[02:10] that's angle X if you're moving your
[02:12] head up and down it puts it into angle y
[02:14] so that's why I put these into inputs
[02:16] and then over here in angles is where I
[02:19] have my head ankles so I named these
[02:21] angle X Y and Z physics but you can name
[02:24] these whatever you want whatever makes
[02:25] easier for you so you can just press new
[02:27] parameter make a new one this is my
[02:29] angle X physics parameter so my name is
[02:31] just Anglo X physics ID doesn't really
[02:33] matter and my ranges go from negative 30
[02:36] to 0 to maximum 30. and then once you're
[02:39] done with that do that for each of these
[02:41] angles so these parameters are going to
[02:43] be our physics parameters obviously so
[02:45] when we input angle X when you look to
[02:48] the left and right it's going to come
[02:49] out as these physics so we're going to
[02:52] start with the face so let's take away
[02:54] all of our hair over here in Parts
[02:56] you're probably going to have a ton of
[02:58] warps that you see in Parts if you go up
[03:00] to here you can actually hide it with
[03:02] the green button and the red button if
[03:04] you have any rotation warps so you can
[03:06] just see all the layers here
[03:08] just so we have our bald little face
[03:10] here hopefully your face is symmetrical
[03:12] and nice and shiny I know a lot of
[03:15] people like to have bald toggles so if
[03:17] you rig your head nice you won't look
[03:19] too weird when you take off all your
[03:21] hair so going over to my face I have all
[03:24] of my face are under one warp to make it
[03:27] easier for myself and we're gonna put in
[03:30] the mesh for our face so if you follow
[03:32] my guide you should have a face line and
[03:35] face skin we're going to add in mesh
[03:38] okay so I have my face line and my face
[03:40] skin here and usually I would manually
[03:42] mesh this but I want to focus on
[03:44] something else I'm just going to
[03:45] automatically mesh this these manually
[03:47] mesh this if you can I'm gonna start
[03:48] with the face kit I'm gonna deform it
[03:50] heavily so it's gonna look something
[03:51] like this and then for the face line if
[03:54] you do it with a heavy deformation it's
[03:56] gonna look like this which is not what
[03:58] we want because actually we're going to
[04:00] use glue to connect the face line to the
[04:03] face skin so we're gonna take the face
[04:04] skin and go into manually mesh and we're
[04:07] actually going to select all of the
[04:09] little vertices on the face control copy
[04:11] check out then we're going to switch
[04:13] over to the Face line manly mesh that
[04:14] we're going to select all of those
[04:16] vertices hit delete and then Ctrl V to
[04:19] paste it and this will put the same
[04:20] exact mesh that we put on the face skin
[04:22] onto the face line so now we can select
[04:24] both the face light and the face skin
[04:25] and then if we go into the manual mesh
[04:27] editor you see that these red lines are
[04:29] now green well they're usually red this
[04:32] is because the meshes are perfectly
[04:34] overlaying on top of each other so now
[04:36] if we select all the vertices here this
[04:38] selects both the face line and the face
[04:40] skin versus and then you can hit Ctrl G
[04:42] and this will put a green box around all
[04:44] these red boxes and this means that
[04:46] these vertices are glued together so the
[04:48] face line and face skin are completely
[04:50] glued together this is like a little
[04:52] intro to glue I will explain glue better
[04:54] in another video but I'm not the best at
[04:56] glue honestly so this basically just
[04:58] makes it so that the face line and the
[05:00] face skin whenever one of them moves the
[05:03] other will follow along with it for
[05:04] example if I take all the vertices here
[05:07] with a brush tool it will move both the
[05:09] face skin and the face line although I'm
[05:11] only selecting the face line right now
[05:12] so it just keeps it nice and neat when
[05:14] you're deforming them of course as I
[05:16] said if your face is just one layer you
[05:18] don't have to do this but there are a
[05:20] lot of benefits to separating your face
[05:21] line from the face skin okay this is my
[05:23] third time recording this section but
[05:26] hopefully the last time so let's get two
[05:30] minion warps and rigging the head so
[05:32] first of all I'm going to open up my
[05:36] face warp folder I'm gonna grab my face
[05:39] line my face Shadows my blush and my
[05:44] face skin and put that all under one
[05:46] angle X Y War now it's gonna
[05:49] automatically put a box around
[05:50] everything but you can actually edit
[05:52] this if you hold down control and then
[05:54] you can warp the green points or the red
[05:56] points holding that all to do both sides
[05:59] at the same time usually like to like
[06:01] usually I like to square in on the face
[06:04] this way just to make sure it's all good
[06:06] and well also you're gonna make sure the
[06:09] warp is in the middle of the face
[06:10] example here mine is not really in the
[06:14] middle it's over to the left a little so
[06:16] I'm gonna grab the right side and bring
[06:17] it out a little bit until it's right
[06:20] there next we're gonna put in three key
[06:23] forms on angle X and we're going to turn
[06:25] this all the way over to positive 30.
[06:28] the key form that's the rightmost side
[06:30] is going to be when your model looks to
[06:32] the right and then the one obviously all
[06:35] the way to the left your model is going
[06:36] to look to the left so going back to the
[06:39] right key form we're going to start
[06:40] deforming the head take away the red box
[06:42] now holding on shift I'm going to grab
[06:44] these green corners and drag them over
[06:46] to the side I'm working at and you'll
[06:48] notice that we're forming that face
[06:50] that's looking to the side make sure you
[06:52] have your reference picture on hand so
[06:53] you can copy shape of the face to what
[06:55] you want or just freehand it like I'm
[06:57] gonna do and then it's gonna look more
[06:59] and more like returning to the side now
[07:01] your face here is not going to move
[07:02] since we're not warping it so it's gonna
[07:04] look a little awkward when you're
[07:05] turning to the side and it's just
[07:07] staying there you can hide if you want I
[07:09] usually don't because I like to use as a
[07:11] guideline but I think it'll be easier to
[07:13] see if I just get rid of all these for
[07:15] you guys so let me just make those
[07:17] disappear okay so now I got this little
[07:19] mushy head over here and we're going to
[07:22] want to deform it a little more we want
[07:24] to edit it really well so it gives the
[07:26] illusion that the face is looking over
[07:27] to the side so we're gonna add more of
[07:30] these green Corners to edit by going
[07:32] into the bezier division number and
[07:34] changing the height usually I could
[07:35] change the height into five or six for
[07:37] the face this adds more green Corners
[07:39] vertically so we can edit these a little
[07:41] more now with the forehead jutting out
[07:44] the head will go back a little and your
[07:46] face sinks a little on your eyes goes
[07:49] back out on your nose and everything
[07:50] obviously it's gonna look a little wonky
[07:52] we need to add more of these gray Dots
[07:55] here to edit it at a more detailed level
[07:56] so we're gonna go to the number of
[07:58] conversion divisions by default it's
[08:00] five by five usually I could go up by 10
[08:02] for the face maybe less maybe more
[08:04] depending on what I'm editing but now I
[08:06] have more that we can edit it's a little
[08:08] awkward because all these gray dots are
[08:11] warp being not as smoothly as they
[08:13] should be especially for the face that's
[08:15] supposed to be something soon we need to
[08:17] go to bezier edit type and by default
[08:19] it's retain control structure but we're
[08:21] going to change it to smooth all so now
[08:23] if we click on these green Corners it's
[08:25] going to smooth out those gray dots into
[08:28] more curves and just make it a lot
[08:31] smoother now of course we only edited
[08:33] the middle of the face so I'm going to
[08:34] go ahead and edit the side over here
[08:36] because we really need that to pop out
[08:39] to show the dimensions of the face when
[08:41] turning
[08:42] I'm gonna add one more to my height
[08:46] [Music]
[08:48] and now it's looking a little more
[08:50] dimensional now this is just a base
[08:53] sketch rig of the face you could say we
[08:55] just want to get a general movement of
[08:57] the face for everything on here so I'm
[08:59] gonna reflect the motion over and now
[09:01] we're looking left and right
[09:04] next we're going to actually edit the
[09:06] face line and the face skin specifically
[09:08] so we can really get the right curves
[09:11] for the face so if you select both your
[09:13] face light and your face skin you can
[09:15] put a path to former around the edge I
[09:18] already have here because that is my
[09:21] third time recording this but if you
[09:23] want to follow me it's a little hard to
[09:24] see but as always you can start with
[09:27] less path deformers and add more when
[09:29] you need to add more details so after
[09:31] you have that finished we can actually
[09:33] with both Face line and face get
[09:35] selected put in angle X physics key
[09:37] forms turn over to the right now we can
[09:40] edit the face more usually I have to
[09:42] hover over Pat the former hide all my
[09:44] mesh and actually edit that way so it's
[09:46] a little easier to see everything
[09:47] [Music]
[09:49] foreign
[09:54] lumpy Parts like I do especially over
[09:57] here you can actually fix these pretty
[09:59] easily with Pat deformers just delete
[10:01] some at the area you want to fix and
[10:04] then you're gonna put Pat the former
[10:05] dots at the peaks of your awkward spots
[10:08] for example mine are here and here and
[10:11] then make sure you have little anchor
[10:12] points in between so since I have one at
[10:15] this peak here I need one here and one
[10:17] right in the middle here and the same
[10:19] for this one I need one in the middle
[10:20] here and one over here
[10:23] so after playing those path of formers
[10:25] in you can just edit those dots and
[10:27] smooth those out you might have to lower
[10:29] your path to form a distance depending
[10:32] on how crazy your Peak is
[10:36] [Music]
[10:38] and then once you have those smoothed
[10:40] out you can actually just get rid of
[10:42] those path of formers and put them all
[10:45] on a nice straight line again or a
[10:47] curved line I guess and then you just
[10:48] keep detail editing each little bit of
[10:50] the face until you have something you're
[10:52] satisfied with
[10:53] [Music]
[10:55] you can also just use the brush tool if
[10:58] there's larger areas you want to edit
[11:07] and then once you have something you're
[11:09] satisfied with just reflect it over
[11:10] horizontally and Bam you have it looking
[11:13] left
[11:14] all right
[11:15] now of course you can make this turn
[11:17] more extreme depending on how far you
[11:19] want your model to look when you're
[11:21] looking over to your left and right it's
[11:22] all up to personal preference
[11:25] now if you have blush or any Shadows on
[11:27] your face like me they're probably gonna
[11:29] look really whack because you're
[11:31] focusing on just the face skin for now
[11:33] honestly you can just hide those for now
[11:35] I do use my blush as a guideline for
[11:38] where I'm placing my eyes and my brows
[11:40] and everything so I'm gonna take
[11:42] everything under my blush I have my
[11:44] blush marks separated from my blush so
[11:46] I'm going to add a web deformer a little
[11:49] X Y on that and since this is a child
[11:52] deformer under our parent the former the
[11:55] original angle X Y warp deformer it's
[11:57] gonna have the same busier settings so
[12:00] if you want to edit those you can I
[12:02] would because I don't need this much
[12:04] editing for my blush I'm Going to center
[12:06] it on my blush and then add key forms
[12:09] and edit my blush into where I want it
[12:12] to look
[12:13] foreign
[12:19] let's actually start working on angle y
[12:23] some people like to do all their X
[12:24] angles first and then doing their y's
[12:27] and then do the corners personally I
[12:29] just like do x y and the corners of X Y
[12:32] all together so that's what we're doing
[12:35] in this tutorial so going back to our
[12:37] original X Y deformer on this entire
[12:40] face we're gonna add three key forms to
[12:43] angle Y and then positive angle Y is
[12:46] going to be when you're looking up and
[12:47] negative angle Y is when you're looking
[12:49] down it should be pretty easy to
[12:51] remember so going up to positive y we're
[12:54] going to make our face look up and it's
[12:56] going to be a little hard with all of
[12:58] these right down the middle with all of
[13:01] these green Corners right down the
[13:02] middle because we have to move each bit
[13:04] individually up and up so I just like to
[13:07] lower it down to like three and then
[13:10] start editing the face looking up from
[13:12] there foreign
[13:13] [Music]
[13:15] saying yours might look a little
[13:17] different from mine if you're
[13:18] freehanding it like me you should always
[13:20] think of the face as a ball someone
[13:23] looks up it's going to be curved upwards
[13:25] so it has that little Bend here same
[13:28] thing for when it goes down it's going
[13:29] to curve down
[13:32] now I always feel like looking up and
[13:34] down is pretty tricky for some riggers
[13:37] that aren't too used to how to make the
[13:39] illusion of looking up and down so it
[13:41] might be something you have to practice
[13:42] with but as I said using a reference
[13:45] really helps with how to make your model
[13:47] look like it's actually looking up and
[13:48] down
[13:51] okay now that we have that done I'm
[13:55] going to okay now that we have that done
[13:57] we're gonna work on the corners for the
[14:00] rig quote unquote sketch the face so
[14:02] there's a couple ways you can do this
[14:04] obviously since it moves like in a
[14:06] circle pattern you can link both and
[14:09] synthesize the corners but this will
[14:11] make it a little awkward because if we
[14:13] look up and to the side our head is
[14:16] going to be jutting out like crazy over
[14:19] here now if we look down it's still
[14:21] going to look kind of weird
[14:23] now this goes back into my little ball
[14:26] analogy if the ball is turning in this
[14:29] direction this part of the ball would
[14:32] disappear behind it that makes any sense
[14:35] so this head would actually be going in
[14:37] like that instead of joining out so I'll
[14:39] make solution that you're looking over
[14:41] to the side and up a little better
[14:43] obviously I'm just freehanding it if you
[14:45] have reference look at your reference
[14:47] and see how the head looks when it turns
[14:49] to the side at these angles same thing
[14:51] for this side it would be squished in a
[14:54] little and that side
[14:56] now you can do it that way you can also
[14:58] just take your angle x copy this form
[15:02] paste it on the corners and edit it from
[15:05] there it's all the personal choice on
[15:07] how you think you could rig yours the
[15:09] best but since this is a bit of a lazy
[15:12] easy tutorial synthesizing the corners
[15:14] and squeezing in the corners of the
[15:16] faces a little bit easier and then once
[15:18] you do the corners for one side you can
[15:20] just reflect it horizontally so once you
[15:23] have all those refracted over you can
[15:26] test your face and see if it looks
[15:27] alright
[15:28] obviously it's still gonna look a little
[15:30] rough you can edit the sketch more if
[15:32] you'd like I don't know why my head went
[15:33] back I must have control Z too much
[15:37] [Music]
[15:42] I don't think my head goes down my neck
[15:44] enough to really have that rotational
[15:47] effect so I'm gonna change that
[15:51] damn man it's looking a little better if
[15:53] you just did the same way I did and hit
[15:55] all the mesh and just use the brush tool
[15:57] you can go back in and shift the green
[16:01] Corners a little bit to smooth
[16:02] everything out
[16:03] foreign
[16:06] obviously since I deformed it a lot with
[16:08] the brush tool it's gonna have to smooth
[16:09] out a lot so it will change a lot from
[16:12] me and you if you copied me when you
[16:15] click on the green Corners so if you
[16:17] don't like how it looks after smoothing
[16:19] it out you can just go back and edit it
[16:20] or you can add more divisions here if
[16:23] you go change the width so that you can
[16:25] edit the sides here more
[16:28] and then once we have the little sketch
[16:30] done you can edit these Corners when you
[16:33] go into your face line and face skin
[16:35] just add the key forms to angle y you
[16:37] can edit the looking up and looking down
[16:39] [Music]
[16:41] looking at the corners
[16:45] [Music]
[16:52] [Music]
[16:57] and I'm going to reflect those over to
[17:00] the left and double check
[17:03] [Music]
[17:04] we have our face rotating on our X Y
[17:08] axis hopefully yours looks nicer than
[17:11] mine I'm probably gonna go and edit it
[17:13] more a little later but it's good enough
[17:15] for now now that we have the base of our
[17:17] face finished let's get into rigging the
[17:21] rest of the face onto angle X and Y so
[17:24] I'm gonna start putting my eyes on and
[17:29] going over to my eye warp I'm gonna put
[17:32] those under an angle X Y warp and then
[17:35] same thing as I did for the face make
[17:38] sure the warp is centered on the face it
[17:41] looks pretty center to me I think and
[17:43] then add angle X turn over to the right
[17:47] and just start wringing it in
[17:50] foreign
[17:54] [Music]
[18:03] mostly because of my blush placement so
[18:07] I'm probably going to move my blush a
[18:09] little later on
[18:10] [Music]
[18:28] all right it looks good enough to me
[18:31] I'm just gonna quickly edit my blush to
[18:33] match
[18:35] okay now I'm gonna go over and do my
[18:39] eyebrows
[18:40] [Music]
[18:49] something that really helps with giving
[18:51] the illusion of head turning is adding
[18:55] anything that makes it look more 3D for
[18:57] example where your eyebrows are I
[18:59] usually you have a little bump so I put
[19:02] my visual division width to four so I
[19:05] can have green corners on right in the
[19:08] middle of my eyebrows and this may look
[19:10] like it's jutting out a little bit if
[19:13] that makes any sense a lot of doing the
[19:15] angle X Y for the face is really trying
[19:17] to make all these little things add up
[19:20] until looking like the head is turning
[19:23] so put in a lot of detail and care when
[19:26] editing your face foreign
[19:31] [Music]
[19:45] next I'm gonna do my nose so the nose is
[19:49] another object on the face that if you
[19:52] rig it pretty well when it turns left
[19:54] and right it really adds more onto the
[19:58] illusion of looking left and right I'm
[20:00] sorry I keep saying that but it's all I
[20:02] can use right now depending on the kind
[20:04] of nose you make you might have to do a
[20:06] lot of effort into rigging it but since
[20:08] I'm just doing a basic anime girl with a
[20:11] little dot nose it's a lot easier I do
[20:13] have a little more layers for some more
[20:15] details in the future if you have like
[20:17] an Eco men face with like an actual
[20:19] defined longer nose I will try to do a
[20:22] tutorial about that in another another
[20:25] little series but for now simple little
[20:28] anime nose and take everything on my
[20:30] nose put it in its own ankle X Y web
[20:33] deformer and I'm gonna Center the award
[20:35] and like I did it for the rest put in
[20:37] key forms for angle X
[20:39] I'm gonna start raking it
[20:41] [Music]
[20:46] and I usually for anime characters
[20:48] facing forward they have a little dot
[20:50] for their nose most of the time but when
[20:53] they turn they're gonna have a little
[20:55] line
[20:57] that usually looks like this
[20:59] or something that looks a little better
[21:01] than that so usually as I just showed I
[21:05] would first manually put in my mesh for
[21:08] the nose I'm probably going to want to
[21:09] make it a lot nicer than this but that's
[21:11] what we're going with and we'll put two
[21:13] and we'll put three path to former dots
[21:15] right along the middle of it so when you
[21:18] turn it to the side don't put your key
[21:20] forms you can stretch out what little
[21:22] color there is on this layer to give
[21:25] more of a nose illusion again little
[21:27] detailed edits you can do after the base
[21:30] warp can really add more life into your
[21:33] rig I'm gonna go in and edit my angle X
[21:36] where I know shine since it's a little
[21:37] wonky on let's get trick
[21:41] and there we go we got the nose looking
[21:44] a little more dimensional I'm gonna do
[21:47] my angle line out
[21:49] [Music]
[21:59] okay I think I'm done nose
[22:02] [Music]
[22:13] okay I just edited some more parts of
[22:17] the face I was looking weird when I was
[22:19] looking around so it looks a little
[22:21] better now but anyway we're gonna go
[22:23] into the next part which are the ears
[22:26] sometimes I like to do the front hair
[22:28] before I do the ears depends depends but
[22:31] I think right now we'll do the ears
[22:32] first and we can edit it later now for
[22:34] the ears I'm gonna explain more about
[22:35] how to use clipping masks so for example
[22:39] on some rigs if you can even see their
[22:41] ears they turn to the side their ear
[22:43] might pop out right on top of their head
[22:45] some people use draw order to do this
[22:48] and I know when I was first learning
[22:50] live today there are a lot of tutorials
[22:52] out there that really emphasize draw
[22:54] order obviously if you've watched
[22:56] through all my tutorials I haven't
[22:58] touched on that yet but I almost never
[23:01] use it so you're not on the right
[23:03] channel if you want to learn how to use
[23:04] draw order but this is how I do that ear
[23:07] popping out technique for my models so
[23:09] first of all my ear art is under my face
[23:12] as you can see here I'm gonna put my
[23:14] ears over my face obviously it is gonna
[23:16] look really weird especially if you have
[23:19] a lot of your ear poking out onto your
[23:21] face so we can actually use clipping
[23:24] masks to hide the sides of the ears when
[23:27] we're facing forward I'm going to teach
[23:29] you guys how to use the invert mask
[23:31] option so with my ears on top of my face
[23:34] I'm actually going to go into my face
[23:36] and take my face skin actually copy
[23:38] paste that also make sure your face skin
[23:40] is actually under all your ears that'll
[23:41] be a little easier to understand and
[23:43] then when you copy paste your face skin
[23:45] it's going to be in the same folder
[23:46] where your original face skin is keep it
[23:49] there because we want it to work the
[23:51] same way as the face and then let's
[23:53] rename this into ear clip or whatever
[23:56] else it's easier for you to understand
[23:58] so first let me just organize my ears
[24:01] until left and right since I have a lot
[24:03] of accessories on them
[24:04] okay so taking the ear clip layer which
[24:08] is our face skin just copied we're going
[24:10] to take the ID copy that select
[24:13] everything on your ears paste it into
[24:15] your clipping ID and then click invert
[24:17] mask so this makes it so that the ears
[24:19] look like they're behind the skin this
[24:21] is because everything of the ears or
[24:23] everything we just clipped will show
[24:25] except for whatever touches the face
[24:27] skin and then if we take the ear clip
[24:29] layer and turn the opacity to zero we
[24:31] won't be able to see all the face skin
[24:33] on top but it will still clip onto the
[24:36] ears like this so we'll still hide the
[24:37] ear when we move it so I'm gonna hide so
[24:40] I'm gonna hide the ear clip layer just
[24:41] so I can see the ears on top first I'm
[24:43] going to take both ears and add an angle
[24:46] X Y to former and then we do the same
[24:48] process I did with the other things on
[24:50] the face and rig them on
[24:53] for this other ear here I'm going to
[24:55] tuck it behind the face obviously it
[24:57] doesn't look like I'm tucking it because
[24:59] you can still see the ears and
[25:01] everything and tuck it in there and
[25:02] double check that looks good enough I
[25:04] think I'm just gonna reflect it
[25:05] horizontally now I'm going to turn back
[25:07] on the ear clip our ears are behind
[25:09] everything and then turn it over to the
[25:12] right and I just realized we already
[25:15] have key forms on this because it copies
[25:17] the key forms of the face skin this is
[25:19] an issue because we only put the opacity
[25:21] zero on one key form so we would have to
[25:24] put opacity zero on all these key forms
[25:25] or else it will pop up again you can
[25:27] turn each little key Point into zero if
[25:30] you'd like I'm just gonna set another
[25:31] warp let's call this ear clip I'm going
[25:34] to set this warp deformer to opacity
[25:37] zero and that will make everything in
[25:38] that warp opacity zero I don't see it at
[25:41] all and I'm gonna go back into my ear
[25:43] clip layer and get to editing so I look
[25:46] to the right I want my ear to pop out so
[25:48] I'm going to grab my brush tool and push
[25:50] the ear clip over so I can reveal my ear
[25:52] it looks kind of weird on my blush but
[25:55] I'll have my hair covering that anyway
[25:56] they can play around with that and see
[25:58] what works for you and then since our
[26:00] ear clip is just copy of the face it's
[26:02] already perfect on this side and will
[26:04] hide this ear
[26:05] as you can see here and I'll just
[26:07] reflect that horizontally and then it'll
[26:09] be the same on this ear and then having
[26:12] the ear on top gives it a little more
[26:14] dimension for the face turns so I think
[26:17] it's a nice touch might move the ears
[26:18] back a little more though so I'm going
[26:20] to hide my ear clip again and just rig
[26:22] my angle X Y for my ears and all the
[26:25] corners and everything
[26:28] foreign
[26:32] [Music]
[26:34] once my ears are done I'm gonna pack the
[26:37] ear clip and I'm gonna do Each corner
[26:39] and everything for these
[26:41] [Music]
[26:46] and voila we've got ears moving back and
[26:50] in front of her head
[26:51] [Music]
[26:53] hello it's a new day for me so um I have
[26:57] no idea what I just did I think I just
[27:00] got finished rigging the ears so next
[27:02] we're gonna fill up our bald little head
[27:05] and usually I like to start with the
[27:06] front hair so I'm just going to turn on
[27:08] all the front hair and it's going to be
[27:10] mostly the same process as everything
[27:12] else we've ripped on the face just you
[27:14] know getting it to look right at each
[27:15] angle except hair is also one of the big
[27:20] factors in really making a rig look like
[27:23] they're actually looking to the left and
[27:25] right and down and up because the hair
[27:28] you know it encapsulates your head so
[27:30] when your head turns your hair is gonna
[27:33] turn pretty drastically too I'll explain
[27:35] it as I go but I have my front hair here
[27:39] and I've kind of separated my fringes
[27:42] into different sections okay so usually
[27:46] for hair I like to tackle each section
[27:48] section by section but I think an easier
[27:51] method is to group everything and then
[27:55] edit each one individually you can
[27:57] obviously do this for each part that
[27:59] you're rigging I probably already put
[28:01] notes in the video for this but for
[28:03] example if you wanted to put your eyes
[28:04] and your brows your nose and your mouth
[28:06] all in one General angle XY rig and then
[28:10] rig each of them individually to fit
[28:12] them into different spots or different
[28:14] angles that would be good for keeping
[28:16] everything pretty consistent and hair
[28:18] gets pretty tricky so I do like to do
[28:21] that with hair so I'm just going to
[28:23] select everything on my front hair and
[28:25] put it into an XY warp again make sure
[28:28] everything's meshed correctly for my
[28:31] hair I usually like to do an automatic
[28:32] mesh
[28:33] um for heavy deformation usually for my
[28:37] lazy self that's good enough but if it's
[28:39] a pretty particular piece of hair I will
[28:42] manually mesh it so it's up to your
[28:44] personal choice
[28:45] since the hair does get pretty warped up
[28:49] when we rig in the physics you might
[28:52] want to make it pretty detailed but
[28:55] we'll handle that when we get to hair
[28:57] physics and everything so having our
[28:59] warp selected I'm just going to do the
[29:01] same thing I did for the face and make
[29:03] it smaller with control and ALT
[29:07] so we're gonna start with ankle X turn
[29:09] this over to the side now to put on your
[29:12] hair now depending on your hair you
[29:14] might want to rig it differently it's
[29:15] all up to personal choice and of course
[29:17] how your hair works and how you want to
[29:19] work with it but as a general rule of
[29:21] thumb I like to actually just grab
[29:23] everything here and shift it over a
[29:25] little bit and then I will bump this out
[29:28] I'm gonna add more conversion divisions
[29:31] and bezier divisions
[29:33] just down the middle like I did for the
[29:36] face I'm gonna more fit like I said the
[29:39] face is kind of like a ball so I want my
[29:41] hair to Puff that a little over here and
[29:43] then I'm going to tuck the hair on the
[29:46] side in
[29:49] A good rule of thumb is to also note
[29:51] where the center of your head is or
[29:54] where your hair is sprouting from for
[29:56] example mine is pretty much on the
[29:58] center
[29:59] so I turn my head it's Gonna Keep onto
[30:02] the center here really helps with the
[30:04] illusion of turning left and right and
[30:06] I'm just going to reflect it
[30:07] horizontally
[30:08] now for me this is a pretty decent
[30:11] sketch rig so I'm just gonna go into the
[30:13] hair and do a more detailed edit on the
[30:17] angle X as I said earlier hair really
[30:19] helps with the illusion so what I want
[30:21] to do is I have a lot of mid hair here
[30:24] for example this Fringe here is like my
[30:26] front hair and these two over here like
[30:27] my mid hair so when I turn I want these
[30:29] to kind of jut out a little bit like
[30:32] this so it really shows more depth into
[30:35] my turn and send it symmetrical on both
[30:37] sides I'm just going to select each
[30:39] piece pair them together with their own
[30:41] warp on and then just break in the angle
[30:45] X
[30:46] [Music]
[30:53] foreign
[30:53] [Music]
[30:59] decent to me right now I'll probably do
[31:02] more detailed edits since I have a lot
[31:04] of separation for my hair example I have
[31:06] this here and I have little flicks here
[31:08] I'll probably do that later now that I
[31:10] have that done I'm now just gonna go
[31:12] back into all those angle X Y warps I
[31:15] just did and do angle Y and then do the
[31:18] corners
[31:20] foreign
[31:22] [Music]
[31:31] obviously I will go back and do some
[31:33] more detailed editing after I record but
[31:36] just some little tips or I mean you can
[31:39] take them if you like them but whenever
[31:41] I look down I do like to make the hair
[31:43] go over my face a little more it kind of
[31:47] gives the illusion that your hair is
[31:49] hanging over your face so gives more of
[31:52] that looking down look but maybe I have
[31:55] it too much I'm probably gonna squish it
[31:57] up a little bit but
[32:02] foreign
[32:07] with this for now next I'm gonna move on
[32:10] to my mid hair obviously we so this is
[32:14] my humid hair which is my hair tied back
[32:16] so it's basically the shape of my head
[32:19] so I'm gonna mesh all this is some crazy
[32:22] looking mesh but it'll work I guess I'm
[32:25] gonna select everything on my
[32:28] mid hair give it a warp I'm gonna Zone
[32:32] in on everything
[32:34] and then I'm just gonna do my sketch rig
[32:41] if your hair only has like two layers
[32:44] like the front and the back it's really
[32:46] too too dimensional you're going to want
[32:48] to add some sort of mid layer that will
[32:50] usually be hidden when you're just
[32:52] facing forward like this but it will
[32:54] reveal itself when you turn your head
[32:55] something to keep in mind for a better
[32:57] looking rig in my opinion at least
[33:09] okay ignore my wonky looking rig I'll
[33:12] probably show my finished product at the
[33:15] end of the tutorial we're just trying to
[33:17] get in um the general rig right now
[33:19] Wally Style just do it better than me
[33:22] okay I'm gonna rig in my little flicks
[33:25] here really quick
[33:30] okay this is decent enough now I'm gonna
[33:33] add the pigtails which are just pretty
[33:35] easy honestly
[33:40] another good thing to note when you're
[33:42] rigging hair or anything else for when
[33:45] you're looking up and down is how they
[33:47] move up and down respectively to your
[33:50] face imagine you have a ponytail on the
[33:52] back of your head just just imagine and
[33:54] then you look down it's gonna look up
[33:56] then when you look up it's gonna be
[33:58] pointing down something to keep in mind
[34:02] [Music]
[34:04] I'm sorry my Ray's getting sloppy and
[34:06] sloppy as we go I know this tutorial is
[34:09] going to be a bit longer too so I'm
[34:11] trying to speed things up I just want to
[34:12] teach you guys how to do it and then you
[34:15] guys can perfect it on your own there
[34:18] are some things here I do want to fix
[34:19] the face like for example in this corner
[34:22] I kind of want to smush these in more so
[34:24] I don't have too much of this showing
[34:26] here just some little things I gotta go
[34:28] back when I find back and forth back and
[34:31] forth anyway I'm gonna find this and
[34:33] then I'll be back for ankle Z see you in
[34:37] a second okay so I did a little bit of
[34:39] touch up I fixed the hair a bit it looks
[34:43] a little better obviously as I go
[34:45] through I'm gonna fix it more I fixed up
[34:47] my drop it I fixed this on my face a
[34:50] little bit
[34:51] um I especially fixed up my eyes here on
[34:54] the original angle X Y rig for the eyes
[34:57] they're pretty concave going this way so
[35:00] they they look pretty flat against the
[35:02] face so I just put another orb deformer
[35:06] on top of the eye that just pushes it
[35:08] out more when it looks to the side here
[35:09] as you can see here just to get more
[35:12] Dimension I especially did it on the
[35:14] pupils here so they look like they're
[35:16] rounded against a surface so just little
[35:19] things there you can obviously do as
[35:21] much as you want unless you're on the
[35:23] free version so touch up as much as
[35:26] needed I am gonna go more into how to
[35:29] use inversion masks to up your rig if
[35:33] you've been paying close attention to my
[35:35] layers you'll notice I already have a
[35:37] neck clip layer here turn that on it's
[35:40] invisible right now it's just this
[35:42] little purple circle it doesn't really
[35:43] matter what color since you know it's
[35:45] going to be invisible but I'm going to
[35:46] use this to fade my face line when I
[35:49] look up so it really gives more illusion
[35:52] of me looking up so that's why I like to
[35:54] separate my face line from my face skin
[35:56] there's also other benefits to doing
[35:58] that but this is one of my favorites of
[36:00] course if if you don't have a neck clip
[36:02] or anything to use you can take your
[36:05] pupil and just copy paste it and warp it
[36:07] into a shape you want to use or just use
[36:10] your face again just make it small in
[36:12] the beginning after I take all the key
[36:13] forms out there's plenty of ways to
[36:15] reuse stuff if you do copy and paste
[36:17] apart from your model it does save some
[36:20] space on your texture Atlas so just a
[36:21] heads up so to do with this I'm going to
[36:24] automatically mesh my little neck clip
[36:27] and I'm just going to bring it up to my
[36:30] face and parts and I'm going to grab the
[36:33] ID and then grab my face line and paste
[36:36] it into the clipping ID and then hit
[36:37] invert mask then I'm going to turn my
[36:40] net clip back to zero so can't see it
[36:43] I'm gonna hide the face line so first of
[36:45] all it's kind of awkward right here
[36:47] because this is just our default looking
[36:49] position and we don't really want our
[36:51] neck to fade here I mean you can if you
[36:53] want but I'm gonna move it here and
[36:55] since we have no key forms on it it's
[36:57] going to be its default position as well
[36:59] as with opacity zero all the key forms
[37:01] we make now will start at zero and this
[37:03] position I'm going to start with angle y
[37:05] since this is mostly just for looking up
[37:07] at three key forms I'm gonna look up now
[37:10] right now it's actually fine as you can
[37:13] see it's giving more of that illusion I
[37:15] am gonna have to extend my face more and
[37:17] do more editing to really make it look
[37:20] not awkward but all you gotta do is warp
[37:23] it a bit and get looking right
[37:27] once you have the angle lie up all
[37:30] rigged up you can add in your angle X
[37:32] physics so you can edit how it looks
[37:34] when you turn to the side while looking
[37:35] out behind my hair
[37:37] and voila it just gives a little more of
[37:40] that illusion you might want to fix the
[37:43] default position here if it looks
[37:45] awkward at certain angles example I turn
[37:48] here the side it's going to make my jaw
[37:51] disappear but if you like it you can
[37:53] keep it if you don't you can move it I'm
[37:55] going to move it just a little bit I
[37:57] actually like the little hidden part
[37:58] when looking to the side although I
[38:00] might change it later but yeah just
[38:02] something to use and keep in mind to um
[38:05] edit it to however you want it to look
[38:07] I'm going to just quickly fix my face
[38:09] from when I look up
[38:13] okay it's a little better when we look
[38:15] up your Chin's gonna be tilted up so you
[38:17] don't really see it facing forward so I
[38:20] tucked my chin in a bit I have a goofy
[38:22] looking up little face but yeah you can
[38:24] play around with that obviously you can
[38:26] use inverse clipping for a lot of other
[38:28] things so it's something to keep in mind
[38:29] when you're drawing your model and
[38:31] trying to figure out how you're going to
[38:32] read certain things all right next we're
[38:35] gonna finally do angle Z so angle Z is
[38:38] just when your head tilts from side to
[38:39] side so it's pretty easy honestly we're
[38:42] just gonna grab everything on our head
[38:44] and we're gonna use a rotation deformer
[38:48] which is the one next to the warp
[38:49] deformer here the one with the circle
[38:51] and the point if you've been following
[38:52] my tutorials only we have not used these
[38:55] yet another thing you'll see but these
[38:58] deformers are as it's labeled they're
[39:00] rotation points so ever is at the point
[39:03] it will rotate from that point so I'm
[39:06] going to hit Ctrl and shift to shift
[39:08] this down to the neck now depending on
[39:12] where you place it depends on you know
[39:14] where your head hinges from so just find
[39:16] a place you like that looks okay when
[39:18] your head turns I know some people like
[39:21] to put it directly on their chin I like
[39:23] to put like a little Bob really depends
[39:26] on how you like the look now we're just
[39:28] gonna add three key forms and you'll see
[39:30] and positive angle C is going to be over
[39:34] leaning to the right ah just pick a
[39:37] place you like honestly I kind of like
[39:38] it when there's a lot so I think I'm
[39:41] gonna go here is that too much I guess
[39:44] we'll see and then I'll just reflect the
[39:46] motion over and there we go and then you
[39:49] can also link angle X and Y and then as
[39:52] you're tilting your head you can see how
[39:54] it looks at that angle they're obviously
[39:56] gonna look a little funky because we
[39:57] haven't done anything to the neck here
[39:58] but now I kind of avoid using rotation
[40:02] deformers so you won't see me using them
[40:04] too much if you use the wrong
[40:06] combination of rotation and work
[40:08] deformers it will mess up your regular
[40:11] bit so I just for now if you don't
[40:14] really know how they work too much
[40:15] together just try to avoid using too
[40:18] many rotation deformers so now that we
[40:20] have the head done we can do the neck so
[40:23] go over to your neck I have mine and its
[40:25] own award folder here with a shadow I'm
[40:28] going to Auto mesh them and then I'm
[40:31] just going to grab both of them and put
[40:33] them into an angle Z the former put
[40:36] three key forms on that and now we're
[40:38] gonna go all the way positive angle C
[40:40] and morph the neck to suit the head now
[40:44] I know some people don't like to rig the
[40:46] neck for angle Z for whatever reason so
[40:49] if you like this look you can just keep
[40:51] it like that
[40:52] um you are gonna have to edit these
[40:54] though so what I like to do is with my
[40:57] pointer tool just actually click and
[41:00] drag to select some Dots here and I'll
[41:03] just rotate it here and then try to find
[41:05] a good spot on the neck and you can play
[41:07] around this now it looks pretty decent
[41:10] obviously looks like our neck is broken
[41:11] so I'm going to add more there's your
[41:15] divisions and smooth them out
[41:18] I also like to expand the top a little
[41:21] like this that's like sprouting out it's
[41:24] really up to you because I like it's a
[41:26] little thicker over here near the head
[41:28] just makes it look like it's more
[41:30] balanced and then don't forget to make
[41:32] sure your neck down here looks the same
[41:34] you can actually go to right here at the
[41:37] default select some of those gray dots
[41:40] and then you can hit Ctrl shift C and
[41:42] then go over here to control shift V and
[41:45] that will paste the form here in a
[41:47] second you can also do that obviously it
[41:49] looks a little weird with the shoulders
[41:51] here honestly I will edit the neck later
[41:54] when I get to the body so honestly this
[41:57] for now is fine gonna reflect the motion
[41:59] check the angles now for now the angle
[42:03] is all together look fine yours might be
[42:06] a little awkward and if it is you can
[42:09] actually adjust with angle X and Y
[42:11] always combined once you have your angle
[42:13] Z completed you can hit the add three
[42:15] key forms here and I'll add all key
[42:17] forms here the like just like precisely
[42:19] edit each Little Dot so like for example
[42:22] if yours look messed up here you can
[42:24] edit this a little and then switch over
[42:26] to the other side and edit that a little
[42:27] and then lean your head over and fix
[42:31] this a little and that's basically how I
[42:33] would do angle Z for the neck now
[42:35] obviously when you're using angle Z and
[42:37] your head's tilted to the side you're
[42:38] gonna want your hair to also fall over
[42:41] on that side I'll do one section just as
[42:44] an example and then I'll speed through
[42:46] me doing it to the rest of the hair but
[42:48] I'm going to take my little pigtail here
[42:51] and put these in their own warp deformer
[42:53] add three keyframes turn over to the
[42:56] side and then I'm gonna use this tool
[42:59] here that grabs multiple dots as a brush
[43:02] and I'm gonna rotate all these as if
[43:05] they're falling over to the side
[43:06] position knot now when we're leaning
[43:09] over to the side it's going to fall that
[43:10] way I'm gonna make it tilt this way for
[43:12] this side a little bit it's really up to
[43:14] you how much you want it built I'm just
[43:16] gonna copy that pigtail and paste on the
[43:18] other side now for angle Z you are going
[43:21] to want to reflect these parameters so
[43:23] keep that in mind and now my pigtails
[43:25] are falling to either side when I'm
[43:27] counting my head I'm just going to
[43:29] quickly do that for everything else on
[43:31] my head
[43:36] okay so I think that's all the hair I
[43:39] want to do that to I think it just makes
[43:41] it a lot cuter now we've basically got
[43:44] all the face angles done Yahoo and now
[43:47] we can test it out in the physics menu
[43:50] so going over to modeling you can open
[43:52] up your physics settings now this is the
[43:54] fun part I already have my presets in if
[43:57] you watch the first ranking video but
[43:59] I'm going to show you how to make your
[44:01] own for the easy augmented angles so
[44:04] you're just going to hit add and then
[44:05] you can name this the same name as
[44:08] whatever you named your new angle
[44:10] parameters as all of mine are named
[44:12] physic angle XYZ so I can just name it
[44:15] whatever you want and then just hit OK
[44:17] and then you should get links late I'll
[44:19] go through my physic angle excellent
[44:21] first and then you guys can just do the
[44:22] same for for Y and Z so on our input
[44:25] settings you're going to want to hit add
[44:27] and then find your angle X you're going
[44:29] to add that as an angle so the
[44:31] difference between position and angle is
[44:38] I don't know if I can explain this well
[44:39] but just follow along and then once you
[44:42] add your angle X angle you're going to
[44:45] want to put the effect to a hundred I'll
[44:47] explain how the effect changes how your
[44:51] physics look and then for output
[44:53] settings you're going to want to add
[44:54] your angle X physics parameter that you
[44:57] made that's not your angle X input and
[45:00] then once you have that in you're going
[45:02] to want to make your physics settings so
[45:04] this is mine duration 10 shaking point
[45:07] eight reaction one overall acceleration
[45:09] one and then once you have your input
[45:11] output and your physics done you should
[45:13] be able to just use your cursor and
[45:14] click and drag across your model or you
[45:17] can go over to the angle X slider and
[45:20] look left and right now you'll see the
[45:22] augmented physics here obviously when we
[45:24] look to the right there's a little
[45:25] bounce
[45:26] it adds a lot more life to your model
[45:28] trust me and you'll notice that it will
[45:32] follow your angle X physics here but not
[45:34] completely so if you go all the way over
[45:35] to your max of X your angle X physics is
[45:38] not actually going to reach the end of
[45:40] what you rate because it needs it to
[45:42] balance here so this is what the angle
[45:44] does if we change it to position you'll
[45:46] see here that it goes back to the
[45:48] default position after a bit also it's
[45:50] kind of awkward right now since we
[45:51] changed it but that's the difference
[45:52] between position angle you can play with
[45:54] that and then effect is how much turning
[45:57] to the right for angle X is going to
[46:00] affect our angle X physics so if we turn
[46:02] this down to 50 it's going to be more in
[46:05] the middle here so not as effective
[46:07] that's why we want this all the way up
[46:09] to 100
[46:12] so we get as most as we can out of this
[46:15] so we won't completely get the max we
[46:18] rigged here because we're doing my lazy
[46:21] augmented version of augmented physics
[46:23] but yeah so you just do that for angle X
[46:26] Y and Z they're all going to be the same
[46:27] thing
[46:28] I have the same physics settings for
[46:31] most of them
[46:32] you can change the shaking or the
[46:34] duration for some of them if you want to
[46:37] play around with how each thing works so
[46:39] once you have all those physics in you
[46:41] should be able to just play around with
[46:42] your model and everything should be
[46:44] moving for your angle X Y and Z physics
[46:46] and then if you want to test the
[46:48] clicking and dragging with angle Z you
[46:50] just go to preview settings of the
[46:52] cursor tracking and then find your angle
[46:55] Z input and then set that to whatever
[46:57] Mouse button you want and then once it
[46:59] happens
[47:00] you can click and drag and test it out I
[47:03] think I'm gonna change my angle C to 100
[47:05] and yeah we got the head all rigged in
[47:07] it looks okay I think I'm gonna hit some
[47:10] random poses obviously after playing
[47:11] around with it in the physics settings
[47:13] you might want to change some parts
[47:16] um I definitely am I know I've been
[47:18] saying it this entire time but I am
[47:19] always going back to edit stuff because
[47:21] I'm always messing up so don't be afraid
[47:24] to go back and edit your stuff guys but
[47:26] yeah we successfully completed the head
[47:28] with augmented physics that are pretty
[47:30] easy trust me you should keep them they
[47:33] make the models really nice and less
[47:35] stiff unless you like stiff models then
[47:37] that's but that's okay but I don't like
[47:40] stiff models I like bouncy models so I
[47:43] hope I was able to teach this okay I'm
[47:47] sorry I was like all over the place and
[47:50] I think the way I do it it's kind of
[47:51] complicated but hopefully you learned
[47:53] something I do try to incorporate new
[47:55] tools each time I do a tutorial like
[47:57] starting off really simple and then
[47:59] slowly building up the tools you guys
[48:02] know how to use I hope that helps a lot
[48:04] but you know I just want to make it more
[48:05] easy to digest as I've been saying doing
[48:08] the face angles is kind of tough for
[48:11] models if you want to make it look a
[48:13] certain way but the next video I will
[48:15] finally start doing hair physics and
[48:17] then we'll get to the body so I hope you
[48:19] guys are ready for that I just want to
[48:21] say again thank you guys for all the
[48:22] love and support recently even though
[48:24] I've been gone for like a month
[48:26] basically especially on Twitter I see
[48:28] you guys on there tagging me and stuff
[48:30] and I'm so happy you guys are actually
[48:33] learning stuff for my tutorials yeah
[48:35] that's about it I'll see you guys in the
[48:37] next video good bye
[48:39] [Music]
⚡ Saved you time reading this? Transcribe any YouTube video for free — no signup needed.